Chicken Onigiri: An Incredible Ultimate Recipe for 5-Star Deliciousness

Chicken Onigiri is a delightful twist on the classic Japanese rice ball that combines savory chicken with flavorful rice, wrapped in nori. This dish embodies the essence of comfort food while being portable, nutritious, and simple to prepare. Ideal for lunchboxes, picnics, or as a snack, Chicken Onigiri is the perfect solution for busy individuals looking for a nutritious meal option. Once you take a bite into the fluffy rice and tender chicken, you’ll understand why this dish has gained immense popularity.
If you’ve been searching for a satisfying and easy-to-make recipe, Chicken Onigiri is the answer. The first time you taste these rice balls, you’ll be amazed by the delightful combination of flavors and textures. The tender, marinated chicken pairs beautifully with perfectly seasoned rice, creating an explosion of flavor in every bite. Ideal for those who wish to try something different, Chicken Onigiri will certainly impress your friends and family with its incredible taste.
In this guide, you will discover why this recipe is so beloved, learn about the preparation and cooking times, and get step-by-step instructions to create your own Chicken Onigiri. Whether you’re an experienced cook or just starting, this incredible recipe is guaranteed to become a staple in your kitchen. Get ready to indulge in this flavorful experience that’s perfect for any occasion!
Why You’ll Love This Recipe
Chicken Onigiri is not just a dish; it’s a culinary adventure! Here are several reasons why you’ll fall in love with this amazing recipe:
- Flavorful Filling: The seasoned chicken bursting with umami flavor elevates the rice to new heights.
- Healthy Ingredients: Packed with protein and fiber, this dish provides balanced nutrition in every bite.
- Easy to Make: With simple instructions, you can whip up Chicken Onigiri even on your busiest days.
- Customizable Options: You can easily adjust the filling and seasonings to fit your taste preferences.
- Fun to Eat: The unique shape and packaging make it a fun, hands-on meal perfect for all ages.
- Great for Meal Prep: These rice balls store well in the fridge, making them ideal for grabbing on the go.
With these great reasons, it’s easy to see why Chicken Onigiri is becoming a favorite among many!
Preparation and Cooking Time
Preparing Chicken Onigiri is not only quick but also satisfying. Here’s a breakdown of the time involved in crafting this delicious dish:
- Preparation Time: 30 minutes
- Cooking Time: 20-25 minutes
- Cooling Time: 15 minutes (for the chicken)
In total, you can expect to spend about 1 hour to bring this incredible dish to life!
Ingredients
- 2 cups sushi rice
- 2 ½ cups water
- 1 pound boneless chicken thighs, cut into small pieces
- 2 tablespoons soy sauce
- 1 tablespoon mirin
- 1 tablespoon sesame oil
- 1 tablespoon sugar
- 1 teaspoon ginger, grated
- 1 tablespoon green onion, finely chopped (optional)
- 1 tablespoon rice vinegar
- Nori sheets, cut into strips
- Salt, to taste
Step-by-Step Instructions
Creating Chicken Onigiri can be a straightforward process if you follow these simple steps:
- Rinse the Sushi Rice: Place sushi rice in a colander and rinse it under cold water until the water runs clear. Drain thoroughly.
- Cook the Sushi Rice: In a rice cooker or a pot, combine rinsed sushi rice and water. Cook according to the rice cooker's instructions or bring to a boil, then cover and simmer on low for 20 minutes. Let it rest for 10 minutes off the heat.
- Prepare the Chicken: In a bowl, combine soy sauce, mirin, sesame oil, sugar, and grated ginger. Add chicken and mix well. Let marinate for 15 minutes.
- Cook the Chicken: Heat a non-stick skillet over medium-high heat. Add the marinated chicken and cook for 8-10 minutes until cooked through and caramelized. Stir occasionally.
- Season the Rice: In a separate small bowl, mix rice vinegar and a pinch of salt. Once the rice is done, gently fold this mixture into the rice to season it.
- Shape the Onigiri: Wet your hands to prevent sticking. Take a small amount of seasoned rice, flatten it in your palm, and place a spoonful of cooked chicken in the center. Mold the rice around the chicken, forming a triangle shape or oval.
- Wrap with Nori: Take a strip of nori and wrap it around the bottom of your formed rice ball. This makes for easy handling and adds flavor.
- Repeat: Continue shaping and wrapping with the remaining rice and chicken.
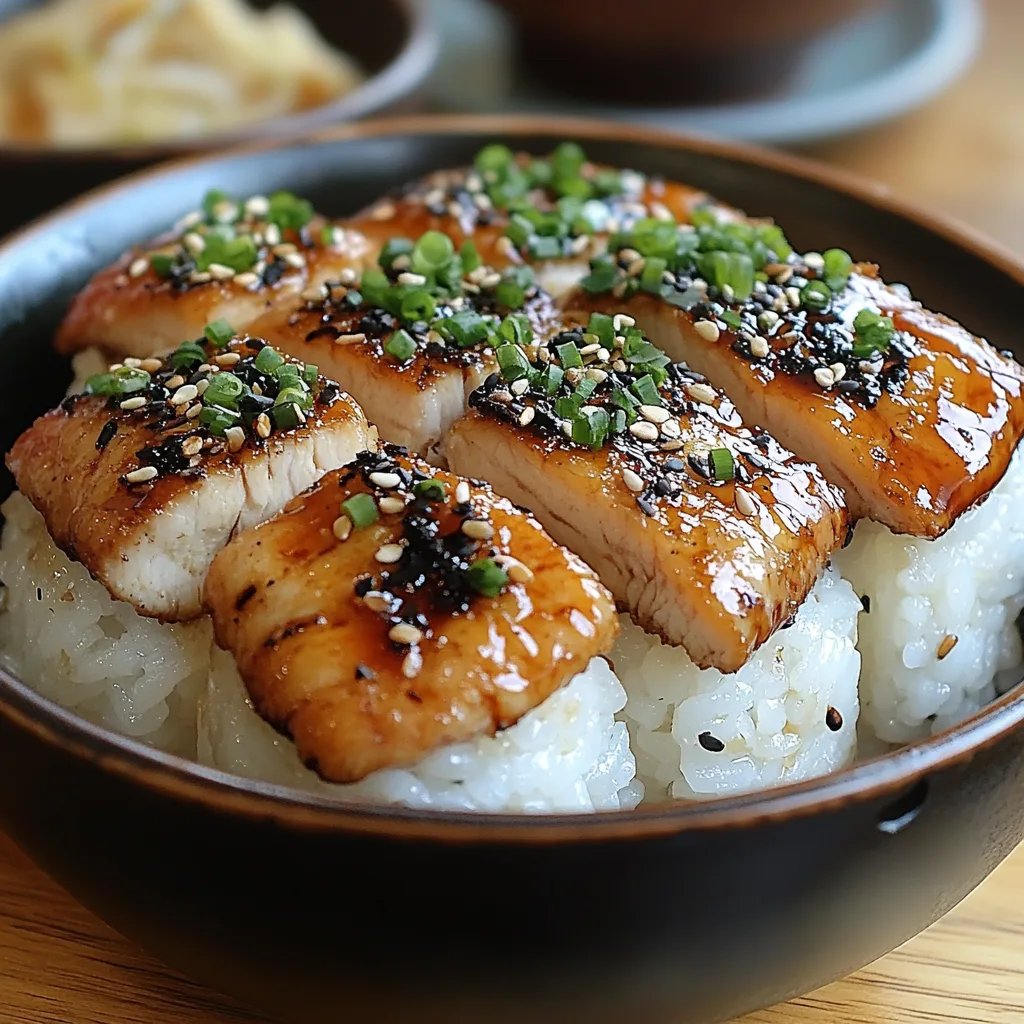
- Serve the Onigiri: Arrange the Chicken Onigiri on a plate and garnish with chopped green onions if desired.
Enjoy the fruits of your labor and the incredible flavors that Chicken Onigiri brings to your table!
How to Serve
When it comes to serving Chicken Onigiri, presentation and accompaniments can elevate the experience. Here are some ideas for serving this delightful dish:
- Plating: Arrange the Onigiri on a decorative plate to highlight their shape and color. Garnishing with extra green onions or sesame seeds can enhance visual appeal.
- Accompaniment: Serve with soy sauce or homemade dipping sauce for an extra layer of flavor. Pickled vegetables also make a wonderful side.
- Beverage Pairing: Complement the dish with green tea for a refreshing and authentic experience.
- Lunchbox Option: Pack Chicken Onigiri with seasonal fruits or a side of edamame for a balanced meal that’s easy to take on the go.
- Sharing Platter: For gatherings, present several onigiri flavors on a large platter, allowing everyone to sample different combinations.
These serving tips will ensure your Chicken Onigiri is not only delicious but also visually appealing, making every meal a special occasion!
Additional Tips
- Use Short-Grain Sushi Rice: For the best texture, opt for short-grain sushi rice. Its sticky quality helps the rice hold its shape.
- Season the Rice to Perfection: Use the right amount of salt in the rice vinegar mixture to enhance the flavor without overpowering it.
- Experiment with Fillings: Don’t hesitate to add other ingredients such as cooked vegetables or different proteins to make your Chicken Onigiri unique.
- Keep Your Hands Wet: Wetting your hands helps prevent sticking, making it easier to mold the rice into the desired shape.
- Allow the Chicken to Cool: After cooking, let the chicken cool slightly to avoid making the rice mushy when forming the onigiri.
Recipe Variation
Feel free to explore these variations to tailor your Chicken Onigiri experience:
- Spicy Chicken Onigiri: Add a teaspoon of sriracha or chili paste to the marinade for a kick of heat.
- Vegetarian Onigiri: Substitute chicken with marinated tofu or a mixture of seasonal vegetables for a nutritious alternative.
- Teriyaki Chicken Onigiri: Use teriyaki sauce in place of soy sauce for a sweeter, richer flavor profile.
- Citrus Zest Addition: Incorporate lemon or lime zest into the rice or chicken marinade for a refreshing citrus taste.
- Grilled Chicken Onigiri: For a smoky flavor, grill your marinated chicken instead of pan-frying it.
Freezing and Storage
- Storage: Store Chicken Onigiri in an airtight container in the refrigerator for up to 3 days to maintain freshness.
- Freezing: For longer storage, freeze shaped onigiri before wrapping in nori. They'll last up to 1 month. Thaw in the refrigerator before consuming.
- Best Served Fresh: While they can be stored, fresh Chicken Onigiri have the best flavor and texture. Enjoy them soon after making!
Special Equipment
To make Chicken Onigiri effortlessly, consider using the following tools:
- Rice Cooker: A rice cooker ensures perfectly cooked sushi rice every time.
- Non-Stick Skillet: Ideal for cooking the marinated chicken without sticking.
- Silicone Mats or Plastic Wrap: Useful for shaping and wrapping the onigiri without creating a mess.
- Mixing Bowls: Needed for marinating the chicken and mixing the rice seasoning.
- Measuring Cups and Spoons: For accurate ingredient measurements.
Frequently Asked Questions
Can I make Chicken Onigiri with brown rice?
Yes, but keep in mind that the texture may differ, and brown rice may require a longer cooking time.
How do I store leftover Chicken Onigiri?
Store them in an airtight container in the refrigerator. They are best consumed within 3 days.
Can I customize the size of my onigiri?
Absolutely! Make them smaller for bite-sized snacks or larger for a filling meal.
Are Chicken Onigiri gluten-free?
If you use gluten-free soy sauce or tamari, Chicken Onigiri can easily be made gluten-free. Just ensure all ingredients meet your dietary needs.
What’s the best way to reheat Chicken Onigiri?
The best way to reheat is by using a microwave for about 15-30 seconds or thawing overnight in the refrigerator and enjoying them at room temperature.
Conclusion
Chicken Onigiri is a versatile and delicious dish that brings the unique flavors of Japan to your kitchen. With its easy preparation and delightful taste, you can be creative by changing ingredients and fillings to suit your palate. Whether enjoyed as a snack, lunch, or part of a picnic, this dish has something for everyone. Dive into the culinary adventure and experience the joy of making Chicken Onigiri at home!