Classic Apple Crisp w/ Ice Cream Topping: An Amazing Ultimate 5-Ingredient Recipe

Classic Apple Crisp w/ Ice Cream Topping is an incredible dessert that brings warmth and comfort to any gathering. The combination of tender baked apples and a crumbly, buttery topping creates a sweet and satisfying experience. Topped with creamy ice cream, this dish becomes pure magic on your plate. It’s a recipe passed down through generations and evokes feelings of nostalgia, making it a favorite for family gatherings or cozy evenings at home.
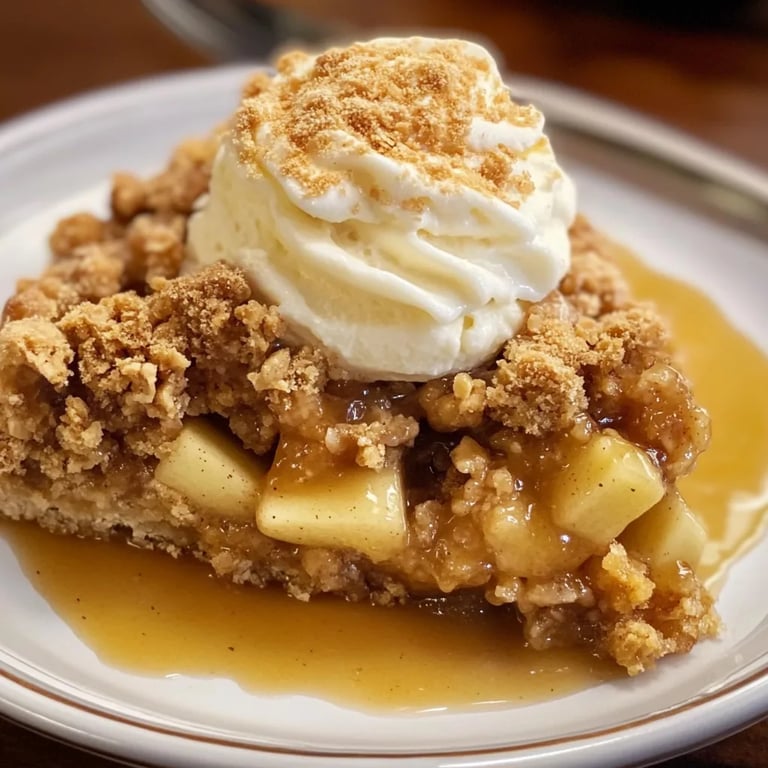
Imagine the aroma wafting from your kitchen as you bake this dish. The sweet and slightly tart apples blend with cinnamon to create a comforting scent that fills your home. Once it’s served warm with a scoop of vanilla ice cream, it's a delightful treat that's hard to resist. There's something about the contrasting textures—the warm, soft apples combined with the crunchy topping and cool ice cream—that leaves everyone craving more.
In this guide, you’ll learn more about why Classic Apple Crisp w/ Ice Cream Topping deserves a special place in your recipe box. Whether you have experience in the kitchen or are just starting your culinary journey, this amazing recipe is easy to follow. Get ready to impress your friends and family with a dessert that's both delicious and satisfying!
Why You’ll Love This Recipe
Classic Apple Crisp w/ Ice Cream Topping is the kind of dessert that warms not only your stomach but also your spirit. Here are some reasons why you’re likely to fall in love with it:
- Minimal Ingredients – With just a handful of ingredients, you can create a memorable dessert.
- Effortless Preparation – The recipe is easy to follow, making it perfect even for beginners.
- Versatile Serving Options – Serve it warm or cold, with different ice cream flavors to suit everyone’s taste.
- Comforting and Nostalgic – This dessert brings back childhood memories, making it a hit at family gatherings.
- Seasonal Enjoyment – Perfect for autumn but enjoyable year-round, it suits various occasions.
- Customizable Toppings – Add nuts, caramel sauce, or different fruit types for a unique twist.
With these appealing elements, it’s clear why Classic Apple Crisp w/ Ice Cream Topping has remained a beloved dessert. Each bite brings joy, reminding you of cozy moments spent with loved ones.
Preparation and Cooking Time
Making Classic Apple Crisp w/ Ice Cream Topping requires a bit of time, but it’s well worth the effort. Here’s a quick breakdown of the time needed:
- Preparation Time: 15 minutes
- Cooking Time: 30 minutes
- Cooling Time: 5-10 minutes (optional, for serving)
In total, you can expect to spend around 45-55 minutes, depending on your experience and how quickly you work.
Ingredients
- 6 cups sliced and peeled apples (Granny Smith or Honeycrisp work well)
- 1 cup granulated sugar
- 1 cup all-purpose flour
- 1 cup rolled oats
- 1 cup unsalted butter, softened
- 1 teaspoon ground cinnamon
- Vanilla ice cream (for topping)
Step-by-Step Instructions
Creating Classic Apple Crisp w/ Ice Cream Topping is simple when you follow these easy steps:
- Preheat Oven: Preheat your oven to 350°F (175°C).
- Prepare Baking Dish: Grease a 9×13 inch baking dish lightly with butter or cooking spray.
- Slice Apples: Peel and slice the apples evenly, then place them in the prepared dish.
- Mix Sugar and Cinnamon: In a separate bowl, combine granulated sugar and ground cinnamon. Sprinkle this mixture evenly over the apples.
- Prepare Topping: In another bowl, mix together flour, oats, and softened butter. Use your hands or a fork to crumble the mixture until it resembles coarse crumbs.
- Top the Apples: Evenly spread the crumb topping over the sugared apples in the dish.
- Bake: Place the dish in the preheated oven and bake for 30 minutes, or until the topping is golden brown and the apples are tender.
- Cool Slightly: Once baked, remove from the oven and let it cool for about 5-10 minutes before serving.
- Serve with Ice Cream: Scoop out portions into bowls and top with a generous scoop of vanilla ice cream.
By following these straightforward steps, you’ll create a delicious and memorable dessert that’s bound to delight your guests.
How to Serve
Serving Classic Apple Crisp w/ Ice Cream Topping can be as simple or creative as you want. Here are some tips to elevate your serving experience:
- Presentation: Use individual ramekins for a beautiful presentation or serve directly from the baking dish for a homey feel.
- Ice Cream Options: While vanilla is classic, try serving with caramel, cinnamon, or even maple ice cream for a unique twist.
- Garnish: Drizzle with caramel sauce or sprinkle with chopped nuts for added flavor and texture.
- Fresh Fruits: Add a few slices of fresh apple or berries on the side for color and freshness.
- Beverage Pairing: Pair with warm chai tea or a dessert wine to complement the flavors of the apple crisp.
By considering these serving suggestions, you'll ensure that Classic Apple Crisp w/ Ice Cream Topping is not only delicious but also visually appealing and memorable for all. Enjoy every bite of this amazing dessert!
Additional Tips
- Choose the Right Apples: Opt for a combination of sweet and tart apples for the best flavor balance. Granny Smith and Honeycrisp are excellent choices.
- Customize Your Spice: Feel free to add other spices like nutmeg or allspice for extra warmth and depth.
- Don’t Skip Cooling: Allow the apple crisp to cool slightly before serving. This helps set the topping and enhances the flavors.
- Serve Warm: Apple crisp is best enjoyed warm. The ice cream will melt beautifully into the crisp, creating a luscious dessert.
Recipe Variation
Get creative! Here are some delightful variations to consider:
- Berry Apple Crisp: Add fresh blueberries or raspberries to the apples for a burst of flavor and color.
- Nutty Topping: Incorporate chopped walnuts or pecans into the topping for an extra crunch.
- Maple Syrup Twist: Swap granulated sugar for maple syrup in the apple mixture for a distinct and warm profile.
- Gluten-Free Version: Substitute regular all-purpose flour with gluten-free flour to make a gluten-free apple crisp.
Freezing and Storage
- Storage: Store the apple crisp in an airtight container in the fridge for up to 3-4 days.
- Freezing: You can freeze the apple crisp before baking or after. If freezing before baking, assemble and cover tightly; it will keep for about 3 months. Bake from frozen, adding extra time as needed. If freezing after baking, ensure it's completely cool before wrapping.
Special Equipment
You won’t need much to make Classic Apple Crisp w/ Ice Cream Topping, but here are a few essentials:
- Baking Dish: A 9×13 inch baking dish is perfect for this recipe.
- Mixing Bowls: Have a couple of mixing bowls on hand for preparing the apple mixture and the crumb topping.
- Measuring Cups and Spoons: Accurate measurements ensure the perfect balance of flavors.
- Paring Knife: For slicing apples, a sharp knife will make the process quick and easy.
Frequently Asked Questions
Can I use frozen apples?
While fresh apples yield the best texture and flavor, you can use frozen apples. Just make sure to thaw and drain excess moisture before baking.
What if I don’t have rolled oats?
If you don’t have rolled oats, you can use quick oats, but adjust baking time as they may cook faster.
Is this dessert vegan-friendly?
To make this a vegan dish, substitute butter with a plant-based alternative and use vegan ice cream.
Can I double the recipe?
Yes! Just make sure to use a larger baking dish to accommodate the extra ingredients.
What’s the best way to reheat leftovers?
Reheat in the microwave or oven. If using the oven, cover with foil and warm at 350°F until heated through.
Conclusion
Classic Apple Crisp w/ Ice Cream Topping is an exceptional dessert that encapsulates the cozy essence of home. From its sweet, tender apples to the buttery crumble, each bite fills you with comfort and nostalgia. Whether enjoyed during a holiday gathering or as a weeknight treat, this recipe is sure to impress.