Peanut Butter Banana Toast

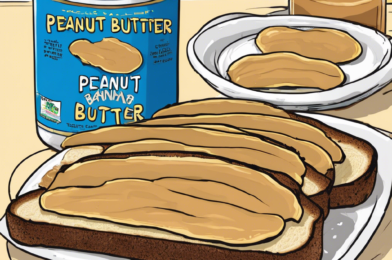
In the realm of quick, nutritious breakfasts, the humble peanut butter banana toast stands out as a perennial favorite. This delightful combination not only tantalizes the taste buds but also offers a well-rounded nutritional profile that can kickstart your day with energy and satisfaction. The simplicity of the ingredients and the minimal preparation time make it an ideal choice for busy mornings, while the rich flavors ensure that it feels like a treat rather than just another meal. In my household, this recipe has become a beloved staple. The creamy peanut butter melted over warm toast, topped with fresh banana slices, is a comforting combination that my family looks forward to. The addition of a sprinkle of cinnamon or a drizzle of honey elevates the dish with a sweet, aromatic finish, making it a breakfast that delights both children and adults alike.

Ingredients

The beauty of peanut butter banana toast lies in its simplicity. You will need:

  • 2 slices of whole-grain bread
  • 2 tablespoons of natural peanut butter
  • 1 large ripe banana
  • A pinch of cinnamon (optional)
  • A drizzle of honey (optional)

Each ingredient plays a crucial role in creating a balanced meal. Whole-grain bread provides complex carbohydrates and fiber, ensuring a steady release of energy throughout the morning. Natural peanut butter, rich in healthy fats and protein, contributes to satiety and muscle recovery, while the banana adds natural sweetness along with a healthy dose of potassium and vitamins. Cinnamon and honey are optional but recommended for an extra dimension of flavor.

Instructions

Making peanut butter banana toast is as easy as it is satisfying. Follow these steps for a perfect breakfast:

  1. Toast the Bread: Start by toasting two slices of whole-grain bread to your preferred level of crispiness. A medium setting usually works best, providing enough crunch without being too hard.
  2. Spread the Peanut Butter: While the bread is still warm, spread a generous tablespoon of natural peanut butter on each slice. The warmth of the toast will help melt the peanut butter slightly, making it easier to spread and enhancing its nutty aroma.
  3. Slice the Banana: Peel a ripe banana and slice it into thin, even rounds. Arrange the slices over the peanut butter layer, ensuring each bite will have a balanced combination of flavors.
  4. Add Finishing Touches: If you’re using cinnamon or honey, now is the time to add them. Sprinkle a little cinnamon over the top for an aromatic touch, or drizzle some honey for added sweetness.
  5. Serve Immediately: Serve your peanut butter banana toast fresh for the best texture and flavor experience.

Nutrition Facts

This recipe yields 1 serving. Each serving contains approximately 350 calories. These calories are well-distributed with healthy fats, protein, and carbohydrates, making it a balanced option for breakfast or a snack.

Preparation Time

The preparation time for this recipe is minimal, taking around 5 to 10 minutes from start to finish. This quick preparation makes it ideal for busy mornings when time is of the essence, yet you don’t want to compromise on nutrition.

How to Serve

Peanut butter banana toast is versatile and can be served in various ways to suit your preferences:

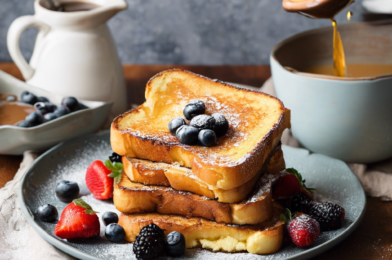
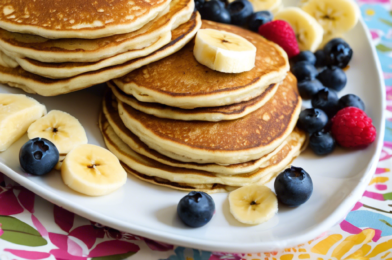
  • **As a Breakfast:** Serve with a side of fresh berries or a glass of milk for a complete meal.
  • **As a Snack:** Pair with a cup of tea or coffee for an afternoon pick-me-up.
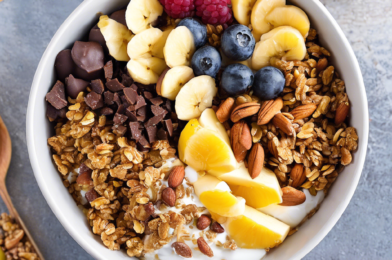
  • **For a Brunch:** Add a side of yogurt and granola for a more substantial meal.
  • **With a Twist:** Try adding sliced strawberries or blueberries for an added burst of flavor.
  • **For Kids:** Cut the toast into fun shapes using cookie cutters to make it more appealing to children.

Additional Tips

To make the most of your peanut butter banana toast, consider these additional tips:

  1. Choose the Right Bread: Opt for whole-grain or multigrain bread for added fiber and nutrients. The texture of the bread also complements the creaminess of peanut butter and bananas.
  2. Go for Natural Peanut Butter: Use natural peanut butter without added sugars or oils. This option is healthier and allows the natural flavors of the peanuts to shine through.
  3. Experiment with Toppings: Don’t be afraid to get creative. Add chia seeds, flaxseeds, or crushed nuts for extra nutrition and crunch.
  4. Adjust Sweetness: If you prefer a sweeter toast, consider using a ripe banana or adding a drizzle of honey or maple syrup.
  5. Make it Vegan: If you’re following a vegan diet, ensure your bread and peanut butter are vegan-friendly, and skip the honey or substitute it with agave syrup.

FAQ Section

Here are some common questions about peanut butter banana toast:

1. Can I use different types of bread?

Yes, you can use any type of bread you prefer, such as sourdough, rye, or gluten-free bread. Each type will bring its own unique flavor and texture to the toast.

2. What if I don’t like peanut butter?

If peanut butter isn’t your favorite, you can substitute it with almond butter, cashew butter, or even sunflower seed butter for a nut-free option.

3. How can I store leftover toast?

Peanut butter banana toast is best enjoyed fresh. However, if you have leftovers, you can store them in an airtight container in the refrigerator for up to a day. Be aware that the bread may become slightly soggy due to the moisture from the banana.

4. Is this recipe suitable for children?

Absolutely! This recipe is kid-friendly and can be adjusted to suit their taste preferences. Consider cutting the toast into fun shapes or adding a sprinkle of chocolate chips for a special treat.

5. Can I add protein powder to this recipe?

Yes, you can mix a small amount of protein powder into the peanut butter before spreading it on the toast for an extra protein boost, making it an even more satisfying meal.

Protein Power Bowl

When it comes to creating a meal that is both satisfying and nutritious, the Protein Power Bowl stands out as a top contender. With its vibrant array of fresh vegetables, hearty grains, and a generous portion of protein, this dish is not only a feast for the eyes but also a powerhouse of nutrients. The first time I tried this recipe, it quickly became a family favorite. The combination of textures and flavors creates a delightful culinary experience that leaves everyone at the table satisfied and eager for seconds. Whether you’re a seasoned cook or a kitchen novice, this recipe is straightforward and achievable, making it a staple in our household meal rotation.

Ingredients

To craft the perfect Protein Power Bowl, you’ll need a selection of fresh ingredients. Each component plays a vital role in balancing taste and nutrition, so be sure to choose quality products.

  • 1 cup of cooked quinoa or brown rice
  • 1 cup of mixed greens (such as spinach, kale, or arugula)
  • 1/2 cup of cherry tomatoes, halved
  • 1/2 cup of cucumber, diced
  • 1/2 cup of shredded carrot
  • 1/4 cup of red onion, thinly sliced
  • 1 avocado, sliced
  • 1 cup of chickpeas or black beans, drained and rinsed
  • 2 tablespoons of olive oil
  • Juice of 1 lemon
  • Salt and pepper to taste
  • Optional toppings: feta cheese, sunflower seeds, or a boiled egg

Instructions

Preparing this Protein Power Bowl is as simple as it is rewarding. Follow these steps to assemble your nourishing meal:

  1. Begin by cooking your choice of grain. Quinoa and brown rice are excellent options; follow the package instructions for the perfect texture. Once cooked, set aside to cool slightly.

  2. In a large bowl, combine the mixed greens, cherry tomatoes, cucumber, shredded carrot, and red onion. Toss these ingredients together to ensure an even distribution of flavors.

  3. Next, arrange the cooked quinoa or brown rice on one side of the bowl. On the opposite side, place the chickpeas or black beans.

  4. Add the avocado slices on top of the greens mixture, creating a visually appealing layer of color and texture.

  5. Drizzle the olive oil and lemon juice over the entire bowl, and season with salt and pepper according to your taste preferences.

  6. For an extra nutrient boost, sprinkle some optional toppings like feta cheese, sunflower seeds, or a boiled egg.

  7. Gently toss the ingredients together if desired, or enjoy the bowl as is, with each bite offering a different combination of flavors.

Nutrition Facts

This recipe serves four people, providing a balanced meal that is both filling and healthy. Each serving contains approximately 400 calories. This makes it an excellent choice for those looking to maintain a healthy diet without sacrificing flavor or satisfaction.

Preparation Time

The Protein Power Bowl is perfect for those busy weeknights when time is short but a wholesome meal is needed. The entire preparation and assembly process takes about 30 minutes, making it a convenient and quick option for lunch or dinner.

How to Serve

To fully enjoy your Protein Power Bowl, consider the following serving suggestions:

  • Serve it in a large, shallow bowl to showcase the vibrant colors and textures.
  • Pair it with a crusty whole-grain bread for added fiber and crunch.
  • Enjoy it with a refreshing glass of iced green tea or a light white wine.
  • For a heartier meal, add grilled chicken or shrimp on top.
  • Garnish with fresh herbs like cilantro or parsley for an extra burst of flavor.

Additional Tips

Here are some tips to make your Protein Power Bowl even better:

  1. Mix and Match: Feel free to substitute any of the vegetables or grains to suit your personal taste or dietary needs. Sweet potatoes or farro can be great alternatives.
  2. Meal Prep: Prepare the ingredients in advance and store them separately in the fridge. This makes assembling the bowls quick and easy throughout the week.
  3. Dress It Up: Experiment with different dressings, such as a tahini lemon dressing or a balsamic vinaigrette, to change up the flavor profile.
  4. Spice It Up: Add a pinch of chili flakes or a dash of hot sauce for those who love a bit of heat.
  5. Protein Boost: Incorporate other protein sources like tofu, tempeh, or edamame to increase the protein content.

FAQ Section

Q: Can I make this bowl vegan?

A: Absolutely! Simply omit any animal-based toppings like cheese or egg and rely on plant-based proteins such as beans or tofu.

Q: What can I use instead of quinoa or brown rice?

A: You can substitute with grains like farro, barley, or even cauliflower rice for a low-carb option.

Q: How long can I store leftovers?

A: Store any leftovers in an airtight container in the refrigerator for up to 3 days. Keep the dressing separate to maintain freshness.

Q: Can I add more vegetables?

A: Yes, adding more vegetables like bell peppers or zucchini can enhance the nutritional value and add more flavor.

Q: Is this recipe suitable for meal prepping?

A: Definitely! Prepare all components ahead of time and store them separately. Assemble the bowls just before serving to keep ingredients fresh.

Choco-Nut Granola Bowl

“`html

When I first stumbled upon the Choco-Nut Granola Bowl recipe, I was intrigued by its delightful combination of flavors and textures. As a food enthusiast and a mother of two, I often look for breakfast options that are not only nutritious but also quick to prepare. The Choco-Nut Granola Bowl checked all the boxes. When I finally decided to make it for my family, the response was overwhelmingly positive. My kids loved the chocolatey crunch, while my husband appreciated the nutty undertones that added depth to each bite. It’s now a staple in our household, and every spoonful evokes a sense of warmth and satisfaction, making mornings a little brighter.

Ingredients

The magic of the Choco-Nut Granola Bowl lies in its simple yet wholesome ingredients. You will need the following:

  • 2 cups of rolled oats
  • 1/2 cup of almonds, chopped
  • 1/2 cup of pecans, chopped
  • 1/3 cup of cocoa powder
  • 1/3 cup of honey or maple syrup
  • 1/4 cup of coconut oil, melted
  • 1 teaspoon of vanilla extract
  • 1/2 teaspoon of salt
  • 1/2 cup of dark chocolate chips
  • 1/4 cup of shredded coconut (optional)

Instructions

Creating this Choco-Nut Granola Bowl is as easy as it is delicious. Follow these steps to bring it to life:

  1. Preheat your oven to 325°F (165°C) and line a baking sheet with parchment paper.
  2. In a large mixing bowl, combine rolled oats, chopped almonds, and pecans.
  3. In a separate bowl, whisk together cocoa powder, honey or maple syrup, melted coconut oil, vanilla extract, and salt until well combined.
  4. Pour the wet mixture over the dry ingredients and stir until the oats and nuts are fully coated.
  5. Spread the mixture evenly onto the prepared baking sheet.
  6. Bake for 20–25 minutes, stirring halfway through, until the granola is golden and fragrant.
  7. Remove from the oven and let it cool completely before mixing in the dark chocolate chips and shredded coconut, if using.
  8. Transfer the granola to an airtight container for storage.

Nutrition Facts

This recipe yields approximately 8 servings, with each serving being around 250 calories. It’s a perfect balance of energy-providing carbohydrates, healthy fats, and a touch of sweetness.

Preparation Time

From start to finish, preparing the Choco-Nut Granola Bowl takes about 35 minutes. This includes 10 minutes of active preparation time and 25 minutes of baking time. It’s a quick and easy recipe that can be made ahead of time, saving you precious minutes during hectic mornings.

How to Serve

  • Serve it with a splash of your favorite milk—dairy, almond, or oat milk pairs wonderfully.
  • Top with fresh fruits like sliced bananas or berries for added flavor and nutrition.
  • For an extra crunch, sprinkle some chia seeds or flaxseeds on top.
  • Use it as a topping for yogurt or smoothie bowls for a delightful texture.
  • Enjoy it straight from the jar for a quick and satisfying snack.

Additional Tips

  1. Customize It: Feel free to swap out the nuts for your favorites, such as walnuts or cashews.
  2. Sweetness Level: Adjust the sweetness by adding more or less honey or maple syrup according to your preference.
  3. Storage: Store the granola in an airtight container to keep it fresh for up to two weeks.
  4. Batch Cooking: Double the recipe and freeze half for a quick breakfast option on busy days.
  5. Experiment with Spices: Add a dash of cinnamon or nutmeg for a warm, spiced flavor.

FAQ Section

  1. Can I use quick oats instead of rolled oats? While quick oats can be used, rolled oats provide a better texture and hold up well during baking.
  2. Is there a substitute for coconut oil? Yes, you can use butter or any neutral oil like vegetable or canola oil.
  3. Can I make this recipe vegan? Absolutely! Use maple syrup instead of honey, and ensure the chocolate chips are dairy-free.
  4. What if I don’t have parchment paper? You can lightly grease the baking sheet with oil to prevent sticking, though parchment paper is preferred for easy cleanup.
  5. How can I make the granola clusters bigger? Press the granola down firmly on the baking sheet before baking and avoid stirring too much.

“`

Classic French Toast

There’s something magical about the aroma of French toast wafting through the kitchen on a lazy Sunday morning. Often, it’s not just about the taste but the nostalgia it evokes. Memories of family breakfasts, laughter, and the clinking of cutlery as everyone dives into a plate of golden-brown slices, perfectly infused with cinnamon and vanilla. This classic dish, while simple in its ingredients, has a profound ability to bring people together. Recently, I tried a particular recipe that promised the perfect balance of sweetness and texture, and I must say, it surpassed expectations. My family gathered around the table, eagerly awaiting the first bite, and the unanimous verdict was clear: this was French toast done right. Crisp on the outside, soft and fluffy within, each slice was a delightful dance of flavors that left everyone reaching for seconds.

Ingredients

Creating the perfect French toast begins with selecting the right ingredients, each playing a vital role in the final masterpiece. Here’s what you’ll need:

  • 6 slices of thick bread: Preferably brioche or challah, as their density and slight sweetness complement the custard mixture.
  • 4 large eggs: The backbone of the custard, providing richness and structure.
  • 1 cup of whole milk: Adds creaminess to the custard, ensuring the toast remains moist.
  • 2 tablespoons of granulated sugar: For a touch of sweetness, balancing the custard flavors.
  • 1 teaspoon of vanilla extract: Infuses the toast with a warm, aromatic undertone.
  • 1/2 teaspoon of ground cinnamon: A classic spice that adds depth and warmth.
  • A pinch of salt: Enhances the overall flavor profile.
  • Butter for frying: Provides a rich, golden crust on the toast.

Instructions

Achieving the ideal French toast requires a few simple steps, each crucial for that perfect bite.

  1. Prepare the custard: In a medium-sized bowl, whisk together the eggs, milk, sugar, vanilla extract, cinnamon, and salt until well combined. Ensure that the sugar dissolves completely to avoid graininess.
  2. Soak the bread: Pour the custard mixture into a shallow dish. Dip each bread slice into the mixture, allowing it to soak for about 20 seconds on each side. This ensures the bread absorbs enough custard without becoming too soggy.
  3. Heat the skillet: Place a non-stick skillet or griddle over medium heat. Add a tablespoon of butter and let it melt, coating the surface evenly.
  4. Cook the toast: Gently place the soaked bread slices onto the skillet. Cook for 3-4 minutes on each side, or until they are golden brown and cooked through. Adjust the heat if necessary to prevent burning.
  5. Serve immediately: Once cooked, serve the French toast warm, topped with your favorite accompaniments.

Nutrition Facts

Understanding the nutritional content of your meal is beneficial for maintaining a balanced diet. Here’s what you need to know:

  • Servings: This recipe yields 3 servings.
  • Calories per serving: Approximately 350 calories, making it a satisfying yet moderate indulgence for breakfast.

Preparation Time

Time management in the kitchen can make the cooking experience enjoyable and stress-free. Here’s the breakdown:

  • Total time: Around 30 minutes from start to finish.
  • Preparation time: 10 minutes, including gathering ingredients and whisking the custard.
  • Cooking time: 20 minutes, ensuring each slice is perfectly toasted.

How to Serve

Serving French toast can be a creative endeavor, allowing you to customize each plate according to personal preferences. Here are a few ideas:

  • Classic: Drizzle with maple syrup and a dusting of powdered sugar for a traditional take.
  • Fruity: Top with fresh berries, banana slices, or sautéed apples for a burst of freshness.
  • Nutty: Add a sprinkle of chopped nuts such as almonds or pecans for a crunchy contrast.
  • Decadent: Serve with a dollop of whipped cream or a scoop of vanilla ice cream for a dessert-like experience.
  • Savory twist: Pair with bacon or sausage links for a hearty breakfast.

Additional Tips

Creating the perfect French toast can be elevated with these expert tips:

  1. Choose the right bread: Opt for slightly stale bread to ensure it holds the custard better without falling apart.
  2. Don’t rush the soaking: Allow the bread to soak in the custard just enough to absorb the flavors but not so long that it becomes too soggy.
  3. Maintain the right temperature: Cooking on medium heat allows the toast to cook through without burning the exterior.
  4. Experiment with spices: Try adding a pinch of nutmeg or cardamom for a unique flavor twist.
  5. Preheat your serving plate: Warm plates help keep the French toast hot longer, enhancing the dining experience.

FAQ Section

Here are some common questions and answers regarding French toast preparation:

  1. Can I use other types of bread? Yes, while brioche and challah are preferred for their texture, any thick-cut bread will work. Just ensure it’s slightly stale for the best results.
  2. Is it possible to make French toast dairy-free? Certainly! Substitute the milk with almond milk, oat milk, or any plant-based milk of your choice.
  3. How can I make it healthier? Use whole-grain bread, less sugar, and serve with fresh fruits to enhance the nutritional value.
  4. Can I prepare French toast in advance? While best enjoyed fresh, you can prepare the custard ahead of time and soak the bread just before cooking.
  5. What can I do with leftovers? Leftover French toast can be stored in the refrigerator for up to two days. Reheat in a toaster or oven for best results.

Mango Magic Parfait

Mango Magic Parfait has become a delightful staple in our family’s dessert repertoire, and for good reason. This tropical treat combines the creamy richness of yogurt with the juicy sweetness of ripe mangoes, creating a dessert that is both refreshing and satisfying. When I first introduced this recipe to my family, I was hopeful but unsure if it would be a hit. To my delight, it was met with enthusiastic approval from everyone, including my picky eater niece who usually turns her nose up at anything involving fruit. The balance of flavors and textures in this parfait is simply magical, and it has quickly become a requested treat at family gatherings and weekend brunches.

Ingredients

To create the Mango Magic Parfait, you will need a few simple, fresh ingredients that, when combined, offer a burst of tropical flavors:

  • 2 ripe mangoes, peeled, pitted, and diced
  • 2 cups of plain Greek yogurt
  • 1/4 cup of honey or agave syrup
  • 1 teaspoon of vanilla extract
  • 1/2 cup of granola or crushed graham crackers
  • 1/4 cup of shredded coconut (optional)
  • Fresh mint leaves for garnish

Instructions

Making the Mango Magic Parfait is as easy as it is delicious. Follow these steps to ensure your parfait is perfect every time:

  1. Prepare the mangoes: Start by peeling and dicing the mangoes into small, bite-sized pieces. Set aside.
  2. Mix the yogurt base: In a medium-sized bowl, combine the Greek yogurt, honey, and vanilla extract. Stir until well blended and smooth.
  3. Layer the parfait: In your serving glasses or bowls, begin by adding a layer of yogurt mixture. Follow this with a layer of diced mangoes and a sprinkle of granola or crushed graham crackers. Repeat the layers until the glasses are full, finishing with a layer of yogurt on top.
  4. Add the finishing touches: Top each parfait with a sprinkle of shredded coconut, if using, and garnish with a few fresh mint leaves for a pop of color and extra freshness.
  5. Chill before serving: For the best flavor, let the parfaits chill in the refrigerator for at least 30 minutes before serving. This allows the flavors to meld together beautifully.

Nutrition Facts

This recipe serves 4, with each serving containing approximately 250 calories. The calories can vary slightly depending on the type and amount of granola or sweetener used. Each serving is a good source of calcium and vitamin C, thanks to the yogurt and mangoes, making it not just a delicious treat but also a nutritious one.

Preparation Time

The Mango Magic Parfait is a quick and effortless dessert to prepare, perfect for those moments when you need a sweet treat in a hurry. The total preparation time is approximately 15 minutes, not including the chilling time. This makes it an ideal option for last-minute gatherings or an impromptu indulgence.

How to Serve

Here are a few ideas on how to serve your Mango Magic Parfait for maximum enjoyment:

  • Individual servings: Use clear glasses or mason jars to showcase the beautiful layers of the parfait.
  • Family-style: Serve the parfait in a large glass bowl, allowing everyone to scoop out their portion.
  • Breakfast treat: Enjoy it as a breakfast option by adding a handful of nuts or seeds for extra protein.
  • Brunch delight: Pair it with a variety of other tropical fruits for a colorful and tasty brunch spread.
  • Special occasion: Dress it up with edible flowers for an elegant touch at a dinner party.

Additional Tips

To make your Mango Magic Parfait even better, consider these tips:

  1. Use ripe mangoes: The key ingredient in this recipe is the mango, so make sure to use ripe ones for maximum flavor. A ripe mango will give slightly to the touch and have a sweet aroma.
  2. Adjust sweetness: Depending on your preference and the sweetness of the mangoes, you can adjust the amount of honey or agave syrup to suit your taste.
  3. Choose the right yogurt: Greek yogurt is recommended for its thick and creamy texture, but feel free to use your favorite type of yogurt, whether it’s full-fat, low-fat, or non-dairy.
  4. Make it ahead: You can prepare the components a day in advance and assemble the parfaits just before serving to save time.
  5. Experiment with toppings: Add a personal touch by experimenting with different toppings such as chopped nuts, seeds, or even a drizzle of chocolate syrup.

FAQ Section

Here are some frequently asked questions about the Mango Magic Parfait:

  1. Can I use frozen mangoes? Yes, you can use frozen mangoes if fresh ones are not available. Just be sure to thaw and drain them before using to avoid excess moisture in the parfait.
  2. Is there a non-dairy alternative for this recipe? Absolutely! You can substitute Greek yogurt with coconut or almond milk yogurt for a non-dairy version of the parfait.
  3. How long can I store the parfait? The parfait can be stored in the refrigerator for up to 2 days. However, for the best taste and texture, it’s recommended to consume it within 24 hours.
  4. Can I make this parfait without added sweeteners? Certainly! If you prefer a naturally sweetened parfait, simply omit the honey or agave syrup and rely on the natural sweetness of the mangoes.
  5. What other fruits can I use in this recipe? The Mango Magic Parfait is quite versatile, and you can substitute or add other fruits like berries, papaya, or pineapple for a different flavor profile.

Crispy Avocado Toast


Crispy Avocado Toast has become a beloved staple in households and cafes around the world. It’s a modern twist on a classic breakfast item that combines the creaminess of ripe avocados with the satisfying crunch of toasted bread. The first time I made this recipe for my family, it was an instant hit. The vibrant green of the avocado paired with the crispy, golden-brown toast created a visually appealing dish that was hard to resist. My family couldn’t get enough of the delicious combination, and it quickly became a regular feature on our breakfast table. This recipe is not only simple to make but also packed with flavor, making it a winner for any meal of the day.

Ingredients

To create the perfect Crispy Avocado Toast, you’ll need the following ingredients:

  • 2 ripe avocados
  • 4 slices of whole-grain bread
  • 1 tablespoon olive oil
  • 1 teaspoon lemon juice
  • Salt and pepper to taste
  • Optional toppings: cherry tomatoes, red pepper flakes, feta cheese, poached egg

Instructions

Creating Crispy Avocado Toast is a straightforward process that even a novice cook can master. Follow these steps:

  1. Prepare the Avocado: Cut the avocados in half, remove the pits, and scoop the flesh into a bowl. Add the lemon juice, salt, and pepper, and mash the avocado with a fork until you reach your desired consistency.
  2. Toast the Bread: Drizzle olive oil over the slices of whole-grain bread. Place them in a preheated oven at 375°F (190°C) or in a toaster oven until they are golden brown and crispy.
  3. Assemble the Toast: Spread the mashed avocado evenly over each slice of toasted bread.
  4. Add Toppings: Customize your toast by adding cherry tomatoes, red pepper flakes, feta cheese, or a poached egg on top. The possibilities are endless!
  5. Serve: Enjoy your Crispy Avocado Toast immediately for the best taste and texture.

Nutrition Facts

This recipe serves approximately 2 people, with each serving containing around 250 calories. This makes it a great option for a nutritious and filling meal without overloading on calories.

Preparation Time

Crispy Avocado Toast is a quick and easy dish to prepare, taking only about 15 minutes from start to finish. It’s perfect for a busy morning or a quick lunch when you’re short on time but still want something delicious and satisfying.

How to Serve

Serving Crispy Avocado Toast can be as simple or as elaborate as you like. Here are some suggestions:

  • Serve with a side of fresh fruit for a balanced breakfast.
  • Add a side salad for a light and refreshing lunch.
  • Pair with a cup of coffee or tea for a cozy morning meal.
  • Top with a drizzle of balsamic glaze for added flavor.
  • Serve with a poached egg on top for extra protein.

Additional Tips

Here are some additional tips to help you create the perfect Crispy Avocado Toast every time:

  1. Choose Ripe Avocados: Make sure your avocados are perfectly ripe for the best flavor and texture. They should be slightly soft but not mushy.
  2. Customize Your Toppings: Feel free to get creative with your toppings. Try adding different herbs, spices, or even smoked salmon for a gourmet touch.
  3. Use High-Quality Bread: The bread you choose can make a big difference. Opt for a hearty, whole-grain bread that will add texture and flavor.
  4. Don’t Skimp on Seasoning: A little salt and pepper go a long way in enhancing the flavor of the avocado. Don’t be afraid to season generously.
  5. Serve Immediately: For the best experience, enjoy your avocado toast right after preparing it to ensure the toast remains crispy.

FAQ Section

Here are some frequently asked questions about Crispy Avocado Toast:

Q: Can I prepare avocado toast ahead of time?
A: It’s best to prepare avocado toast fresh, as the toast can become soggy if it sits too long. However, you can prepare the avocado mixture in advance and store it in the fridge.
Q: What can I substitute for bread?
A: If you’re looking for a gluten-free option, you can use rice cakes, gluten-free bread, or even large slices of sweet potato as a base.
Q: Is avocado toast healthy?
A: Yes, avocado toast can be a healthy option as it’s rich in healthy fats, fiber, and various nutrients. Just be mindful of portion sizes and toppings to keep it balanced.
Q: How can I keep avocado from turning brown?
A: To prevent avocado from browning, add lemon or lime juice to the mashed avocado, and store it in an airtight container if making ahead.
Q: Can I use frozen avocado?
A: While fresh avocado is best for flavor and texture, you can use frozen avocado if it’s thawed properly. Just be aware that it may be slightly more watery.


Fluffy Banana Pancakes

The sweet aroma of freshly made pancakes wafting through the kitchen is a sensation that evokes nostalgic memories for many. Such is the case with the fluffy banana pancakes that have become a weekend staple in my household. These pancakes are not just a breakfast item; they are a delightful experience that brings the family together. The combination of ripe bananas and a hint of cinnamon creates a symphony of flavors that is both comforting and invigorating. My family, especially the kids, love these pancakes, and they have made their way into our hearts as a beloved tradition. Whether served with a drizzle of maple syrup, a dollop of whipped cream, or some fresh berries, these pancakes never fail to brighten our mornings.

Ingredients

The key to achieving the perfect fluffy banana pancake is all in the ingredients. Here’s what you’ll need to create this delightful breakfast dish:

  • 1 cup all-purpose flour
  • 2 tablespoons granulated sugar
  • 2 teaspoons baking powder
  • 1/2 teaspoon salt
  • 1/2 teaspoon ground cinnamon
  • 1 cup milk (dairy or non-dairy)
  • 1 large egg
  • 2 tablespoons unsalted butter, melted
  • 1 teaspoon vanilla extract
  • 2 ripe bananas, mashed

Instructions

Creating these fluffy banana pancakes is a simple and rewarding process. Follow these instructions to enjoy a stack of delicious pancakes:

  1. In a large mixing bowl, combine the flour, sugar, baking powder, salt, and cinnamon. Whisk together until well combined.
  2. In another bowl, whisk the milk, egg, melted butter, and vanilla extract until smooth. Add the mashed bananas to the wet ingredients and stir until fully incorporated.
  3. Gradually add the wet ingredients to the dry ingredients, stirring gently until just combined. Be careful not to overmix; a few lumps are perfectly fine.
  4. Heat a non-stick skillet or griddle over medium heat. Lightly grease with butter or cooking spray.
  5. Pour 1/4 cup of batter onto the skillet for each pancake. Cook until bubbles form on the surface and the edges appear set, about 2-3 minutes. Flip and cook for another 2 minutes, or until golden brown.
  6. Repeat with the remaining batter, adjusting the heat as necessary.
  7. Serve warm, with your choice of toppings.

Nutrition Facts

These fluffy banana pancakes are not only delicious but also relatively healthy, making them a great choice for a balanced breakfast:

  • Servings: 4
  • Calories per serving: Approximately 250 kcal

Preparation Time

One of the advantages of this recipe is how quickly it comes together. From start to finish, you can have a stack of warm, fluffy pancakes ready in no time:

  • Preparation time: 10 minutes
  • Cooking time: 15 minutes
  • Total time: 25 minutes

How to Serve

These pancakes are incredibly versatile and can be served in a variety of ways to suit your taste:

  • Drizzle with maple syrup or honey for a classic touch.
  • Top with fresh berries or sliced bananas for added freshness and flavor.
  • Add a dollop of whipped cream for an indulgent treat.
  • Sprinkle with chopped nuts, such as walnuts or pecans, for a crunchy texture.
  • Serve with a side of bacon or sausage for a hearty breakfast.

Additional Tips

Here are some tips to ensure your banana pancakes turn out perfectly every time:

  • Tip 1: Use ripe bananas for maximum sweetness and flavor.
  • Tip 2: Do not overmix the batter; a few lumps will result in fluffier pancakes.
  • Tip 3: Adjust the heat as needed to prevent the pancakes from burning or cooking too slowly.
  • Tip 4: Consider adding a handful of chocolate chips or nuts to the batter for extra texture and taste.
  • Tip 5: Keep cooked pancakes warm in a low oven while you finish cooking the rest of the batch.

FAQ Section

Here are some frequently asked questions about making fluffy banana pancakes:

Q1: Can I make these pancakes gluten-free?

A1: Yes, you can substitute the all-purpose flour with a gluten-free flour blend. Make sure the blend is suitable for pancakes to achieve the best results.

Q2: Can I prepare the batter in advance?

A2: It’s best to prepare the batter fresh for optimal fluffiness, but you can refrigerate it for up to 24 hours if needed. Stir well before using.

Q3: How do I store leftover pancakes?

A3: Store leftover pancakes in an airtight container in the refrigerator for up to 3 days. Reheat them in the microwave or a toaster for a quick breakfast.

Q4: Can I freeze banana pancakes?

A4: Yes, allow the pancakes to cool completely, then freeze them in a single layer on a baking sheet. Once frozen, transfer them to a freezer bag for up to 2 months. Reheat in the toaster or oven.

Q5: What can I do if the pancakes are too thick?

A5: If the batter is too thick, simply add a tablespoon of milk at a time until you reach the desired consistency. The batter should be pourable but not runny.

Golden Oats Delight

As I stood in my kitchen on a sunny Saturday morning, a new recipe caught my eye: Golden Oats Delight. It promised a delightful mix of flavors and textures that would elevate the humble oat to gourmet status. Skeptical yet curious, I decided to give it a try. The result was nothing short of magical. My family gathered around the table, spoon in hand, their eyes lighting up with each bite of this creamy, warm, and subtly sweet dish. The blend of spices and fruits danced on the palate, earning nods of approval from even my pickiest eater. This recipe has since become a staple in our household, a beloved comfort food that brings smiles to our breakfast table.

Ingredients

The ingredient list for Golden Oats Delight is straightforward, yet each component plays a crucial role in creating the symphony of flavors:

  • 1 cup of rolled oats
  • 2 cups of almond milk (or milk of choice)
  • 1 tablespoon of honey or maple syrup
  • 1 teaspoon of vanilla extract
  • 1/2 teaspoon of ground cinnamon
  • 1/4 teaspoon of ground nutmeg
  • 1/4 teaspoon of salt
  • 1/2 cup of fresh or dried fruit (such as berries, apples, or raisins)
  • 1/4 cup of chopped nuts (such as almonds or walnuts)
  • Optional toppings: shredded coconut, chia seeds, or yogurt

Instructions

Crafting the Golden Oats Delight is as enjoyable as savoring it. Follow these steps to create this delicious breakfast dish:

  1. Start by combining the rolled oats and almond milk in a medium-sized saucepan. Stir gently to ensure all the oats are submerged.
  2. Place the saucepan over medium heat and bring the mixture to a gentle simmer, stirring occasionally.
  3. Once simmering, add the honey or maple syrup, vanilla extract, ground cinnamon, ground nutmeg, and salt. Stir well to distribute the spices evenly.
  4. Continue to cook the oats, stirring occasionally, until they have absorbed most of the liquid and reached your desired consistency, about 10-15 minutes.
  5. Remove the saucepan from the heat and gently fold in the fresh or dried fruit and chopped nuts.
  6. Serve the oats warm in bowls, garnished with your choice of optional toppings like shredded coconut, chia seeds, or a dollop of yogurt for added creaminess.
  7. Enjoy your homemade Golden Oats Delight!

Nutrition Facts

This wholesome recipe serves four people and provides approximately 250 calories per serving. It’s a nutritious choice that balances healthy carbohydrates, proteins, and fats, making it a perfect start to your day.

Preparation Time

The beauty of Golden Oats Delight lies in its simplicity and speed. From start to finish, you can have this delightful breakfast ready in just 20 minutes, making it ideal for busy mornings when time is of the essence yet a nourishing meal is desired.

How to Serve

Golden Oats Delight is versatile and can be served in various ways to suit your taste preferences:

  • Classic Style: Simply serve the oats warm in bowls, topped with your favorite fruits and nuts.
  • On-the-Go: Prepare the oats ahead of time and store them in mason jars for a quick grab-and-go breakfast.
  • As a Dessert: Add a scoop of vanilla ice cream or a drizzle of chocolate syrup for a decadent twist.
  • Family Style: Serve the oats in a large bowl, allowing everyone to add their own toppings.
  • Brunch Spread: Include Golden Oats Delight as part of a brunch buffet, paired with fresh pastries and coffee.

Additional Tips

Here are some tips to perfect your Golden Oats Delight:

  1. Experiment with Milk: Try different types of milk like oat, soy, or coconut to alter the flavor profile.
  2. Spice it Up: Feel free to adjust the amount of cinnamon and nutmeg to suit your taste or add a pinch of cardamom for a unique twist.
  3. Make it Overnight: Prepare the oats the night before and let them soak in the refrigerator for a no-cook breakfast option.
  4. Sweeten Naturally: Use mashed bananas or unsweetened applesauce as a natural sweetener instead of honey or syrup.
  5. Add a Crunch: For added texture, sprinkle some granola on top just before serving.

FAQ Section

Q: Can I use steel-cut oats instead of rolled oats?

A: Yes, you can, but remember that steel-cut oats require a longer cooking time and more liquid. Adjust the cooking time to about 25-30 minutes, and increase the milk to 3 cups.

Q: Is it possible to make this recipe vegan?

A: Absolutely! Simply ensure you’re using a plant-based milk and maple syrup instead of honey to keep it vegan-friendly.

Q: Can I prepare this recipe in a slow cooker?

A: Yes, you can cook the oats on low for about 4-6 hours in a slow cooker. It’s perfect for waking up to a ready breakfast.

Q: How can I store leftovers?

A: Store any leftover oats in an airtight container in the refrigerator for up to 3 days. Reheat on the stovetop or in the microwave, adding a splash of milk if needed.

Q: What other toppings can I try?

A: The possibilities are endless! Try adding peanut butter, sliced bananas, chocolate chips, or even a sprinkle of cinnamon sugar for extra flavor.

Berry Bliss Smoothie

There’s something undeniably refreshing about starting your day with a ‘Berry Bliss Smoothie.’ When I first introduced this vibrant concoction to my family, it quickly became a morning staple. The blend of fresh berries, creamy yogurt, and a hint of honey creates a symphony of flavors that dance on your taste buds. Whether you’re rushing out the door or enjoying a leisurely breakfast, this smoothie offers a delightful balance of sweetness and tanginess that everyone can appreciate. My children, notorious for their picky palates, even requested seconds—a testament to its universal appeal. Moreover, the nutritional boost it provides is a bonus for those looking to kickstart their day with a healthful choice.

Ingredients

The magic of the ‘Berry Bliss Smoothie’ lies in its simplicity and the quality of its ingredients. Here’s what you’ll need to create this delightful beverage:

  • 1 cup of fresh or frozen mixed berries (blueberries, strawberries, raspberries)
  • 1 banana, ripe
  • 1/2 cup of plain Greek yogurt
  • 1/2 cup of almond milk (or any milk of your choice)
  • 1 tablespoon of honey or maple syrup
  • 1 teaspoon of chia seeds (optional)
  • 1/2 teaspoon of vanilla extract (optional)
  • A handful of ice cubes (optional, for a thicker consistency)

Instructions

Creating the perfect ‘Berry Bliss Smoothie’ is a breeze, even on the busiest of mornings. Follow these straightforward steps to enjoy a glass of berry goodness:

  1. Start by washing your fresh berries thoroughly. If you’re using frozen berries, ensure they’re free from any freezer burn.
  2. Peel the banana and break it into smaller chunks to help it blend more smoothly.
  3. In a blender, combine the berries, banana, Greek yogurt, and almond milk. Blend on a medium setting until the ingredients start to combine.
  4. Add the honey, chia seeds, and vanilla extract to the mixture. Blend again, increasing the speed until you achieve a smooth consistency.
  5. If you prefer your smoothie cold and thick, add a handful of ice cubes and blend until the ice is crushed and fully incorporated.
  6. Taste the smoothie and adjust sweetness if necessary by adding more honey or maple syrup.
  7. Pour the smoothie into glasses and serve immediately. Enjoy!

Nutrition Facts

This smoothie is not just a treat for your taste buds but also a powerhouse of nutrition. Here’s a breakdown of what you can expect per serving:

  • Servings: 2
  • Calories per serving: Approximately 250 calories

Preparation Time

One of the greatest advantages of the ‘Berry Bliss Smoothie’ is its quick preparation time. From start to finish, you can have this nutritious beverage ready in just 10 minutes. It’s perfect for those hectic mornings when every minute counts, yet you don’t want to compromise on a healthy breakfast.

How to Serve

The versatility of the ‘Berry Bliss Smoothie’ means you can enjoy it in various ways. Here are a few serving suggestions:

  • As a Breakfast On-the-Go: Pour into a travel-friendly tumbler and enjoy while commuting.
  • As a Brunch Delight: Serve alongside whole grain toast and a hard-boiled egg for a balanced meal.
  • As a Post-Workout Refresher: Add a scoop of protein powder to the blend for a recovery boost.
  • As a Dessert Alternative: Top with a sprinkle of granola and fresh berries for a healthy treat.
  • As a Kids’ Favorite: Serve with fun straws or in colorful cups to make it more appealing to children.

Additional Tips

To ensure your ‘Berry Bliss Smoothie’ is always a hit, consider these additional tips:

  1. Use Seasonal Berries: For the freshest flavor, use berries that are in season. They tend to be more flavorful and affordable.
  2. Experiment with Variations: Feel free to swap the almond milk for coconut milk or add a handful of spinach for an extra nutrient boost.
  3. Adjust Sweetness: Depending on your preference, you can adjust the sweetness by adding more or less honey.
  4. Prep Ahead: Measure and freeze your fruit in individual portions to save even more time during the morning rush.
  5. Enhance Protein Content: For a more filling smoothie, consider adding a tablespoon of peanut butter or a protein-rich nut butter.

FAQ Section

Here are some frequently asked questions about the ‘Berry Bliss Smoothie’:

  1. Can I use dairy yogurt instead of Greek yogurt?
    Yes, you can substitute plain dairy yogurt if you prefer a less tangy taste or need a non-Greek option.
  2. What can I use instead of banana?
    If bananas aren’t your favorite, you can use half an avocado or a cup of mango chunks for a creamy texture without the banana flavor.
  3. Is this smoothie suitable for vegans?
    Absolutely! Simply replace the Greek yogurt with a plant-based yogurt and use maple syrup instead of honey.
  4. How long can I store the smoothie?
    For the best taste and texture, it’s recommended to consume the smoothie immediately. However, you can store it in the refrigerator for up to 24 hours.
  5. Can I add supplements to the smoothie?
    Certainly! You can add supplements like protein powder, collagen, or spirulina to tailor the smoothie to your nutritional needs.

Sunrise Scramble

There’s something utterly magical about waking up to the aroma of a freshly made breakfast. The experience becomes even more enchanting when that breakfast is a delightful Sunrise Scramble. This dish is not just a mere breakfast item; it’s an experience that captures the essence of a perfect morning with its vibrant flavors and hearty ingredients. A well-prepared Sunrise Scramble can be the highlight of your morning, offering comfort and satisfaction with every bite. Recently, I had the opportunity to prepare this dish for my family, and it was met with rave reviews, making it a staple in our household breakfast routine.

Ingredients

The beauty of the Sunrise Scramble lies in its simplicity and the flexibility to customize it according to your preferences. Here’s what you’ll need to make a classic Sunrise Scramble that serves four:

  • 8 large eggs
  • 1/4 cup of milk
  • Salt and pepper to taste
  • 1 tablespoon olive oil or butter
  • 1 cup diced bell peppers (a mix of red, yellow, and green for color)
  • 1/2 cup diced onions
  • 1 cup chopped fresh spinach
  • 1 cup shredded cheddar cheese
  • Optional: 1/2 cup cooked bacon or sausage, crumbled

Instructions

Creating the perfect Sunrise Scramble is all about timing and technique. Follow these steps to achieve a scrumptious result that will have everyone asking for seconds:

  1. In a medium bowl, whisk together the eggs and milk until fully combined. Season with salt and pepper to taste.
  2. Heat the olive oil or butter in a large non-stick skillet over medium heat. Add the diced onions and bell peppers, sautéing until the onions are translucent and the peppers are tender, about 5 minutes.
  3. Add the chopped spinach to the skillet and cook for another 2 minutes until wilted.
  4. If using, add the crumbled bacon or sausage to the skillet and stir to combine.
  5. Reduce the heat to low and pour the egg mixture over the vegetables and meat in the skillet. Let the eggs cook undisturbed for a minute before gently stirring with a spatula to form curds.
  6. Continue to cook, stirring occasionally, until the eggs are just set. Be careful not to overcook the eggs as they should remain soft and creamy.
  7. Sprinkle the shredded cheddar cheese over the scramble and cover the skillet with a lid. Allow the cheese to melt for about 1-2 minutes.
  8. Remove from heat and serve immediately, garnished with additional cheese or fresh herbs if desired.

Nutrition Facts

This Sunrise Scramble recipe yields four servings, with each serving containing approximately 300 calories. The nutritional content may vary depending on the specific ingredients used, especially if additional proteins like bacon or sausage are added.

Preparation Time

One of the many appealing aspects of the Sunrise Scramble is its quick preparation time. From start to finish, this dish takes about 20 minutes, making it an ideal choice for busy mornings when you need a nutritious and satisfying meal without the wait.

How to Serve

Serving the Sunrise Scramble can be as creative as you wish. Here are some ideas to enhance your breakfast experience:

  • Classic Style: Serve the scramble on its own or with a side of toast or warm biscuits.
  • On-the-Go: Stuff the scramble into a warm tortilla for a delicious breakfast burrito.
  • With a Twist: Top the scramble with a dollop of sour cream or salsa for an extra kick of flavor.
  • Family Style: Serve the scramble in a large dish, allowing family members to serve themselves and add their favorite toppings.
  • Healthy Option: Pair the scramble with a fresh fruit salad for a balanced meal.

Additional Tips

To ensure your Sunrise Scramble turns out perfectly every time, consider these helpful tips:

  1. Fresh Ingredients: Use the freshest vegetables you can find to enhance the flavor and nutritional value of your scramble.
  2. Low and Slow: Cooking the eggs over low heat will result in a creamier texture, preventing them from becoming rubbery.
  3. Cheese Choice: Feel free to experiment with different types of cheese such as feta, mozzarella, or pepper jack to suit your taste.
  4. Herb Addition: Fresh herbs like chives, parsley, or basil can be added for an aromatic touch.
  5. Protein Variation: For a vegetarian version, omit the meat or substitute with plant-based options like tofu or tempeh.

FAQ Section

Here are some common questions and answers about preparing and enjoying Sunrise Scramble:

  1. Can I make the Sunrise Scramble ahead of time? Yes, you can prepare the vegetable and meat mixture ahead of time and store it in the refrigerator. When ready to serve, simply heat and add the eggs.
  2. What other vegetables can I include? Feel free to add mushrooms, zucchini, or tomatoes for added flavor and nutrition.
  3. Can I use egg substitutes or whites only? Absolutely, egg substitutes or egg whites can be used for a lower cholesterol option.
  4. How do I store leftovers? Store any leftover scramble in an airtight container in the refrigerator for up to two days. Reheat gently on the stove or in the microwave.
  5. Can I make this dish dairy-free? Yes, simply omit the cheese or use a dairy-free alternative to accommodate dietary preferences.