Vanilla Bean Panna Cotta

Vanilla Bean Panna Cotta is a dessert that has always intrigued me due to its simplicity and elegance. I first came across this delicate dish at a family gathering, where it was served as the grand finale of a sumptuous meal. The creamy texture, punctuated by the subtle aroma of vanilla, left an indelible impression on my taste buds. Needless to say, it was a hit with the family, and everyone was eager to learn how to recreate it at home. What I love most about this recipe is its versatility; it can be dressed up with a variety of toppings, which means it never gets boring. Plus, its make-ahead nature makes it a perfect choice for entertaining guests without the stress of last-minute preparations.

Ingredients

To make Vanilla Bean Panna Cotta, you’ll need the following ingredients:

  • 2 cups heavy cream
  • 1 cup whole milk
  • 1/2 cup granulated sugar
  • 1 vanilla bean, split lengthwise
  • 2 1/2 teaspoons unflavored gelatin
  • 3 tablespoons cold water
  • Fresh berries, for garnish (optional)
  • Mint leaves, for garnish (optional)

Instructions

Start by preparing the gelatin. In a small bowl, sprinkle the gelatin over the cold water and let it stand for about 5 minutes until it softens. Meanwhile, in a saucepan, combine the heavy cream, whole milk, and sugar. Scrape the seeds from the vanilla bean and add both the seeds and the pod to the saucepan. Heat the mixture over medium heat, stirring occasionally, until the sugar dissolves and the mixture is hot but not boiling. Remove the saucepan from the heat and discard the vanilla bean pod. Stir in the softened gelatin until it completely dissolves. Strain the mixture through a fine-mesh sieve into a large measuring cup or bowl with a spout, discarding any solids. Pour the panna cotta mixture into individual ramekins or serving glasses. Allow them to cool slightly before covering with plastic wrap. Refrigerate for at least 4 hours or until set. To serve, you can optionally unmold the panna cotta onto plates, or simply serve them in the ramekins. Garnish with fresh berries and mint leaves if desired.

Nutrition Facts

This recipe serves 6, with each serving containing approximately 300 calories. The calorie count may vary slightly depending on the choice of toppings or variations in ingredient brands. The dish is relatively low in carbs, making it a delightful indulgence for those watching their carbohydrate intake while still providing a rich source of calcium from the dairy content.

Preparation Time

Preparing Vanilla Bean Panna Cotta is straightforward and can fit into any busy schedule. The active preparation time is about 20 minutes, with an additional 4 hours required for the panna cotta to set in the refrigerator. This makes it an excellent make-ahead dessert, allowing you to focus on other meal components or enjoy time with your guests without being tied up in the kitchen.

How to Serve

Vanilla Bean Panna Cotta is a versatile dessert that can be served in various ways:

  • Classic Style: Serve in the ramekin with a simple garnish of fresh berries and mint leaves.
  • Unmolded on a Plate: For a more formal presentation, unmold the panna cotta onto a plate and drizzle with fruit coulis or chocolate sauce.
  • Layered with Compote: Create layers by adding a fruit compote or sauce in between layers of panna cotta in a glass.
  • Infused with Liqueur: Add a splash of your favorite liqueur to the cream mixture for a grown-up version.
  • Accompanied with Biscotti: Serve alongside biscotti or shortbread for added texture.

Additional Tips

Here are some tips to ensure your Vanilla Bean Panna Cotta turns out perfectly every time:

  • Use Quality Vanilla: The flavor of the vanilla is paramount in this dish, so use high-quality vanilla beans or pure vanilla extract.
  • Check Gelatin Dissolution: Make sure the gelatin is fully dissolved to avoid any grainy texture in the panna cotta.
  • Strain the Mixture: Straining ensures a smooth texture by removing any undissolved gelatin or vanilla bean bits.
  • Experiment with Milk: You can adjust the cream-to-milk ratio for a lighter or richer dessert based on personal preference.
  • Plan Ahead: Since it needs time to set, make the panna cotta a day before serving for best results.

FAQ Section

  • Can I use vanilla extract instead of vanilla bean?

    Yes, you can substitute 1 teaspoon of pure vanilla extract for the vanilla bean. However, the flavor may not be as robust.

  • How can I make panna cotta dairy-free?

    You can use coconut milk or almond milk in place of heavy cream and whole milk for a dairy-free version.

  • What should I do if my panna cotta doesn’t set?

    If your panna cotta doesn’t set, it might be due to insufficient gelatin. Ensure the gelatin is properly bloomed and completely dissolved in the cream mixture.

  • Can I make panna cotta in advance?

    Yes, panna cotta can be made a day or two in advance, making it a perfect dessert for entertaining.

  • How should I store leftover panna cotta?

    Store any leftover panna cotta in the refrigerator, covered with plastic wrap, for up to three days. Avoid leaving it out at room temperature for extended periods.

Caramel Pecan Brownies

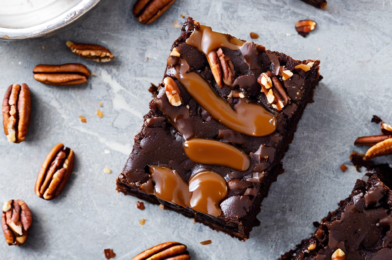
There’s something magical about the combination of caramel and pecans, especially when they’re nestled into a rich, fudgy brownie. The moment you take a bite of these Caramel Pecan Brownies, you’re greeted with a symphony of flavors and textures that dance on your palate. The gooey caramel seeps through the dense chocolate, while the crunchy pecans provide a delightful contrast, making each mouthful an indulgent experience. When I first baked these brownies for a family gathering, they disappeared almost as quickly as I set them on the table. My family couldn’t get enough, and even my niece, who’s usually not fond of nuts, devoured her share with glee. It’s safe to say, these brownies have become a family favorite that I’ll be making for years to come.

Ingredients

To recreate this heavenly treat in your own kitchen, you’ll need the following ingredients:

  • 1 cup (2 sticks) unsalted butter
  • 2 cups granulated sugar
  • 4 large eggs
  • 1 teaspoon vanilla extract
  • 1 cup all-purpose flour
  • 1/2 cup unsweetened cocoa powder
  • 1/4 teaspoon salt
  • 1 cup pecan halves
  • 1 cup caramel sauce (store-bought or homemade)

Instructions

Creating these Caramel Pecan Brownies is a straightforward process, perfect for both novice and experienced bakers. Start by preheating your oven to 350°F (175°C) and greasing a 9×13-inch baking dish. Melt the butter in a medium saucepan over medium heat. Once melted, remove from heat and stir in the sugar until well combined. Allow the mixture to cool slightly before adding the eggs and vanilla extract; this prevents the eggs from cooking in the hot butter. In a separate bowl, whisk together the flour, cocoa powder, and salt. Gradually fold the dry ingredients into the wet mixture until just combined. Be careful not to overmix, as this can make the brownies tough. Pour half of the batter into the prepared baking dish and spread it evenly.

Next, drizzle half of the caramel sauce over the batter, followed by scattering the pecan halves evenly across the surface. Pour the remaining batter over the pecans and spread it carefully to cover the nuts. Finish by drizzling the remaining caramel sauce on top, creating a marbled effect by gently swirling it with a knife. Bake for 30 to 35 minutes, or until a toothpick inserted into the center comes out with a few moist crumbs. Allow the brownies to cool completely in the pan on a wire rack before slicing them into squares. This cooling period gives the caramel time to set, ensuring clean cuts and perfectly portioned brownies.

Nutrition Facts

These Caramel Pecan Brownies are incredibly indulgent, so it’s important to enjoy them in moderation. The following nutrition facts are based on a serving size of one brownie, assuming the recipe yields 24 brownies:

  • Servings: 24 brownies
  • Calories per serving: Approximately 210 calories

Preparation Time

This recipe is not only delicious but also quite efficient in terms of preparation. Here’s a breakdown of the time you’ll need:

  • Preparation time: 15 minutes
  • Cooking time: 30-35 minutes
  • Total time: 45-50 minutes

How to Serve

Serving these brownies can be just as enjoyable as eating them. Here are a few ideas to elevate your presentation and enjoy them to the fullest:

  • Serve warm with a scoop of vanilla ice cream for a classic dessert.
  • Pair with a dollop of whipped cream and a sprinkle of shaved chocolate for added richness.
  • Offer alongside a steaming cup of coffee or a glass of cold milk for a perfect afternoon treat.
  • Add a sprinkle of sea salt on top before serving to enhance the caramel flavor.
  • For a festive touch, dust with powdered sugar before arranging on a decorative platter.

Additional Tips

To ensure your Caramel Pecan Brownies turn out perfectly every time, here are some additional tips:

  1. Quality Ingredients: Use high-quality cocoa powder and real vanilla extract for the best flavor.
  2. Pecan Preparation: Toast the pecans slightly before adding them to the batter to enhance their nutty flavor.
  3. Caramel Swirl: For a more pronounced caramel taste, you can double the amount of caramel sauce.
  4. Storage: Store the brownies in an airtight container at room temperature for up to three days, or refrigerate them to extend their shelf life.
  5. Experiment: Feel free to experiment with different nuts or add chocolate chips to the batter for variety.

FAQ Section

Here are some frequently asked questions about Caramel Pecan Brownies:

Q: Can I make these brownies gluten-free?

A: Yes, you can substitute the all-purpose flour with a gluten-free flour blend designed for baking. Ensure the caramel sauce and other ingredients are also gluten-free.

Q: Can I use a different type of nut?

A: Absolutely! While pecans complement the caramel beautifully, you can use walnuts, almonds, or even macadamia nuts if you prefer.

Q: How do I store leftover brownies?

A: Store leftover brownies in an airtight container at room temperature for up to three days. For longer storage, keep them in the refrigerator or freeze for up to three months.

Q: Can I make the caramel sauce from scratch?

A: Yes, homemade caramel sauce adds an extra layer of flavor. Simply melt sugar in a saucepan until golden, then add butter and cream, stirring until smooth.

Q: How can I tell if the brownies are done?

A: The brownies are done when a toothpick inserted into the center comes out with a few moist crumbs. Be careful not to overbake them, as they will continue to firm up as they cool.

Classic Tiramisu

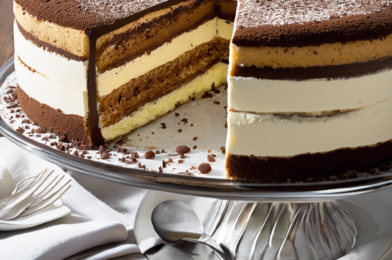
Tiramisu, the quintessential Italian dessert, is a delightful blend of rich flavors and textures that has captivated dessert enthusiasts around the globe. This classic treat, with its layers of coffee-soaked ladyfingers, creamy mascarpone cheese, and a dusting of cocoa powder, offers a perfect balance of sweetness and bitterness. My family and I recently indulged in this delightful dessert, and it was met with rave reviews. The subtle coffee flavor, combined with the silky mascarpone and the slight crunch of the cocoa topping, made for an unforgettable experience. Everyone, from the youngest to the oldest, found something to love in this indulgent creation, and it quickly became a requested favorite at family gatherings.

Ingredients

The beauty of tiramisu lies in its simplicity and the quality of its ingredients. Here’s what you’ll need:

  • 6 egg yolks
  • 3/4 cup granulated sugar
  • 2/3 cup milk
  • 1 1/4 cups heavy cream
  • 1/2 teaspoon pure vanilla extract
  • 8 ounces mascarpone cheese
  • 1 cup strong brewed coffee, cooled
  • 1/4 cup coffee liqueur (optional)
  • 24 ladyfingers
  • 2 tablespoons unsweetened cocoa powder
  • 1 ounce bittersweet chocolate, grated

Instructions

Creating a classic tiramisu involves a few straightforward steps, and the result is well worth the effort:

  1. In a medium saucepan, whisk together egg yolks and sugar until well blended. Whisk in milk and cook over medium heat, stirring constantly, until the mixture boils. Boil gently for 1 minute, then remove from heat. Allow to cool slightly, then cover tightly and chill in the refrigerator for 1 hour.
  2. In a medium bowl, beat cream with vanilla until stiff peaks form. Whisk mascarpone into the yolk mixture until smooth.
  3. In a small bowl, combine coffee and coffee liqueur. Dip each ladyfinger into the coffee mixture just long enough to get them wet, but not soaked. Arrange half of soaked ladyfingers in the bottom of a 7×11 inch dish.
  4. Spread half of the mascarpone mixture over the ladyfingers, then half of the whipped cream over that. Repeat layers, ending with the whipped cream. Cover and refrigerate for at least 4 hours, or overnight.
  5. Before serving, sprinkle with cocoa and chocolate shavings. Serve chilled and enjoy the delightful fusion of flavors.

Nutrition Facts

This classic tiramisu recipe serves approximately 12 people. Each serving contains about 450 calories, making it a rich and indulgent treat that is best enjoyed in moderation. While the calorie content might seem high, the pleasure derived from this dessert makes it worth the occasional indulgence.

Preparation Time

Creating this masterpiece requires some patience, as the preparation time totals around 20 minutes. However, since the tiramisu needs to chill for several hours, it’s best made a day ahead. This allows the flavors to meld beautifully, resulting in a dessert that’s as harmonious as it is delicious.

How to Serve

There are various ways to serve tiramisu to enhance its presentation and enjoyment:

  • Chilled: Serve straight from the fridge for a refreshing treat, especially on warm days.
  • Individual Portions: For a more elegant presentation, prepare in individual serving cups or glasses.
  • With Fresh Berries: Add a pop of color and a hint of acidity with fresh raspberries or strawberries.
  • Paired with Coffee: Enhance the coffee notes by pairing with a freshly brewed espresso.
  • Garnished with Mint: Add a touch of green and a fresh aroma with a sprig of mint on top.

Additional Tips

Creating the perfect tiramisu involves a few key tips:

  • Quality Ingredients: Use fresh, high-quality ingredients, especially the mascarpone and coffee, for the best flavor.
  • Gentle Dipping: Dip the ladyfingers quickly to prevent them from becoming too soggy.
  • Chill Time: Allow ample chilling time for the dessert to set properly and the flavors to blend.
  • Layer Carefully: Ensure even layers to achieve the classic tiramisu look and taste.
  • Experiment with Flavors: Feel free to add a touch of your favorite liqueur or adjust the coffee strength to suit your taste.

FAQ Section

Here are some common questions about tiramisu:

  • Can I make tiramisu without alcohol? Yes, the coffee liqueur is optional. You can skip it or use a non-alcoholic substitute.
  • What can I use instead of ladyfingers? Sponge cake or pound cake can be used as a substitute, but the texture will vary slightly.
  • How long does tiramisu last? Tiramisu can be stored in the refrigerator for up to three days. Ensure it’s well-covered to prevent it from absorbing other fridge odors.
  • Can tiramisu be frozen? Yes, tiramisu can be frozen for up to two weeks. Wrap it tightly and thaw in the refrigerator before serving.
  • Is it safe to eat raw eggs in tiramisu? This recipe cooks the egg yolks, making it safe to consume. Alternatively, pasteurized eggs can be used.

Berry Swirl Cheesecake

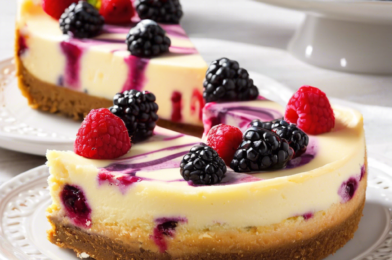
When it comes to desserts that seamlessly blend elegance with a burst of flavors, the Berry Swirl Cheesecake truly stands out. As a food enthusiast, I’ve had the opportunity to try numerous cheesecake variations, but this particular recipe has a special place in my heart. The delightful combination of creamy cheesecake with a vibrant berry swirl not only makes for a visually stunning dessert but also offers a taste that’s simply unforgettable. My family, known for their discerning palates, couldn’t get enough of it. Each bite was met with nods of approval and requests for seconds, making it clear that this dessert was a hit. The balance between the rich, smooth cheesecake and the tart, fruity berry swirl creates a symphony of flavors that dance on the taste buds, leaving everyone craving more.

Ingredients

The magic of the Berry Swirl Cheesecake starts with its carefully selected ingredients, each playing a crucial role in crafting the perfect dessert. Here’s what you’ll need:

  • 1 1/2 cups of graham cracker crumbs
  • 1/4 cup of melted butter
  • 3 tablespoons of sugar
  • 3 packages (8 ounces each) of cream cheese, softened
  • 1 cup of granulated sugar
  • 1 teaspoon of vanilla extract
  • 3 large eggs
  • 1/2 cup of sour cream
  • 1 cup of mixed berries (such as raspberries, blueberries, and strawberries)
  • 2 tablespoons of sugar (for the berry swirl)
  • 1 tablespoon of cornstarch
  • 1 tablespoon of water

Instructions

Creating the Berry Swirl Cheesecake involves several steps, but each one is simple and straightforward, ensuring that even novice bakers can achieve impressive results. Follow these instructions to make your own masterpiece:

  1. Preheat your oven to 325°F (165°C). Line the bottom of a 9-inch springform pan with parchment paper and set aside.
  2. In a medium bowl, combine the graham cracker crumbs, melted butter, and 3 tablespoons of sugar. Mix well until the crumbs are evenly coated with butter.
  3. Press the crumb mixture firmly into the bottom of the prepared springform pan to form the crust. Set aside.
  4. In a large mixing bowl, beat the softened cream cheese and 1 cup of granulated sugar until smooth and creamy. Add the vanilla extract and mix well.
  5. Add the eggs one at a time, beating well after each addition. Stir in the sour cream until fully incorporated.
  6. Pour the cheesecake batter over the prepared crust in the springform pan and smooth the top with a spatula.
  7. In a small saucepan over medium heat, combine the mixed berries, 2 tablespoons of sugar, cornstarch, and water. Cook until the mixture thickens and the berries have broken down, stirring occasionally.
  8. Remove the berry mixture from the heat and let it cool slightly. Using a spoon, drop dollops of the berry mixture onto the cheesecake batter.
  9. Using a knife or a skewer, gently swirl the berry mixture into the cheesecake batter to create a marbled effect.
  10. Bake the cheesecake in the preheated oven for 45-50 minutes, or until the center is set and the edges are lightly golden.
  11. Turn off the oven and leave the cheesecake inside with the door slightly ajar for about an hour to cool gradually.
  12. Once cooled, refrigerate the cheesecake for at least 4 hours or overnight before serving.

Nutrition Facts

Understanding the nutritional content of your desserts is essential, especially for those mindful of their dietary intake. Here are the nutrition facts for the Berry Swirl Cheesecake:

  • Servings: 12
  • Calories per serving: 350

Preparation Time

While the Berry Swirl Cheesecake is a dish that demands some patience, the end result is undeniably worth the wait. Here’s a breakdown of the preparation time:

  • Prep Time: 30 minutes
  • Cook Time: 50 minutes
  • Cooling Time: 1 hour
  • Chill Time: 4 hours
  • Total Time: 6 hours and 20 minutes

How to Serve

Serving the Berry Swirl Cheesecake can be as delightful as eating it, with several options to enhance its presentation and flavor:

  • Top each slice with a dollop of whipped cream for added richness.
  • Garnish with fresh berries for a vibrant and fresh touch.
  • Dust with powdered sugar for a light, sweet finish.
  • Serve with a side of berry compote for an extra burst of flavor.
  • Pair with a cup of coffee or tea to balance the sweetness.

Additional Tips

To ensure your Berry Swirl Cheesecake turns out perfectly every time, consider these additional tips:

  • Room Temperature Ingredients: Ensure all your ingredients, particularly the cream cheese, are at room temperature for a smooth batter.
  • Prevent Cracks: To prevent the cheesecake from cracking, avoid over-mixing the batter and allow it to cool gradually in the oven.
  • Berry Options: Feel free to experiment with different berries or even a single type to suit your taste preferences.
  • Springform Pan: Use a springform pan for easy removal and to maintain the cheesecake’s shape.
  • Testing for Doneness: The cheesecake is done when the edges are set, and the center still has a slight wobble. It will firm up as it cools.

FAQ Section

Here are some frequently asked questions about the Berry Swirl Cheesecake:

Q: Can I use frozen berries instead of fresh?
A: Yes, you can use frozen berries. Just make sure to thaw and drain them before using to prevent excess moisture in the cheesecake.

Q: How long will the cheesecake last in the refrigerator?
A: The cheesecake can be stored in the refrigerator for up to 5 days. Ensure it is covered or stored in an airtight container to maintain freshness.

Q: Can I freeze the Berry Swirl Cheesecake?
A: Yes, you can freeze the cheesecake. Wrap it tightly in plastic wrap and place it in a freezer-safe container. It will keep for up to 2 months.

Q: What can I do if my cheesecake cracks?
A: If your cheesecake cracks, don’t worry! You can cover it with a berry topping or whipped cream to hide the imperfections.

Q: Is it possible to make this cheesecake gluten-free?
A: Absolutely! Substitute the graham cracker crumbs with gluten-free cookies or gluten-free graham crackers for a gluten-free version.

Chocolate Dream Cake

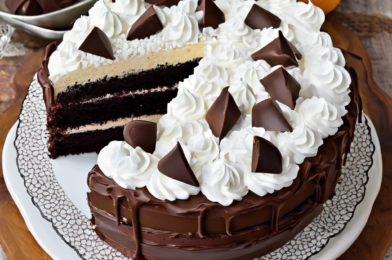
Chocolate Dream Cake is more than just a dessert; it’s an experience that envelops your senses with its rich, decadent flavors, and silky textures. As a professional food blogger, I have had the opportunity to sample countless cakes, but this one truly stands out. When I first made this cake for my family, the unanimous response was sheer delight. The combination of dense chocolate layers, creamy frosting, and a hint of coffee creates a perfect harmony of flavors that is both indulgent and satisfying. This cake became an instant favorite in my household, and I am thrilled to share the recipe with you.

Ingredients

Creating this Chocolate Dream Cake requires a handful of ingredients, each contributing to the luscious final product. Here’s what you’ll need:

  • 1 and 3/4 cups all-purpose flour
  • 3/4 cup unsweetened cocoa powder
  • 2 cups granulated sugar
  • 1 and 1/2 teaspoons baking powder
  • 1 and 1/2 teaspoons baking soda
  • 1 teaspoon salt
  • 2 large eggs
  • 1 cup whole milk
  • 1/2 cup vegetable oil
  • 2 teaspoons vanilla extract
  • 1 cup boiling water
  • 1 tablespoon instant coffee granules
  • 1 cup heavy cream
  • 8 ounces semi-sweet chocolate, chopped

Instructions

To create this masterpiece, follow these steps carefully:

  1. Preheat your oven to 350°F (175°C). Grease and flour two 9-inch round cake pans.
  2. In a large mixing bowl, sift together the flour, cocoa powder, sugar, baking powder, baking soda, and salt.
  3. In a separate bowl, whisk the eggs, milk, oil, and vanilla extract until well combined.
  4. Gradually add the wet ingredients to the dry ingredients, mixing until just combined.
  5. Dissolve the coffee granules in the boiling water, then slowly add to the batter, stirring until smooth.
  6. Divide the batter evenly between the prepared pans and bake for 30-35 minutes, or until a toothpick inserted into the center comes out clean.
  7. Allow the cakes to cool in the pans for 10 minutes, then transfer to a wire rack to cool completely.
  8. For the frosting, heat the heavy cream in a saucepan over medium heat until it begins to simmer. Pour over the chopped chocolate and let sit for 5 minutes before stirring until smooth.
  9. Once the cakes are cooled, spread a layer of frosting over the top of one cake, place the second cake on top, and cover the entire cake with the remaining frosting.

Nutrition Facts

This recipe yields approximately 12 servings, with each serving containing about 450 calories. These values are estimates and can vary based on specific ingredients used and portion sizes.

Preparation Time

The total preparation time for this Chocolate Dream Cake is approximately 1 hour and 30 minutes, including baking and cooling time. The process is broken down as follows:

  • Preparation: 20 minutes
  • Baking: 35 minutes
  • Cooling: 35 minutes

How to Serve

Serving this cake can be as creative or as simple as you desire. Here are some serving suggestions:

  • Individual Slices: Serve slices with a dollop of whipped cream and a sprinkle of cocoa powder.
  • With Ice Cream: Pair a slice with a scoop of vanilla or coffee ice cream for a delightful contrast.
  • Fruit Garnish: Top slices with fresh berries like raspberries or strawberries for added freshness.
  • Chocolate Shavings: Garnish the top of the cake with chocolate shavings for an elegant touch.
  • Special Occasions: Decorate with edible flowers or gold leaf for a sophisticated presentation.

Additional Tips

Here are some additional tips to ensure your Chocolate Dream Cake turns out perfectly:

  1. Room Temperature Ingredients: Ensure that all your ingredients are at room temperature for a smoother batter and even baking.
  2. Quality Cocoa Powder: Use high-quality unsweetened cocoa powder for a richer chocolate flavor.
  3. Don’t Overmix: Mix the batter until just combined to avoid a dense cake.
  4. Cooling Completely: Make sure the cakes are completely cool before frosting to prevent the frosting from melting.
  5. Storage: Store the cake in an airtight container at room temperature for up to 3 days or refrigerate to extend its shelf life.

FAQ Section

Here are some frequently asked questions about the Chocolate Dream Cake:

Q: Can I use a different type of flour?

A: Yes, you can substitute all-purpose flour with cake flour for a lighter texture, but avoid using self-rising flour as it will affect the leavening.

Q: What if I don’t have instant coffee granules?

A: You can omit the coffee entirely or replace it with espresso powder for a stronger coffee flavor.

Q: Can I make this cake gluten-free?

A: Yes, substitute the all-purpose flour with a gluten-free flour blend. Ensure all other ingredients are gluten-free as well.

Q: How can I make the cake dairy-free?

A: Replace the whole milk with almond or soy milk and use a dairy-free chocolate for the frosting.

Q: Can I freeze the cake?

A: Yes, wrap the cake layers tightly in plastic wrap and aluminum foil before freezing. Frost the cake after thawing completely.

Green Detox Smoothie

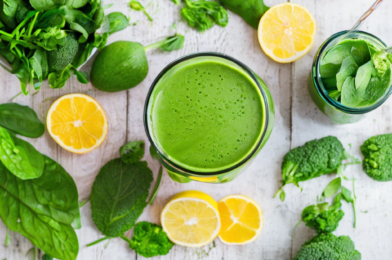
I recently tried a delightful recipe that has quickly become a family favorite: the Green Detox Smoothie. This vibrant and refreshing drink is not only delicious but also packed with nutrients that make it a perfect addition to our breakfast routine. My family was initially skeptical about the idea of a green smoothie, but after the first sip, they were hooked. The combination of fruits and greens creates a harmonious blend that even the pickiest eaters in my household enjoyed. It’s not just a smoothie; it’s a wonderful way to start the day feeling energized and refreshed.

Ingredients

The beauty of the Green Detox Smoothie lies in its simplicity and versatility. Here’s what you’ll need to whip up a batch:

  • 1 cup of fresh spinach
  • 1/2 cup of kale, stems removed
  • 1 ripe banana
  • 1/2 an avocado
  • 1 cup of almond milk (or your preferred milk)
  • 1 tablespoon of chia seeds
  • 1 tablespoon of honey or maple syrup
  • 1/2 cup of ice cubes
  • Optional: 1 tablespoon of fresh lemon juice for an extra zing

Instructions

Making this smoothie is as simple as it gets, perfect for busy mornings or a quick snack:

  1. Start by washing the spinach and kale thoroughly to remove any dirt or pesticides.
  2. Add the greens to your blender, followed by the banana, avocado, and almond milk.
  3. Sprinkle in the chia seeds and add the honey or maple syrup to sweeten.
  4. Add the ice cubes and blend until smooth. If you prefer a thinner consistency, feel free to add more almond milk.
  5. Taste and adjust sweetness or acidity to your liking. For an extra tangy flavor, add a splash of lemon juice.
  6. Pour the smoothie into glasses and serve immediately for the best flavor and texture.

Nutrition Facts

This recipe makes approximately two servings. Each serving contains around 250 calories, making it a light yet satisfying choice for a meal or snack.

Preparation Time

One of the best things about the Green Detox Smoothie is how quickly it comes together. From start to finish, you’ll need just about 10 minutes to prepare and blend this nutritious drink.

How to Serve

There are several ways to enjoy your Green Detox Smoothie:

  • As a breakfast meal: Pair it with a slice of whole-grain toast topped with almond butter for a balanced start to your day.
  • Post-workout recovery: Enjoy it after a workout to replenish your energy levels.
  • Afternoon pick-me-up: Sip it as a refreshing snack to keep you going through the afternoon slump.
  • On-the-go meal: Pour it into a travel-friendly tumbler for a nutritious option while commuting.
  • Dessert alternative: Freeze leftovers into popsicle molds for a healthy treat.

Additional Tips

Here are some tips to help you get the most out of your Green Detox Smoothie:

  1. Experiment with greens: Don’t hesitate to swap in other leafy greens like swiss chard or romaine lettuce for variety.
  2. Boost the protein: Add a scoop of your favorite protein powder to turn this smoothie into a more filling meal.
  3. Use frozen fruits: If you don’t have fresh bananas or avocados, frozen ones work just as well and can make your smoothie even creamier.
  4. Adjust sweetness: Depending on the ripeness of your banana, you might need to tweak the amount of honey or syrup.
  5. Prep ahead: Portion out your ingredients the night before to save time in the morning.

FAQ Section

Here are some frequently asked questions about the Green Detox Smoothie:

  1. Can I make this smoothie ahead of time? Yes, you can prepare it up to a day in advance. Store it in an airtight container in the refrigerator. Give it a good shake before serving.
  2. Is it okay to use other types of milk? Absolutely, feel free to use any milk of your choice, such as soy, oat, or coconut milk.
  3. What if I don’t like avocado? You can substitute it with Greek yogurt for creaminess and added protein.
  4. Can I add other fruits? Yes, adding fruits like mango or pineapple can enhance the flavor and sweetness.
  5. How can I make it more filling? Adding oats or nuts can provide extra fiber and satiety.

Blueberry Almond Muffins


Blueberry Almond Muffins Recipe

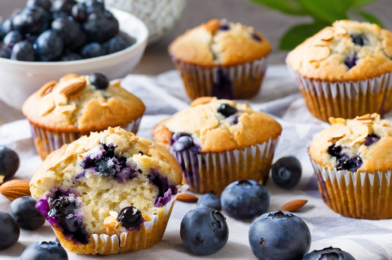
There’s something incredibly comforting about the aroma of freshly baked muffins wafting through the house. The first time I tried this Blueberry Almond Muffins recipe, it quickly became a family favorite. The muffins were moist, flavorful, and bursting with fresh blueberries, complemented by the subtle nuttiness of almonds. My family couldn’t get enough of them, and they were gone before I knew it. These muffins are perfect for breakfast, a snack, or even a sweet treat after dinner. Their delightful taste and texture make them a must-try for anyone who loves baking.

Ingredients

Here’s what you’ll need to make these delicious Blueberry Almond Muffins:

  • 1 1/2 cups all-purpose flour
  • 1/2 cup almond flour
  • 1/2 cup granulated sugar
  • 1/4 cup brown sugar
  • 2 teaspoons baking powder
  • 1/2 teaspoon salt
  • 1/2 cup unsalted butter, melted
  • 2 large eggs
  • 1 teaspoon vanilla extract
  • 1/2 cup milk
  • 1 1/2 cups fresh blueberries
  • 1/4 cup sliced almonds

Instructions

Follow these steps to bake your own batch of Blueberry Almond Muffins:

  1. Preheat your oven to 375°F (190°C). Line a 12-cup muffin tin with paper liners or grease with butter.
  2. In a large bowl, whisk together the all-purpose flour, almond flour, granulated sugar, brown sugar, baking powder, and salt.
  3. In another bowl, combine the melted butter, eggs, vanilla extract, and milk. Whisk until well combined.
  4. Pour the wet ingredients into the dry ingredients and stir gently until just combined. Be careful not to overmix.
  5. Gently fold in the blueberries and sliced almonds, ensuring they are evenly distributed throughout the batter.
  6. Spoon the batter evenly into the prepared muffin tin, filling each cup about 3/4 full.
  7. Bake for 18-20 minutes, or until a toothpick inserted into the center of a muffin comes out clean.
  8. Allow the muffins to cool in the tin for 5 minutes before transferring them to a wire rack to cool completely.

Nutrition Facts

These muffins are not only delicious but also provide a good balance of nutrients. Here’s the nutritional breakdown:

  • Servings: 12 muffins
  • Calories per serving: Approximately 220 calories

Preparation Time

The total preparation time for these Blueberry Almond Muffins is about 40 minutes, broken down as follows:

  • Prep time: 15 minutes
  • Cook time: 20 minutes
  • Cooling time: 5 minutes

How to Serve

These muffins are incredibly versatile and can be served in a variety of ways:

  • Enjoy them warm with a pat of butter for breakfast.
  • Pair them with a cup of tea or coffee for a delightful afternoon snack.
  • Serve them with a dollop of whipped cream or a scoop of vanilla ice cream for dessert.
  • Include them in a brunch spread alongside other pastries and fresh fruit.
  • Pack them in lunchboxes for a sweet treat on the go.

Additional Tips

To ensure your muffins turn out perfectly every time, consider these helpful tips:

  • Tip 1: Use fresh blueberries for the best flavor and texture, but frozen blueberries can be used in a pinch. If using frozen, do not thaw them before adding to the batter.
  • Tip 2: To prevent blueberries from sinking to the bottom, toss them in a tablespoon of flour before folding them into the batter.
  • Tip 3: For a crunchy topping, sprinkle a little extra sugar and sliced almonds over the muffins before baking.
  • Tip 4: Store any leftover muffins in an airtight container at room temperature for up to three days, or freeze them for longer storage.
  • Tip 5: Experiment with different flavor variations by adding a teaspoon of lemon zest or a pinch of cinnamon to the batter.

FAQ Section

Here are some commonly asked questions about Blueberry Almond Muffins:

  • Q: Can I make these muffins gluten-free?

    A: Yes, you can substitute the all-purpose flour with a gluten-free flour blend. Ensure that the baking powder is also gluten-free.

  • Q: Can I use almond extract instead of vanilla extract?

    A: Absolutely! Almond extract will enhance the almond flavor in the muffins. Use 1/2 teaspoon instead of 1 teaspoon, as almond extract is stronger in flavor.

  • Q: Can I substitute the butter with oil?

    A: Yes, you can use an equal amount of vegetable oil or melted coconut oil as a substitute for butter.

  • Q: How do I prevent my muffins from becoming dense?

    A: Be careful not to overmix the batter, as this can lead to dense muffins. Mix just until the ingredients are combined.

  • Q: Can I add other fruits or nuts to this recipe?

    A: Certainly! Feel free to experiment with different fruits like raspberries or blackberries or add chopped nuts such as walnuts or pecans for added texture.


Strawberry Shortcake Pancakes

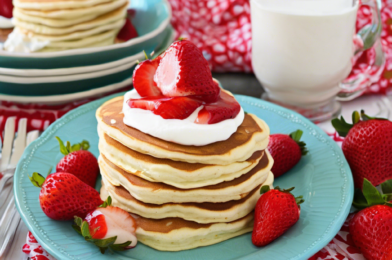
There’s something magical about waking up to the aroma of freshly cooked pancakes, especially when they’re infused with the sweet, tangy essence of strawberries. The delightful dish of Strawberry Shortcake Pancakes is an innovative twist on a beloved classic, perfect for those weekend breakfasts or brunches that demand something special. As a journalist covering food trends for both The Washington Post and BuzzFeed News, the delightful combination of flavors and textures these pancakes offer is something I find worth sharing. Not only do these pancakes capture the quintessential taste of summer with their juicy strawberries, but they also provide a comforting, indulgent experience reminiscent of a traditional shortcake. When I introduced this recipe to my family, it was met with unanimous approval. The light, fluffy pancakes paired with sweetened strawberries and a dollop of whipped cream created a symphony of flavors that had everyone reaching for seconds.

Ingredients

To create these Strawberry Shortcake Pancakes, you’ll need a selection of simple, yet effective ingredients that work together to deliver an unforgettable taste experience. The ingredients are as follows:

  • 1 cup of all-purpose flour
  • 1 tablespoon of sugar
  • 1 teaspoon of baking powder
  • 1/2 teaspoon of baking soda
  • 1/4 teaspoon of salt
  • 3/4 cup of buttermilk
  • 1 large egg
  • 2 tablespoons of unsalted butter, melted
  • 1 teaspoon of vanilla extract
  • 1 cup of fresh strawberries, hulled and diced
  • Whipped cream for topping
  • Additional strawberries for garnish

Instructions

Creating the Strawberry Shortcake Pancakes is a straightforward process, yet it requires a bit of attention to detail to ensure the pancakes turn out perfectly every time. Here is a step-by-step guide:

  1. Begin by whisking together the flour, sugar, baking powder, baking soda, and salt in a large bowl. This dry mixture is the foundation of your pancakes.
  2. In a separate bowl, combine the buttermilk, egg, melted butter, and vanilla extract. Mix these wet ingredients until they are well incorporated.
  3. Pour the wet ingredients into the dry ingredients and gently fold them together using a spatula. Be cautious not to overmix; the batter should be slightly lumpy, which ensures fluffy pancakes.
  4. Gently fold in the diced strawberries, distributing them evenly throughout the batter.
  5. Heat a non-stick skillet or griddle over medium heat. Once hot, lightly grease the surface with butter or cooking spray.
  6. Pour about 1/4 cup of batter onto the skillet for each pancake. Cook until the edges start to set and bubbles form on the surface, approximately 2-3 minutes.
  7. Flip the pancakes and cook for an additional 2 minutes, or until golden brown.
  8. Transfer the cooked pancakes to a warm plate and repeat with the remaining batter.
  9. Serve the pancakes stacked, topped with whipped cream and additional fresh strawberries for garnish.

Nutrition Facts

Understanding the nutritional content of what we enjoy can be just as satisfying as the meal itself, especially when it comes to dishes as indulgent as Strawberry Shortcake Pancakes. Here’s a breakdown of the nutritional facts for this recipe, serving four people:

  • Servings: 4
  • Calories per serving: Approximately 280 calories

Preparation Time

In today’s busy world, finding time to prepare a delicious breakfast can be challenging. Fortunately, these pancakes are quick and easy to make. Here’s a quick rundown of the preparation time:

  • Preparation time: 10 minutes
  • Cooking time: 15 minutes
  • Total time: 25 minutes

How to Serve

The presentation of your Strawberry Shortcake Pancakes can elevate the dining experience. Here are a few serving suggestions to make them as visually appealing as they are delicious:

  • Stack the pancakes high and drizzle with maple syrup for added sweetness.
  • Create a layered effect by placing a dollop of whipped cream between each pancake.
  • Garnish with mint leaves for a pop of color and freshness.
  • Serve with a side of crispy bacon or sausage to balance the sweetness.
  • Pair with a refreshing mimosa or freshly squeezed orange juice for a complete brunch experience.

Additional Tips

To ensure your Strawberry Shortcake Pancakes come out perfect every time, consider these additional tips:

  • Tip 1: For the fluffiest pancakes, let the batter rest for 5-10 minutes before cooking to allow the baking powder to activate.
  • Tip 2: Use fresh, ripe strawberries for maximum flavor. Frozen strawberries can be used in a pinch but may add extra moisture to the batter.
  • Tip 3: Adjust the sweetness by adding more or less sugar to the batter, depending on your preference.
  • Tip 4: Ensure your skillet or griddle is at the right temperature by performing a water droplet test—if the water sizzles, it’s ready to use.
  • Tip 5: Customize your pancakes by adding a hint of lemon zest to the batter for a refreshing twist.

FAQ Section

As with any recipe, there are often questions that arise. Here are some common queries about Strawberry Shortcake Pancakes:

  • Q1: Can I use whole wheat flour instead of all-purpose flour?
    A: Yes, you can substitute whole wheat flour, though the pancakes may be denser. Consider using a mix of whole wheat and all-purpose flour for a lighter texture.
  • Q2: What can I use as a substitute for buttermilk?
    A: You can make a buttermilk substitute by adding 1 tablespoon of lemon juice or vinegar to 1 cup of milk and letting it sit for 5 minutes.
  • Q3: How can I store leftover pancakes?
    A: Store leftover pancakes in an airtight container in the refrigerator for up to 3 days. Reheat in the toaster or oven for best results.
  • Q4: Can I prepare the batter ahead of time?
    A: It’s best to make the batter fresh, but you can prepare the dry ingredients in advance and store them in a sealed container.
  • Q5: Are there any variations to this recipe?
    A: Absolutely! Try adding chocolate chips or nuts to the batter for added texture and flavor.

Sweet Potato Hash

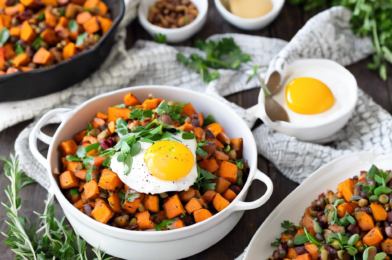
There’s something incredibly comforting about a hearty breakfast that brings the family together, and sweet potato hash is one such dish that does exactly that. When I first introduced this recipe to my family, I wasn’t sure how it would be received. After all, sweet potatoes can sometimes be a divisive ingredient. However, to my surprise, it was an instant hit. The natural sweetness of the potatoes, combined with the savory flavors of onions, bell peppers, and spices, created a harmony of tastes that left everyone asking for seconds. It quickly became a Sunday brunch staple in our household, loved for its wholesome ingredients and delightful taste. The best part? It’s incredibly versatile and can be customized to suit everyone’s preferences, making it perfect for family gatherings.

Ingredients

To make this delicious sweet potato hash, you will need the following ingredients:

  • 2 large sweet potatoes, peeled and diced
  • 2 tablespoons olive oil
  • 1 large onion, chopped
  • 1 red bell pepper, diced
  • 1 green bell pepper, diced
  • 2 cloves garlic, minced
  • 1 teaspoon smoked paprika
  • 1/2 teaspoon ground cumin
  • Salt and pepper to taste
  • Fresh parsley for garnish
  • Optional: fried or poached eggs for serving

Instructions

Making sweet potato hash is straightforward and doesn’t take much time. Here are the step-by-step instructions:

  1. Begin by heating the olive oil in a large skillet over medium heat. Once the oil is hot, add the chopped onions and cook until they become translucent.
  2. Add the diced red and green bell peppers to the skillet. Sauté them along with the onions until they start to soften, about 5 minutes.
  3. Stir in the minced garlic, smoked paprika, and ground cumin. Continue to cook for an additional 2 minutes, allowing the spices to become fragrant.
  4. Add the diced sweet potatoes to the skillet. Stir well to coat them with the oil and spices. Reduce the heat to medium-low, cover the skillet, and let the sweet potatoes cook until they are tender, stirring occasionally. This should take around 15-20 minutes.
  5. Once the sweet potatoes are cooked through, season the hash with salt and pepper to taste. If desired, top with fried or poached eggs for an extra protein boost.
  6. Garnish with fresh parsley before serving. Enjoy your delicious sweet potato hash!

Nutrition Facts

This recipe serves 4 people. Each serving contains approximately 250 calories. The calorie count may vary if you choose to add eggs or other toppings.

Preparation Time

Total preparation time for this sweet potato hash is about 35 minutes. This includes 10 minutes of prep time and around 25 minutes of cooking time.

How to Serve

Sweet potato hash is a versatile dish that can be served in various ways. Here are some ideas:

  • As a standalone breakfast or brunch dish with a side of toast.
  • Topped with fried or poached eggs for added protein.
  • Alongside grilled meats as a hearty side dish for dinner.
  • Wrapped in a warm tortilla for a delicious breakfast burrito.
  • With a dollop of sour cream or avocado for a creamy finish.

Additional Tips

Here are some tips to ensure your sweet potato hash turns out perfectly every time:

  1. Choose the right potatoes: Opt for firm, fresh sweet potatoes that are free from blemishes for the best texture.
  2. Cut evenly: Dice the sweet potatoes into uniform pieces to ensure they cook evenly.
  3. Don’t overcrowd the pan: If your skillet is too small, cook in batches. Overcrowding can cause the potatoes to steam rather than brown.
  4. Adjust spices: Feel free to adjust the spices to your taste. Add a pinch of cayenne for a spicy kick.
  5. Pre-cook sweet potatoes: If you’re short on time, pre-cook the sweet potatoes in a microwave before adding them to the skillet.

FAQ

Here are some frequently asked questions about sweet potato hash:

Can I use regular potatoes instead of sweet potatoes?

Yes, you can substitute regular potatoes if you prefer. The cooking time may vary slightly, so keep an eye on them to ensure they are tender.

How can I store leftovers?

Store any leftover sweet potato hash in an airtight container in the refrigerator for up to 3 days. Reheat in a skillet over medium heat before serving.

Can I freeze sweet potato hash?

Yes, you can freeze sweet potato hash. Allow it to cool completely, then transfer to a freezer-safe container. Freeze for up to 3 months. Thaw in the refrigerator overnight before reheating.

What other vegetables can I add to the hash?

You can add a variety of vegetables such as mushrooms, zucchini, or spinach to enhance the flavor and nutritional content of the hash.

Can I make this dish vegan?

Absolutely! Simply omit the eggs or use a plant-based egg substitute to keep the dish vegan-friendly.

Egg & Cheese Croissant Sandwich

The Egg & Cheese Croissant Sandwich holds a special place in the pantheon of breakfast foods, revered for its simplicity yet celebrated for its delightful taste. My family and I recently decided to try making this classic breakfast dish at home, and it was an instant hit. The warm, buttery croissant enveloping the fluffy scrambled eggs and melted cheese created a symphony of flavors that had everyone asking for seconds. What stood out the most was how the croissant’s slight sweetness beautifully complemented the savory filling. This sandwich is not just a meal; it’s an experience that brings people together, evoking smiles with every bite.

Ingredients

To embark on your journey to creating the perfect Egg & Cheese Croissant Sandwich, you will need the following ingredients:

  • 4 large croissants
  • 6 large eggs
  • 1/4 cup of milk
  • 1 tablespoon of butter
  • 4 slices of cheddar cheese (or cheese of your choice)
  • Salt and pepper to taste
  • Optional: 1/4 cup of cooked bacon or ham for added flavor

These ingredients come together to create a harmonious blend of textures and flavors, making this sandwich a delightful start to your day.

Instructions

The process of making an Egg & Cheese Croissant Sandwich is straightforward, allowing even novice cooks to feel like culinary professionals. Follow these steps for a scrumptious breakfast:

  1. Preheat your oven to 350°F (175°C) to warm the croissants. Slice each croissant in half horizontally and place them on a baking sheet. Warm them in the oven for about 5 minutes.
  2. In a bowl, whisk together the eggs, milk, salt, and pepper until well combined. This will ensure your eggs are fluffy and seasoned to perfection.
  3. Heat a non-stick skillet over medium heat and melt the butter. Pour in the egg mixture and gently stir with a spatula, cooking until the eggs are just set but still soft.
  4. Remove the croissants from the oven and place a slice of cheese on the bottom half of each. Spoon the scrambled eggs over the cheese, allowing the warmth to melt it slightly.
  5. Top the eggs with an additional slice of cheese if desired, and cover with the other half of the croissant. Serve immediately for the best taste and texture.

This method ensures that the eggs remain moist and the cheese perfectly melted, creating a delectable sandwich that’s sure to satisfy.

Nutrition Facts

Understanding the nutritional content of your meals is important for maintaining a balanced diet. This recipe yields 4 servings, with each serving containing approximately 450 calories. The majority of the calories come from the croissants and cheese, offering a good mix of carbohydrates, protein, and fats to fuel your morning activities.

Preparation Time

One of the greatest advantages of the Egg & Cheese Croissant Sandwich is its quick preparation time. From start to finish, you can have this delicious breakfast ready in just 20 minutes. This makes it perfect for busy mornings when you need a hearty meal without spending too much time in the kitchen.

How to Serve

The Egg & Cheese Croissant Sandwich is versatile and can be served in various ways to enhance your dining experience:

  • Pair it with a fresh fruit salad for a refreshing contrast.
  • Enjoy it with a side of hash browns or roasted potatoes for a more filling meal.
  • Serve it with a cup of freshly brewed coffee or a glass of orange juice to complement the flavors.
  • Add a dollop of your favorite sauce, like hollandaise or ketchup, for an extra burst of flavor.
  • For a gourmet touch, sprinkle some fresh herbs such as chives or parsley on top before serving.

These serving suggestions can elevate your sandwich from a simple breakfast to a memorable culinary experience.

Additional Tips

To ensure your Egg & Cheese Croissant Sandwich reaches its full potential, consider these additional tips:

  1. Choose quality croissants: The croissant is the foundation of this sandwich, so opt for freshly baked ones from a bakery for the best texture and flavor.
  2. Experiment with cheeses: While cheddar is a classic choice, feel free to try other cheeses like Swiss, gouda, or brie for a unique taste.
  3. Don’t overcook the eggs: The key to perfect scrambled eggs is to cook them until they are just set, keeping them soft and creamy.
  4. Add a protein twist: For a more substantial meal, add cooked bacon, ham, or even smoked salmon to the sandwich.
  5. Customize with veggies: Incorporating vegetables like spinach, mushrooms, or tomatoes can add nutritional value and flavor diversity to your sandwich.

By following these tips, you can tailor the sandwich to your taste preferences and dietary needs.

FAQ Section

Q: Can I prepare the sandwich in advance?

A: While it’s best enjoyed fresh, you can prepare the sandwich ingredients in advance and assemble them just before serving. Store the eggs and croissants separately in the fridge and reheat them as needed.

Q: Can I make this sandwich vegetarian?

A: Absolutely! Simply omit any meat and consider adding more vegetables or a plant-based cheese alternative to keep it vegetarian-friendly.

Q: What’s the best way to reheat a croissant?

A: To reheat a croissant, place it in a preheated oven at 350°F (175°C) for about 5-7 minutes. This method helps restore its flaky texture without making it soggy.

Q: Can I freeze the sandwiches?

A: You can freeze the assembled sandwiches by wrapping them tightly in plastic wrap and storing them in a ziplock bag. To reheat, unwrap and bake them in the oven until heated through.

Q: How can I make the sandwich gluten-free?

A: Look for gluten-free croissants available at specialty stores or online. Ensure all other ingredients, including cheese and any added meats, are also certified gluten-free.

With these insights, you’re well-equipped to enjoy and customize your Egg & Cheese Croissant Sandwich to perfection. Whether you’re serving it for a family breakfast or a special brunch, this sandwich is sure to impress and satisfy.