Greek Yogurt Power Bowl

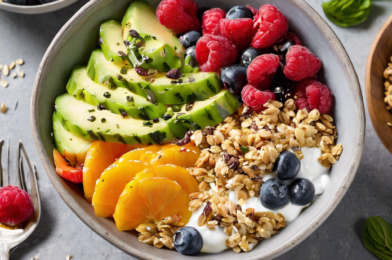
There’s something magical about a dish that can be both a hearty breakfast and a satisfying snack, and the Greek Yogurt Power Bowl is precisely that. As a food enthusiast who constantly explores healthy yet delicious meals, this particular bowl has found a permanent spot in my culinary repertoire. My family, always my most honest critics, immediately fell in love with its creamy texture and the delightful medley of flavors and textures. The first time I served it, the kitchen was filled with the aroma of fresh berries and a hint of honey, which quickly lured them to the table. Their verdict was unanimous: this was a winner. I’ve since experimented with various toppings and have found that the versatility of this dish is one of its greatest strengths. Whether you’re looking for a quick breakfast or a post-workout snack, the Greek Yogurt Power Bowl delivers on all fronts.

Ingredients

The beauty of the Greek Yogurt Power Bowl lies in its simplicity. Here is what you’ll need to make this nutritious dish:

  • 1 cup of Greek yogurt: Opt for plain or vanilla for a neutral base. Greek yogurt is rich in protein, making it an excellent choice for a filling meal.
  • 1/2 cup of mixed berries: Use fresh or frozen blueberries, strawberries, raspberries, or blackberries. These add a burst of flavor and are rich in antioxidants.
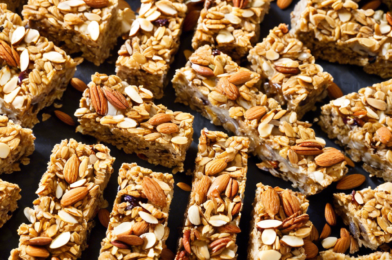
  • 1/4 cup of granola: Choose your favorite granola or make your own. This adds a satisfying crunch.
  • 1 tablespoon of honey: A drizzle of honey adds natural sweetness, but you can adjust this to taste.
  • 1 tablespoon of chia seeds: These are optional but offer additional fiber and omega-3 fatty acids.
  • 1/4 teaspoon of cinnamon: A sprinkle of cinnamon enhances the flavor profile with its warm, aromatic notes.

Instructions

Creating the Greek Yogurt Power Bowl is as straightforward as it is rewarding. Follow these simple steps:

  1. Prepare the base: Start by placing the Greek yogurt in a medium-sized bowl. Stir it well to ensure a creamy consistency.
  2. Add the berries: Scatter the mixed berries over the yogurt. If you’re using frozen berries, thaw them slightly to release their juices.
  3. Top with granola: Sprinkle the granola evenly over the berries. This will give your bowl a delightful crunch.
  4. Sweeten with honey: Drizzle the honey over the top, letting it seep through the layers of yogurt and berries.
  5. Enhance with chia seeds and cinnamon: If desired, sprinkle chia seeds and a pinch of cinnamon to finish.
  6. Mix and serve: Gently mix the ingredients to combine, or serve as is for a layered effect.

Nutrition Facts

This recipe is designed to serve one, making it perfect for individual meals or tailoring portions for family servings. Each serving contains approximately 300 calories, depending on the specific brands and amounts of ingredients used. The Greek Yogurt Power Bowl is a balanced meal, offering a good mix of protein, healthy fats, and carbohydrates, not to mention the myriad of vitamins and minerals from the berries and seeds.

Preparation Time

The Greek Yogurt Power Bowl is an excellent choice for those mornings when time is of the essence. With just a 10-minute preparation time, you can whip up this nutritious dish even on the busiest of days. The simplicity of the ingredients means minimal prep work, and the assembly is quick and easy, making it an ideal option for a quick and healthy breakfast or snack.

How to Serve

This versatile bowl can be enjoyed in various ways, catering to different preferences and occasions. Here are a few serving suggestions:

  • Breakfast: Serve as a nutritious start to your day. Pair it with a hot cup of coffee or tea for a balanced morning meal.
  • Post-Workout Snack: The protein-packed Greek yogurt makes it a great option for a post-exercise recovery snack.
  • On-the-Go: Prepare the ingredients in a portable container for a quick and easy meal to take to work or school.
  • Brunch: Impress your guests by serving it as part of a brunch spread, offering a healthy alternative to traditional dishes.
  • Dessert: With a few tweaks, such as adding a layer of crushed nuts or dark chocolate chips, this can transform into a delightful dessert.

Additional Tips

Creating the perfect Greek Yogurt Power Bowl can be an art, and here are some tips to elevate your bowl to the next level:

  • Choose the right yogurt: Full-fat Greek yogurt offers a creamier texture, but if you’re watching your calorie intake, low-fat or fat-free options are available.
  • Experiment with flavors: Try adding a dash of vanilla extract or almond essence for a deeper flavor profile.
  • Mix up the toppings: Don’t be afraid to experiment with different fruit combinations, nuts, or seeds to keep things interesting.
  • Seasonal fruits: Use seasonal fruits to ensure the freshest and most flavorful ingredients.
  • Pre-prep ingredients: Save time by prepping your ingredients the night before, making your morning routine even smoother.

FAQ Section

Here are some common questions about the Greek Yogurt Power Bowl, along with their answers:

  1. Can I use regular yogurt instead of Greek yogurt? Yes, you can use regular yogurt, but it will have a thinner consistency and lower protein content. If you prefer a thicker texture, Greek yogurt is the best choice.
  2. Is this recipe suitable for vegans? To make a vegan version, substitute the Greek yogurt with a plant-based alternative, such as almond or coconut yogurt, and replace honey with agave syrup or maple syrup.
  3. How can I store leftovers? Although it’s best to enjoy the Greek Yogurt Power Bowl fresh, you can store leftovers in an airtight container in the refrigerator for up to 24 hours. Keep in mind that the granola may lose its crunch.
  4. Can I add protein powder to the bowl? Absolutely! Adding a scoop of protein powder can enhance the nutritional value, especially if you’re consuming it post-workout.
  5. What are some alternative toppings I can use? In addition to berries and granola, you can try adding sliced bananas, chopped nuts, dried fruits, or a dollop of nut butter for variation.

Honey Almond Granola Bars

The sweet, nutty aroma filled my kitchen as I pulled a tray of homemade Honey Almond Granola Bars from the oven. These delightful treats have quickly become a family favorite, cherished for their perfect balance of flavors and wholesome ingredients. With every bite, there’s a satisfying crunch from the almonds, a subtle sweetness from the honey, and an earthiness from the oats that makes these bars irresistible. Whether packed in lunchboxes or enjoyed as a quick snack, these granola bars have won over my family, including the picky eaters, with their delicious taste and nutritious value. They not only serve as a perfect energy boost but also as a comforting treat that brings everyone to the kitchen, eager for just one more piece.

Ingredients

Creating these granola bars requires a handful of simple, yet flavorful ingredients that come together to form a deliciously chewy snack. Here’s what you’ll need:

  • 2 cups old-fashioned rolled oats
  • 1 cup raw almonds, roughly chopped
  • 1/2 cup honey
  • 1/4 cup unsalted butter
  • 1/4 cup light brown sugar, packed
  • 1 teaspoon vanilla extract
  • 1/4 teaspoon salt
  • 1/2 teaspoon ground cinnamon
  • 1/2 cup dried cranberries (optional)

Instructions

Making these Honey Almond Granola Bars is a straightforward process, perfect for both beginner and experienced bakers. Follow these steps to create your homemade granola bars:

  1. Preheat your oven to 350°F (175°C) and line an 8×8-inch baking pan with parchment paper, leaving extra paper hanging over the sides for easy removal.
  2. In a large bowl, combine the oats and chopped almonds. Spread them in a single layer on a baking sheet and toast in the oven for about 10 minutes, or until lightly golden and fragrant.
  3. In a small saucepan over medium heat, combine the honey, butter, and brown sugar. Stir continuously until the butter is melted and the sugar has dissolved.
  4. Remove the saucepan from heat and stir in the vanilla extract, salt, and cinnamon. Let the mixture cool slightly.
  5. Pour the honey mixture over the toasted oats and almonds. Add the dried cranberries, if using, and mix well to ensure all the dry ingredients are coated.
  6. Transfer the mixture to the prepared baking pan, pressing it down firmly with a spatula or your hands to ensure it’s tightly packed.
  7. Bake for 20-25 minutes, or until the edges are golden brown. Allow the bars to cool completely in the pan before lifting them out using the parchment paper overhang.
  8. Once cooled, cut into bars or squares of your desired size. Store in an airtight container at room temperature.

Nutrition Facts

These Honey Almond Granola Bars are not only delicious but also packed with nutrition, making them a great addition to your diet. Here’s the nutritional breakdown:

  • Servings: 12 bars
  • Calories per serving: Approximately 200 calories

Preparation Time

One of the best things about these granola bars is how quick and easy they are to make. Here’s a breakdown of the preparation time:

  • Prep time: 10 minutes
  • Cook time: 25 minutes
  • Total time: 35 minutes

How to Serve

These granola bars are incredibly versatile and can be served in a variety of ways:

  • As a quick, on-the-go breakfast option.
  • Pack them in lunchboxes for a healthy midday snack.
  • Enjoy them as a post-workout energy boost.
  • Pair with a cup of tea or coffee for a delightful afternoon treat.
  • Crumble over yogurt or ice cream for a crunchy topping.

Additional Tips

To ensure your granola bars turn out perfect every time, consider the following tips:

  • Tip 1: Use fresh, high-quality ingredients for the best flavor and texture.
  • Tip 2: For extra crunch, add a handful of sunflower seeds or pumpkin seeds.
  • Tip 3: Adjust the sweetness by varying the amount of honey or using maple syrup as an alternative.
  • Tip 4: Experiment with different dried fruits, such as apricots or raisins, for a flavor variation.
  • Tip 5: Press the mixture firmly into the pan to ensure the bars hold together once baked.

FAQ Section

Here are some frequently asked questions about Honey Almond Granola Bars:

Q1: Can I use quick oats instead of old-fashioned rolled oats?

A: While you can use quick oats, the texture of the bars may be slightly different. Rolled oats provide a chewier texture that is ideal for granola bars.

Q2: Are there any nut-free alternatives for those with allergies?

A: Yes, you can substitute the almonds with sunflower seeds or pumpkin seeds to make the bars nut-free.

Q3: How long do these granola bars last?

A: Stored in an airtight container at room temperature, these bars will stay fresh for up to one week. For longer storage, you can freeze them for up to three months.

Q4: Can I add chocolate chips to the recipe?

A: Absolutely! Adding chocolate chips can enhance the flavor. Just be sure to add them after the oat mixture has cooled slightly, to prevent melting.

Q5: What can I do if my granola bars turn out too crumbly?

A: If your bars are too crumbly, try adding a bit more honey or pressing the mixture more firmly into the pan before baking.

Loaded Breakfast Burrito

There’s something irresistibly satisfying about a loaded breakfast burrito that has captured the hearts of many breakfast enthusiasts. This delightful creation combines the classic components of a traditional breakfast, neatly wrapped in a warm tortilla. The fusion of flavors and textures makes it an ideal choice for those seeking a delicious and hearty start to their day. In my own experience, serving this dish to my family was met with enthusiastic approval. The combination of scrambled eggs, crispy bacon, and melted cheese, all enveloped in a soft tortilla, was a hit at our breakfast table. The ease of preparation and the ability to customize the ingredients to suit individual preferences make it a versatile option for any household.

Ingredients

To create the perfect loaded breakfast burrito, you’ll need a variety of ingredients that come together in a harmonious blend. Here’s what you’ll need:

  • 4 large eggs
  • 1/4 cup of milk
  • 1/2 teaspoon of salt
  • 1/4 teaspoon of black pepper
  • 4 slices of bacon
  • 1 cup of shredded cheddar cheese
  • 1/2 cup of diced bell peppers (any color)
  • 1/4 cup of diced onions
  • 4 large flour tortillas
  • 1/2 cup of salsa
  • 1/4 cup of sour cream
  • 1 avocado, sliced

Instructions

Preparing a loaded breakfast burrito is a straightforward process that even novice cooks can master. Follow these steps for a delightful morning meal:

  1. In a mixing bowl, whisk together the eggs, milk, salt, and black pepper until well combined. Set aside.
  2. In a large skillet over medium heat, cook the bacon until crisp. Remove the bacon and drain on paper towels. Once cooled, crumble the bacon into small pieces.
  3. In the same skillet, sauté the diced bell peppers and onions until they are soft and fragrant. Remove from the skillet and set aside.
  4. Pour the egg mixture into the skillet and cook over medium heat, stirring gently until the eggs are scrambled and fully cooked.
  5. Warm the flour tortillas in a separate pan or microwave until they are pliable.
  6. To assemble the burritos, place a tortilla on a flat surface and layer with scrambled eggs, crumbled bacon, sautéed vegetables, and shredded cheese.
  7. Fold in the sides of the tortilla and then roll it up from the bottom to enclose the filling securely.
  8. Repeat with the remaining tortillas and filling ingredients.
  9. Serve each burrito with a side of salsa, a dollop of sour cream, and slices of avocado.

Nutrition Facts

This recipe yields 4 servings, with each burrito containing approximately 450 calories. The nutritional content may vary depending on the specific ingredients used and any additional toppings added.

Preparation Time

The total preparation time for this loaded breakfast burrito is approximately 30 minutes. This includes 10 minutes for ingredient preparation and 20 minutes for cooking and assembly.

How to Serve

  • Serve warm, straight from the skillet for the best taste and texture.
  • Pair with a fresh fruit salad or a green smoothie for a balanced breakfast.
  • Offer a variety of hot sauces on the side for those who enjoy a spicy kick.
  • For a brunch setting, complement the burritos with a side of crispy hash browns.
  • Consider adding a sprinkle of fresh cilantro or chopped green onions for an extra burst of flavor.

Additional Tips

  1. Customize Your Fillings: Feel free to add other ingredients like cooked sausage, sautéed mushrooms, or diced tomatoes to cater to your taste preferences.
  2. Cheese Options: While cheddar is a classic choice, you can experiment with other cheeses such as Monterey Jack or pepper jack for a different flavor profile.
  3. Make Ahead: These burritos can be prepared in advance and stored in the refrigerator. Simply reheat them in the microwave for a quick breakfast option during busy mornings.
  4. Gluten-Free Option: Substitute the flour tortillas with gluten-free tortillas to cater to dietary restrictions.
  5. Vegetarian Version: Omit the bacon and add extra vegetables like spinach or zucchini for a vegetarian-friendly version.

FAQ Section

  1. Can I freeze the breakfast burritos? Yes, you can freeze them. Wrap each burrito individually in foil or plastic wrap, then store them in a freezer bag. When ready to eat, thaw overnight in the refrigerator and reheat in the microwave.
  2. What is the best way to reheat a breakfast burrito? The best way to reheat a breakfast burrito is to wrap it in a damp paper towel and microwave it for 1-2 minutes, or until heated through.
  3. Can I use corn tortillas instead of flour tortillas? Yes, corn tortillas can be used, although they are smaller and may require more careful wrapping to contain the fillings.
  4. How can I make these burritos spicier? Add ingredients like jalapeños, hot sauce, or spicy sausage to increase the heat level of your burritos.
  5. Is it possible to make this recipe dairy-free? Yes, substitute dairy products with plant-based alternatives like almond milk, dairy-free cheese, and coconut yogurt.

Nutty Banana Smoothie

The humble banana, often seen as a simple fruit, transforms into something extraordinary when combined with a medley of nuts in the form of a Nutty Banana Smoothie. This delightful concoction has quickly become a favorite in my household, winning over even the most skeptical taste buds. The smoothie’s creamy texture, punctuated by the subtle crunch of nuts, creates a sensory experience that’s both satisfying and refreshing. My family has embraced this smoothie as a go-to breakfast option, and its simplicity and nutritional benefits have made it a staple in our morning routine. The combination of natural sweetness from the banana and the rich, earthy flavor of nuts creates a balanced taste profile that appeals to both children and adults alike. It’s a way to start the day on a flavorful and nutritious note, providing the energy and nourishment needed to tackle the day ahead.

Ingredients

To create this delicious Nutty Banana Smoothie, you will need the following ingredients:

  • 2 ripe bananas
  • 1 cup of almond milk (or any milk of your choice)
  • 2 tablespoons of peanut butter
  • 1 tablespoon of honey (optional)
  • 1/4 cup of mixed nuts (such as almonds, walnuts, and cashews)
  • 1/2 teaspoon of vanilla extract
  • A pinch of cinnamon (optional)
  • Ice cubes (as required)

Instructions

Creating the Nutty Banana Smoothie is a straightforward process that even novice smoothie makers can master:

  1. Start by peeling the bananas and breaking them into smaller chunks. This makes them easier to blend and ensures a smoother texture.
  2. In a blender, combine the banana chunks, almond milk, peanut butter, and honey. Blend until the mixture is smooth and creamy.
  3. Add the mixed nuts, vanilla extract, and a pinch of cinnamon to the blender. Pulse a few times to mix the ingredients while leaving small nutty bits for texture.
  4. If you prefer a colder or thicker smoothie, add a handful of ice cubes and blend until the ice is crushed and fully integrated.
  5. Taste the smoothie and adjust sweetness if necessary by adding more honey. Blend again to combine.
  6. Pour the smoothie into glasses and garnish with a sprinkle of chopped nuts or a dusting of cinnamon for an extra touch of flavor and presentation.

Nutrition Facts

This Nutty Banana Smoothie recipe serves two, with each serving containing approximately 300 calories. The calorie count may vary based on specific ingredient brands and quantities used.

Preparation Time

The preparation time for this delicious smoothie is minimal, requiring only about 10 minutes from start to finish. This makes it an excellent choice for busy mornings when time is limited but nutrition is needed.

How to Serve

  • Serve the Nutty Banana Smoothie immediately after preparation for the freshest taste.
  • Garnish with extra nuts or a sprinkle of cinnamon for added flavor and visual appeal.
  • If serving children, consider using fun straws to make the smoothie more appealing.
  • Pair the smoothie with a slice of whole-grain toast for a complete breakfast.
  • For a special treat, top with a dollop of whipped cream and a drizzle of honey.

Additional Tips

  1. Select ripe bananas: For the sweetest and most flavorful smoothie, use bananas that are fully ripe with spots on the peel.
  2. Experiment with nut butters: While peanut butter is a classic choice, feel free to try almond butter or cashew butter for a different flavor profile.
  3. Adjust thickness: If you prefer a thicker smoothie, reduce the amount of almond milk or add more bananas.
  4. Make it vegan: To make the smoothie vegan, use maple syrup instead of honey and ensure the nut butter is free from animal products.
  5. Nut allergies: If allergic to nuts, substitute with sunflower seed butter and omit the mixed nuts for a nut-free version.

FAQ Section

  1. Can I prepare the smoothie in advance? It’s best to enjoy the smoothie fresh. However, you can prepare the ingredients the night before and blend them in the morning.
  2. What can I use instead of almond milk? Feel free to use any milk of your choice, such as cow’s milk, soy milk, or oat milk.
  3. Is this smoothie suitable for weight loss? This smoothie can be part of a balanced diet for weight loss due to its moderate calorie count and nutritious ingredients.
  4. Can I add protein powder to this smoothie? Yes, adding a scoop of protein powder can enhance the nutritional value, especially if consumed post-workout.
  5. How can I make the smoothie sweeter? To sweeten the smoothie naturally, consider adding more ripe bananas or a bit of honey or maple syrup.

Cinnamon Apple Oatmeal

There’s something incredibly comforting about the aroma of cinnamon and apples wafting through your home on a crisp autumn morning. Cinnamon Apple Oatmeal is more than just a breakfast staple; it’s an embrace of warmth and nostalgia wrapped in a bowl. As someone who cherishes hearty breakfasts, I can attest that this dish is not only a family favorite but also a delightful way to start the day. My family often gathers around the kitchen island, drawn by the enticing scent, eagerly anticipating the first spoonful. The combination of sweet, tender apples, and the warm spice of cinnamon with creamy oats creates a perfect harmony of flavors that everyone enjoys.

Ingredients

Creating this delicious Cinnamon Apple Oatmeal requires a few simple ingredients that you likely already have in your pantry. Here’s what you’ll need:

  • 1 cup of rolled oats
  • 2 cups of milk or water (adjust according to preference)
  • 2 medium apples, peeled, cored, and diced
  • 1 teaspoon of ground cinnamon
  • 2 tablespoons of brown sugar or maple syrup
  • 1/4 teaspoon of salt
  • 1 teaspoon of vanilla extract
  • A handful of chopped nuts (such as walnuts or almonds) for garnish
  • Optional: raisins, dried cranberries, or a dollop of yogurt

Instructions

Follow these steps to prepare a comforting and delicious bowl of Cinnamon Apple Oatmeal:

  1. Prepare the apples: Begin by peeling, coring, and dicing the apples into small pieces. This ensures that they cook evenly and quickly.
  2. Cook the oats: In a medium saucepan, combine the rolled oats, milk or water, diced apples, ground cinnamon, brown sugar, and salt. Stir well to mix all ingredients thoroughly.
  3. Simmer: Place the saucepan over medium heat and bring the mixture to a gentle boil. Once boiling, reduce the heat to low and let it simmer for about 10-15 minutes. Stir occasionally to prevent sticking and ensure the oats are cooking evenly.
  4. Add flavor: As the oatmeal nears the end of cooking, stir in the vanilla extract. This adds a lovely aroma and enhances the overall flavor.
  5. Serve: Once the oatmeal reaches your desired consistency, remove it from the heat. Serve hot, garnished with chopped nuts, a sprinkle of cinnamon, and any additional toppings you enjoy.

Nutrition Facts

The following nutrition facts are based on a recipe that serves four people:

  • Servings: 4
  • Calories per serving: Approximately 220

Preparation Time

The preparation time for Cinnamon Apple Oatmeal is minimal, making it an ideal breakfast option for busy mornings:

  • Prep Time: 10 minutes
  • Cook Time: 15 minutes
  • Total Time: 25 minutes

How to Serve

Here are some serving suggestions to elevate your Cinnamon Apple Oatmeal experience:

  • Top with a dollop of Greek yogurt for added creaminess and protein.
  • Sprinkle with additional cinnamon or nutmeg for extra warmth.
  • Add a handful of raisins or dried cranberries for a pop of sweetness.
  • Drizzle with honey or maple syrup if you prefer a sweeter oatmeal.
  • Enjoy with a cup of hot coffee or tea for a complete breakfast experience.

Additional Tips

For those looking to perfect their Cinnamon Apple Oatmeal, here are some additional tips:

  • Choose the right apples: Opt for sweet varieties like Honeycrisp or Fuji to complement the cinnamon.
  • Adjust sweetness: Modify the amount of sugar or syrup based on personal taste preferences.
  • Make it vegan: Use almond milk or another plant-based milk alternative in place of dairy.
  • Add protein: Stir in a scoop of protein powder or a tablespoon of peanut butter for a nutritious boost.
  • Make in advance: Prepare a large batch and store in the refrigerator for up to three days for quick breakfasts.

FAQ Section

Here are some frequently asked questions about Cinnamon Apple Oatmeal:

  1. Can I use instant oats instead of rolled oats?

    Yes, you can use instant oats, but the texture will be softer, and the cooking time will be reduced. Adjust the liquid amounts accordingly.

  2. What other fruits can I add?

    Pears, bananas, or berries work well in this recipe. Adjust the cinnamon and sugar to balance the flavors.

  3. Is this recipe gluten-free?

    Ensure that your oats are certified gluten-free if you need a gluten-free option. Oats are naturally gluten-free, but cross-contamination can occur.

  4. How can I store leftovers?

    Store any leftover oatmeal in an airtight container in the refrigerator for up to three days. Reheat with a splash of milk or water.

  5. Can I freeze this oatmeal?

    Yes, you can freeze portions of cooked oatmeal in airtight containers. Thaw overnight in the refrigerator and reheat on the stove or microwave.

With these detailed instructions and tips, you’re all set to create a comforting and delicious bowl of Cinnamon Apple Oatmeal. Whether you’re starting your day or enjoying a cozy evening snack, this recipe is sure to bring warmth and satisfaction to your table.

Zesty Lemon Poppy Seed Muffins

There’s something undeniably delightful about starting your day with the bright and invigorating flavors of zesty lemon poppy seed muffins. These muffins, with their perfect balance of tartness and sweetness, are a treat for the senses. As they bake, the kitchen fills with a citrusy aroma that’s sure to lift anyone’s spirits. The burst of lemon is complemented by the subtle crunch of poppy seeds, offering a texture that makes each bite interesting and satisfying. Whether enjoyed fresh out of the oven with a pat of butter or cooled to room temperature, these muffins are a versatile delight. They are perfect for breakfast, a mid-morning snack, or even a light dessert. The combination of flavors is not only refreshing but also quite addictive, making it hard to stop at just one.

The origin of lemon poppy seed muffins can be traced back to the blending of Eastern European traditions with American baking innovations. Poppy seeds have long been a staple in European pastries, valued for their nutty flavor and slight crunch. When combined with the zest of lemons, they create a harmonious blend that has become a beloved classic in many households. The incorporation of lemon not only enhances the flavor but also adds a burst of vitamin C, making these muffins a somewhat healthier choice compared to other bakery options. The use of yogurt or sour cream in the batter ensures a moist crumb, while the natural oils from lemon zest infuse the muffins with their signature zing.

For those looking to experiment, lemon poppy seed muffins offer a canvas for creativity. Adding a glaze made from lemon juice and powdered sugar can elevate these muffins to dessert status. Alternatively, a sprinkle of coarse sugar before baking adds a delightful crunch. Some bakers even incorporate additional flavors like vanilla or almond extract to personalize their recipes further. If you’re feeling adventurous, try adding a handful of fresh blueberries or raspberries to the batter for a fruity twist. These muffins are not just a treat for the taste buds but also a feast for the eyes, with their speckled appearance and sunny hue. Perfect for a brunch spread or a thoughtful homemade gift, zesty lemon poppy seed muffins are a testament to the joy of simple, well-executed baking.

Tomato Basil Egg Muffins

There’s something truly comforting about the smell of freshly baked muffins wafting through the kitchen on a lazy Sunday morning. This past weekend, I had the opportunity to try out a delightful recipe for Tomato Basil Egg Muffins, and it was a resounding success with the family. The subtle aroma of basil, the sweetness of ripe tomatoes, and the savory richness of eggs come together in a harmonious blend that had everyone reaching for seconds. It’s a recipe that not only satisfies the palate but also offers a nutritious start to the day, making it a new staple in our breakfast rotation. The muffins are not only delicious but also incredibly versatile, lending themselves to customization for every taste preference. Whether served hot out of the oven or packed for a quick breakfast on the go, these muffins are a testament to how simplicity in cooking can yield extraordinary flavor.

Ingredients

The beauty of Tomato Basil Egg Muffins lies in their simplicity, relying on fresh ingredients to deliver a burst of flavor. Here’s what you’ll need:

  • 6 large eggs
  • 1/4 cup of milk (dairy or non-dairy)
  • 1 cup of cherry tomatoes, halved
  • 1/2 cup of fresh basil leaves, chopped
  • 1/2 cup of shredded mozzarella cheese
  • Salt and pepper to taste
  • 1 tablespoon of olive oil
  • A pinch of red pepper flakes (optional, for a little heat)

Instructions

Making these muffins is as easy as it is rewarding. Start by preheating your oven to 375°F (190°C) and greasing a muffin tin with olive oil to prevent sticking. In a large mixing bowl, whisk together the eggs and milk until well combined. Season the mixture generously with salt, pepper, and red pepper flakes if you’re using them. Next, fold in the chopped basil and half of the cheese, reserving the rest for topping. Carefully pour the egg mixture into the prepared muffin tin, filling each cup about halfway.

Evenly distribute the halved cherry tomatoes into each muffin cup, allowing them to nestle into the egg mixture. Sprinkle the remaining mozzarella cheese over the top of each muffin, ensuring a gooey, cheesy crust upon baking. Place the muffin tin in the preheated oven and bake for about 20-25 minutes, or until the egg muffins are puffed up and golden brown on top. A toothpick inserted into the center should come out clean, indicating they are done. Allow the muffins to cool slightly before gently removing them from the tin. Serve warm or at room temperature, and enjoy the medley of flavors in every bite.

Nutrition Facts

Each serving of Tomato Basil Egg Muffins is not only packed with flavor but also provides a nutritious boost to start your day right. This recipe yields 6 servings, with each muffin containing approximately 150 calories. They are a great source of protein, thanks to the eggs and cheese, and offer vitamins and antioxidants from the fresh tomatoes and basil. These muffins are a wholesome choice for those looking to maintain a balanced diet without compromising on taste.

Preparation Time

One of the most appealing aspects of this recipe is its efficiency, making it perfect for busy mornings or meal prep. From start to finish, preparing Tomato Basil Egg Muffins takes about 35 minutes. This includes 10 minutes of prep time to whisk together the ingredients and prepare the muffin tin, followed by a 25-minute bake time. The result is a quick, hassle-free breakfast option that doesn’t skimp on flavor or nutrition.

How to Serve

The versatility of Tomato Basil Egg Muffins allows them to shine in various serving scenarios. Here are a few ideas to inspire your breakfast or brunch menu:

  • Serve alongside a fresh green salad for a light, balanced meal.
  • Pair with a slice of whole-grain toast for added fiber and sustenance.
  • Enjoy with a dollop of Greek yogurt and a sprinkle of chopped chives for an extra burst of flavor.
  • Pack them in a lunchbox with some fresh fruit for a nutritious on-the-go meal.
  • Accompany a steaming cup of coffee or tea for a cozy breakfast experience.

Additional Tips

To ensure your Tomato Basil Egg Muffins turn out perfect every time, consider these handy tips:

  1. Use fresh ingredients: The quality of your tomatoes and basil can significantly impact the overall flavor of the muffins.
  2. Customize to taste: Feel free to add your favorite herbs or spices to the egg mixture for a personal touch.
  3. Make them ahead: These muffins store well in the refrigerator for up to three days, making them ideal for meal prep.
  4. Reheat gently: To enjoy the muffins warm, reheat them in the microwave for 20-30 seconds, or in the oven at a low temperature.
  5. Consider dietary needs: Easily adapt the recipe to accommodate dietary restrictions by using non-dairy milk or reducing the cheese.

FAQ Section

Q: Can I freeze Tomato Basil Egg Muffins?

A: Yes, these muffins freeze well. Allow them to cool completely, then store in an airtight container in the freezer for up to three months. Thaw overnight in the refrigerator before reheating.

Q: Can I use other types of cheese?

A: Absolutely! Feel free to experiment with different varieties such as feta, cheddar, or goat cheese to suit your preferences.

Q: What can I substitute for fresh basil?

A: If fresh basil is unavailable, you can use dried basil, although the flavor may not be as vibrant. Use about one-third of the amount called for fresh herbs.

Q: Are these muffins gluten-free?

A: Yes, as long as no gluten-containing ingredients are added, such as certain types of cheese, these muffins are naturally gluten-free.

Q: How can I add more protein to this recipe?

A: You can boost the protein content by adding cooked and crumbled sausage or bacon into the egg mixture before baking.

Savory Spinach Omelet

There’s something delightfully comforting about a well-prepared savory spinach omelet. Whether you’re enjoying it as a hearty breakfast, a light lunch, or a quick dinner, this dish has a knack for satisfying hunger while also being nutritious. I first tried this recipe on a lazy Sunday morning when I wanted to prepare something rich in flavor yet easy to make. The result was a hit! My family loved how the earthy flavor of the spinach paired perfectly with the creamy texture of the eggs, and the touch of melted cheese made it a dish worth remembering. This omelet has since become a staple in our household, often requested by both kids and adults alike. Whenever I whip it up, it feels like a special occasion, even if it’s just an ordinary weekday morning.

Ingredients

To create this delightful savory spinach omelet, you will need the following ingredients:

  • 3 large eggs
  • 1 cup fresh spinach leaves, washed and chopped
  • 1/4 cup shredded cheese (cheddar or mozzarella work well)
  • 1/4 cup diced onions
  • 1/4 cup diced tomatoes
  • 1 tablespoon butter or olive oil
  • Salt and pepper to taste
  • Optional: a pinch of nutmeg for added flavor

Instructions

Follow these steps to prepare your savory spinach omelet:

  1. Begin by whisking the eggs in a bowl. Add a pinch of salt, pepper, and nutmeg if you’re using it. Set aside.
  2. In a non-stick skillet, heat the butter or olive oil over medium heat. Add the diced onions and sauté until they become translucent.
  3. Add the chopped spinach to the skillet and cook until wilted. This should take about 2-3 minutes.
  4. Add the diced tomatoes to the skillet and cook for another minute.
  5. Pour the beaten eggs over the vegetable mixture, tilting the pan to spread them evenly.
  6. Sprinkle the shredded cheese over the eggs and cover the skillet with a lid. Allow the omelet to cook for about 3-4 minutes, or until the eggs are set and the cheese is melted.
  7. Carefully fold the omelet in half and slide it onto a plate. Serve immediately for best results.

Nutrition Facts

This recipe makes one serving. Each serving contains approximately 320 calories. The nutritional value may vary based on the cheese and additional ingredients you choose to include.

Preparation Time

This savory spinach omelet takes about 10 minutes to prepare and another 10 minutes to cook, making it a quick and easy meal option that can be enjoyed any time of the day.

How to Serve

Here are some suggestions for serving your savory spinach omelet:

  • Serve with a side of whole-grain toast for a balanced meal.
  • Accompany with fresh fruit, such as sliced avocado or berries, for a refreshing taste contrast.
  • Pair with a mixed green salad for a light, nutritious lunch.
  • Top with a dollop of sour cream or Greek yogurt for added creaminess.
  • Garnish with fresh herbs such as parsley or chives for a burst of color and flavor.

Additional Tips

Consider these tips to enhance your omelet-making experience:

  1. Use fresh ingredients: Fresh vegetables and high-quality eggs make a noticeable difference in taste and texture.
  2. Preheat your pan: Ensure your skillet is properly heated before adding the eggs to prevent sticking.
  3. Experiment with fillings: Feel free to add other vegetables or meats like mushrooms, bell peppers, or ham for variety.
  4. Control the heat: Cook the omelet on medium-low heat to avoid overcooking the eggs and ensure a soft texture.
  5. Practice patience: Allow the eggs to cook slowly and resist the urge to stir, which can disrupt the omelet’s structure.

FAQ Section

Here are some frequently asked questions about making a savory spinach omelet:

  1. Can I use frozen spinach? Yes, you can use frozen spinach. Be sure to thaw and drain it thoroughly before adding it to the skillet to prevent extra moisture from affecting the omelet.
  2. What type of cheese works best? Both cheddar and mozzarella are excellent choices, but feel free to experiment with your favorites like feta or Swiss cheese.
  3. How can I make the omelet fluffier? To make a fluffier omelet, you can add a splash of milk or cream to the eggs before whisking.
  4. Can I make this omelet in advance? While it’s best enjoyed fresh, you can prepare the vegetable mixture in advance and refrigerate it. Cook the omelet when you’re ready to eat.
  5. Is this omelet suitable for a vegetarian diet? Yes, this recipe is vegetarian-friendly. Be sure to use vegetarian-approved cheese if adhering strictly to a vegetarian diet.

Coconut Chia Pudding

Coconut Chia Pudding has become a sensation in the world of health-conscious and flavor-savvy eaters alike. This delightful blend of creamy coconut milk and nutrient-rich chia seeds offers not just a delicious treat but also a nutritional powerhouse that fits seamlessly into a busy lifestyle. When I first introduced this pudding to my family, it was an instant hit. The subtle sweetness of the coconut paired with the unique texture of chia seeds made it a dessert that was not only satisfying but also left us feeling good about our choice. My children loved it for its novelty, and my partner appreciated its health benefits. It’s a recipe that has since become a staple in our household, enjoyed as a quick breakfast, a refreshing snack, or even a light dessert. In this article, we’ll delve into the details of creating this simple yet sophisticated dish, perfect for any occasion.

Ingredients

To create the perfect Coconut Chia Pudding, you’ll need a few key ingredients that blend together to form a creamy, delightful mixture. The star of the show is, of course, the chia seeds. These tiny seeds pack a punch, offering a great source of fiber, protein, and omega-3 fatty acids. You’ll require about half a cup of chia seeds for a standard recipe serving. Next, you’ll need two cups of coconut milk. Opt for full-fat coconut milk if you’re aiming for a richer pudding, or go for a lighter version if you prefer a less creamy texture. For sweetness, two to three tablespoons of maple syrup or honey work beautifully, allowing you to adjust according to your taste preferences. A teaspoon of vanilla extract adds depth to the flavor profile, while a pinch of salt enhances all the ingredients, balancing the sweetness and adding complexity. Optional garnishes could include fresh berries, shredded coconut, or a sprinkle of nuts, which add both flavor and visual appeal to the finished dish.

Instructions

Making Coconut Chia Pudding is a simple process that requires minimal effort, yet delivers maximum results. Begin by combining the coconut milk, chia seeds, maple syrup, vanilla extract, and salt in a medium-sized bowl. Stir the mixture well to ensure the chia seeds are evenly distributed and all ingredients are fully incorporated. It’s important to let this mixture sit for about 10 minutes, then give it another stir to break up any clumps of chia seeds that may have formed. Cover the bowl with plastic wrap or transfer the mixture into individual serving containers, then refrigerate for at least four hours or overnight. This allows the chia seeds to fully absorb the liquid, transforming the mixture into a thick, pudding-like consistency. When you’re ready to serve, give the pudding a good stir to fluff it up. Serve it chilled, topped with your choice of garnishes such as fresh berries, shredded coconut, or nuts for added texture and flavor.

Nutrition Facts

Understanding the nutritional value of what you consume is essential, and Coconut Chia Pudding does not disappoint. One serving of this pudding, which typically measures about half a cup, contains approximately 200 calories. This makes it a light yet satisfying option for those who are calorie-conscious. Each serving also provides around 8 grams of protein and 12 grams of fiber, making it an excellent option for keeping you full and satisfied. The healthy fats from the coconut milk contribute to a feeling of satiety, while the omega-3 fatty acids from the chia seeds offer heart-healthy benefits. Additionally, this pudding is naturally gluten-free and can easily be adapted to fit a vegan diet by ensuring the sweetener used is plant-based.

Preparation Time

Coconut Chia Pudding is a time-efficient recipe that fits perfectly into a busy schedule. The actual preparation takes about 10 minutes, which involves mixing the ingredients and ensuring the chia seeds are evenly distributed. The majority of the process is passive, as the mixture needs to sit in the refrigerator for at least four hours to achieve the ideal pudding consistency. For those who plan their meals ahead, preparing this dish the night before makes for a quick, grab-and-go breakfast or snack the next day. The ease of preparation and the minimal time commitment make this recipe a favorite for both busy families and individuals looking for a healthy yet convenient meal option.

How to Serve

Serving Coconut Chia Pudding can be as simple or as elaborate as you desire. Here are a few ideas to inspire your presentation:

  • Classic: Serve chilled in a small bowl or glass, topped with a sprinkle of shredded coconut for an extra touch of tropical flavor.
  • Berry Delight: Add a handful of mixed fresh berries such as blueberries, raspberries, or chopped strawberries to bring a burst of color and freshness.
  • Nutty Crunch: Top with a mix of chopped nuts like almonds or walnuts for added texture and a dose of healthy fats.
  • Chocolate Lover: Drizzle with a bit of melted dark chocolate or sprinkle cocoa nibs on top for a decadent twist.
  • Breakfast Bowl: Layer with granola and a dollop of yogurt for a hearty and nutritious breakfast option.

Additional Tips

To ensure your Coconut Chia Pudding turns out perfectly every time, consider these additional tips:

  • Tip 1: For a smoother texture, blend the coconut milk before adding it to the chia seeds. This will help break up any clumps and create a more even consistency.
  • Tip 2: If you prefer a sweeter pudding, taste the mixture before refrigerating and adjust the level of sweetener to your liking.
  • Tip 3: Experiment with flavors by adding a teaspoon of cinnamon or cocoa powder to the mixture for a unique twist.
  • Tip 4: Use a whisk instead of a spoon to initially mix the ingredients, ensuring a more even distribution of chia seeds.
  • Tip 5: Store the pudding in individual mason jars for a convenient, portable snack that you can take on the go.

FAQ Section

Q1: Can I use almond milk instead of coconut milk?

A1: Yes, almond milk can be used as a substitute for coconut milk. However, keep in mind that it will alter the flavor and texture slightly, resulting in a less creamy pudding.

Q2: How long can I store Coconut Chia Pudding in the fridge?

A2: Coconut Chia Pudding can be stored in the refrigerator for up to five days. Ensure it is kept in an airtight container to preserve its freshness.

Q3: Can I freeze Coconut Chia Pudding?

A3: Yes, you can freeze Coconut Chia Pudding. Store it in a freezer-safe container and thaw in the refrigerator overnight before serving. The texture may change slightly after freezing.

Q4: Is it necessary to use full-fat coconut milk?

A4: While full-fat coconut milk gives a richer texture, you can use light coconut milk if you prefer a lower-calorie option. The pudding will be less creamy but still delicious.

Q5: Are chia seeds mandatory for this recipe?

A5: Chia seeds are essential for creating the pudding’s unique texture, as they absorb liquid and form a gel-like consistency. Without them, the dish would not achieve the same pudding-like texture.

Cheesy Breakfast Quesadilla

There’s something inherently comforting about a breakfast that is both quick to prepare and delightfully indulgent. The cheesy breakfast quesadilla perfectly fits this bill, offering a fusion of flavors that can transform any morning into a celebration of taste. When I first tried this recipe, I was struck by how the gooey, melted cheese combined with the crispy tortilla to create a texture explosion with each bite. My family, notoriously picky eaters, were instant fans. The kids loved how they could hold it in their hands like a sandwich, while my spouse appreciated the versatility of ingredients that could be adapted to personal preferences. Overall, it was a breakfast win that left everyone satisfied and eager for more.

Ingredients

Creating a cheesy breakfast quesadilla requires a handful of simple ingredients that you likely already have in your kitchen. Here’s what you’ll need:

  • 4 large flour tortillas
  • 1 cup shredded cheddar cheese
  • 1 cup shredded mozzarella cheese
  • 4 large eggs
  • 1/4 cup milk
  • 1/2 cup cooked bacon or sausage, crumbled
  • 1/4 cup diced bell peppers
  • 1/4 cup chopped onions
  • Salt and pepper to taste
  • 2 tablespoons butter or olive oil
  • Optional: salsa, sour cream, or avocado for serving

Instructions

To start your cheesy breakfast quesadilla journey, crack the eggs into a bowl, add the milk, and whisk until fully combined. Season with a pinch of salt and pepper. In a skillet over medium heat, add a tablespoon of butter or olive oil. Once heated, pour in the egg mixture and scramble gently, ensuring the eggs are soft and slightly undercooked as they will cook further in the quesadilla.

Remove the eggs from the skillet and set them aside. In the same skillet, add the chopped onions and bell peppers. Sauté them until they are soft and fragrant. Remove from the skillet and set aside. Clean the skillet or use a second one to assemble the quesadillas.

Lay a tortilla flat in the skillet over medium heat. Sprinkle a layer of cheddar and mozzarella cheese on one half of the tortilla. Add a portion of the scrambled eggs, followed by the crumbled bacon or sausage, sautéed vegetables, and more cheese. Fold the tortilla over to create a half-moon shape.

Cook for about 2-3 minutes on each side, or until the tortilla is golden brown and the cheese has melted completely. Remove from the skillet and repeat with the remaining tortillas and filling. Slice each quesadilla into wedges and serve immediately with optional salsa, sour cream, or avocado.

Nutrition Facts

This recipe serves four people, making one quesadilla per serving. Each serving contains approximately 450 calories, though this may vary slightly depending on the exact ingredients and portion sizes used. The quesadilla is a good source of protein from the eggs and cheese, and the addition of vegetables helps to contribute to your daily fiber intake.

Preparation Time

The total preparation and cooking time for these cheesy breakfast quesadillas is around 30 minutes. This includes roughly 10 minutes of prep time to chop vegetables and cook the bacon or sausage, and 20 minutes of cooking time to scramble the eggs and grill the quesadillas to perfection.

How to Serve

  • Serve the quesadillas hot, immediately after they come off the skillet, to enjoy the cheese at its melty best.
  • Pair with a side of salsa for a spicy kick that complements the richness of the cheese.
  • Add a dollop of sour cream for a creamy contrast to the crispy tortilla.
  • Include slices of avocado for a fresh, buttery addition that enhances the quesadilla’s texture.
  • Serve with a fresh fruit salad on the side to balance the savory flavors with a hint of natural sweetness.

Additional Tips

  1. Experiment with different cheeses: While cheddar and mozzarella are classic choices, try adding pepper jack for a spicy twist or gouda for a smoky flavor.
  2. Make it vegetarian: Skip the meat and add more veggies like mushrooms, spinach, or tomatoes for a vegetarian-friendly version.
  3. Prepare in advance: Cook and freeze the quesadillas ahead of time. Simply reheat in the oven or skillet for a quick breakfast solution.
  4. Use whole-wheat tortillas: For a healthier option, use whole-wheat tortillas to boost fiber content without sacrificing taste.
  5. Customize the fillings: Quesadillas are versatile, so feel free to get creative with your fillings based on your family’s preferences.

FAQ Section

  1. Can I use corn tortillas instead of flour tortillas?

    Yes, you can use corn tortillas. They will give the quesadillas a different texture and flavor, and they are also gluten-free, which is a bonus for those with dietary restrictions.

  2. Can I add other ingredients?

    Absolutely! Feel free to add ingredients like jalapeños for heat, black beans for extra protein, or even leftover roasted vegetables to make the quesadilla more robust.

  3. How do I store leftover quesadillas?

    Store any leftover quesadillas in an airtight container in the refrigerator for up to 3 days. Reheat them in a skillet or oven to regain their crispiness.

  4. What can I serve with breakfast quesadillas?

    Breakfast quesadillas pair well with a variety of sides such as hash browns, fresh fruit, or a simple green salad to round out the meal.

  5. Can I make these quesadillas vegan?

    Yes, to make vegan quesadillas, use plant-based cheese and tofu scramble in place of eggs. Also, ensure your tortillas do not contain any animal products.