Banana Foster Parfait

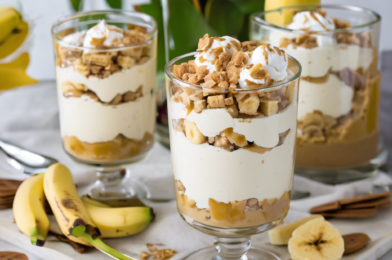
Banana Foster Parfait is a delightful dessert that seamlessly blends the rich flavors of caramelized bananas with the creamy texture of a classic parfait. My first encounter with this dish was nothing short of magical. The intoxicating aroma of bananas sautéed in butter, brown sugar, and a splash of rum filled the kitchen, creating an irresistible invitation to indulge. As my family gathered around the table, each spoonful of the parfait was met with murmurs of satisfaction and the occasional “wow” echoing across the room. The layers of sweet, caramelized bananas, rich vanilla ice cream, and crunchy granola created a symphony of flavors and textures that was both comforting and indulgent. This dessert quickly became a family favorite, requested at gatherings and special occasions, and often the centerpiece of our dessert table.

Ingredients

The magic of Banana Foster Parfait lies in its simplicity and the quality of its ingredients. Here is what you’ll need:

  • 3 ripe bananas, sliced
  • 2 tablespoons unsalted butter
  • 1/4 cup brown sugar
  • 1/4 cup dark rum
  • 1/2 teaspoon ground cinnamon
  • 1 teaspoon vanilla extract
  • 4 cups vanilla ice cream
  • 1 cup granola
  • Whipped cream, for garnish
  • Chopped nuts (optional), for garnish

Instructions

Creating the perfect Banana Foster Parfait is a straightforward process that yields a stunning dessert. Here’s how to do it:

Step 1: Begin by melting the butter in a large skillet over medium heat. Once the butter has melted and started to bubble, add the brown sugar and stir until it dissolves completely, forming a smooth caramel sauce.

Step 2: Add the sliced bananas to the skillet, ensuring they are evenly coated in the caramel sauce. Cook for about 2 minutes, or until the bananas have softened slightly.

Step 3: Carefully add the dark rum to the skillet. If you are comfortable with flambéing, you can ignite the rum using a long lighter or match to burn off the alcohol and add a rich depth of flavor. Allow the flames to subside before continuing.

Step 4: Sprinkle the cinnamon over the bananas and add the vanilla extract. Stir gently to combine all the flavors and remove the skillet from the heat.

Step 5: To assemble the parfaits, start by adding a scoop of vanilla ice cream to each serving glass or bowl. Top the ice cream with a generous spoonful of the caramelized bananas, followed by a layer of granola for crunch.

Step 6: Repeat the layers until the glass is full, finishing with a final scoop of ice cream on top.

Step 7: Garnish each parfait with a dollop of whipped cream and a sprinkle of chopped nuts, if desired. Serve immediately to enjoy the contrast of warm bananas and cold ice cream.

Nutrition Facts

Each serving of Banana Foster Parfait offers a delightful balance of flavors and textures, but it also comes with its nutritional profile:

  • Servings: 4
  • Calories per serving: Approximately 450 calories

Preparation Time

One of the many appealing aspects of the Banana Foster Parfait is its quick preparation time, making it an ideal choice for a last-minute dessert:

  • Preparation time: 10 minutes
  • Cooking time: 10 minutes
  • Total time: 20 minutes

How to Serve

Serving Banana Foster Parfait can be as creative as you wish. Here are some suggestions to elevate your presentation:

  • Use tall, clear parfait glasses to showcase the beautiful layers.
  • Chill the glasses in the freezer for a few minutes before assembling the parfaits to keep the ice cream from melting too quickly.
  • Add a drizzle of hot fudge or caramel sauce on top for extra indulgence.
  • Experiment with different flavored granola to complement the bananas and ice cream.
  • Serve with a side of fresh fruit, such as strawberries or blueberries, for a refreshing contrast.

Additional Tips

Creating the perfect Banana Foster Parfait can be enhanced by keeping a few tips in mind:

  • Tip 1: Use ripe bananas for the best flavor. The natural sweetness of ripe bananas complements the caramel sauce beautifully.
  • Tip 2: If you prefer a non-alcoholic version, simply omit the rum or substitute it with a splash of apple juice for added sweetness.
  • Tip 3: Prepare the caramelized bananas just before serving to keep them warm and delicious.
  • Tip 4: Store leftover caramelized bananas in an airtight container in the refrigerator for up to 2 days. Reheat gently before using.
  • Tip 5: Experiment with different types of nuts, such as pecans or walnuts, to add a unique flavor profile to the parfait.

FAQ Section

As with any recipe, questions may arise, and we’re here to help. Here are some frequently asked questions about Banana Foster Parfait:

Q: Can I make the parfaits in advance?

A: While you can prepare the individual components in advance, it’s best to assemble the parfaits just before serving to maintain the contrast of warm bananas and cold ice cream.

Q: Is there an alternative to using granola?

A: Yes, you can substitute granola with crushed cookies, such as graham crackers or shortbread, for a different texture and flavor.

Q: Can I use other types of fruit in this recipe?

A: Absolutely! While bananas are traditional, feel free to experiment with other fruits like peaches or apples for a unique twist.

Q: How can I make this dessert healthier?

A: To make a lighter version, use low-fat ice cream, reduce the amount of sugar in the caramel sauce, and add more fresh fruit layers.

Q: What is the best way to flambé the rum?

A: If you’re comfortable flambéing, ensure your pan is off the heat and ignite the rum with a long lighter or match. Allow the flames to burn off naturally for a safe and flavorful result.
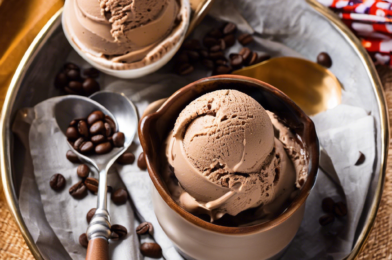
Mocha Coffee Ice Cream

There’s something uniquely satisfying about the creamy, rich taste of ice cream mixed with the bold, invigorating flavor of coffee. Mocha coffee ice cream is a delightful treat that marries these two beloved tastes, offering a sensory experience that is both refreshing and comforting. As someone who has savored this delightful dessert multiple times, I can attest to the sheer indulgence it brings to the palate. Whether enjoyed as a standalone dessert or paired with a warm slice of cake, mocha coffee ice cream has become a favorite in my household, pleasing both adults and kids alike.

Ingredients

Creating mocha coffee ice cream at home is surprisingly simple, requiring only a handful of ingredients, most of which are likely already in your pantry. Here is what you will need to get started:

  • 2 cups of heavy cream – The foundation of creamy texture.
  • 1 cup of whole milk – Adds to the creamy consistency.
  • 3/4 cup of granulated sugar – For sweetness that complements the coffee.
  • 1/2 cup of strong brewed coffee – The star ingredient for that bold coffee flavor.
  • 1/4 cup of unsweetened cocoa powder – Provides the chocolate component of mocha.
  • 1 teaspoon of vanilla extract – Enhances and rounds out the flavors.
  • A pinch of salt – Intensifies the flavors.
  • 1/2 cup of chocolate chips (optional) – For added texture and chocolatey goodness.

Instructions

Making mocha coffee ice cream at home is not only a fun process but also rewarding. Follow these steps to create your own batch:

  1. In a medium saucepan, combine the heavy cream, whole milk, granulated sugar, brewed coffee, and cocoa powder. Heat the mixture over medium heat, stirring continuously until the sugar fully dissolves and the mixture is smooth. Avoid bringing it to a boil.

  2. Once the mixture is smooth, remove the saucepan from heat. Stir in the vanilla extract and a pinch of salt. Allow the mixture to cool to room temperature.

  3. Once cooled, transfer the mixture to an airtight container and refrigerate for at least 2 hours, or until thoroughly chilled.

  4. After the mixture is chilled, pour it into your ice cream maker and follow the manufacturer’s instructions. If you don’t have an ice cream maker, you can use a simple no-churn method by placing the mixture in a freezer-safe container and stirring every 30 minutes until it reaches your desired consistency.

  5. If using, add chocolate chips during the last few minutes of churning, or stir them in gently after the mixture is thickened.

Nutrition Facts

While ice cream is a treat, it’s always good to be mindful of its nutritional content. Here’s what you can expect from a serving of this mocha coffee ice cream:

  • Servings: Approximately 8
  • Calories per serving: 250

Preparation Time

Making mocha coffee ice cream doesn’t require much hands-on time, but it does need some patience as it cools and churns:

  • Preparation Time: 15 minutes
  • Cooling Time: 2 hours
  • Churning Time: 25-30 minutes
  • Total Time: Approximately 3 hours

How to Serve

Mocha coffee ice cream is versatile and can be enjoyed in various ways. Here are some serving suggestions:

  • Serve in a bowl topped with a drizzle of chocolate syrup and a sprinkle of crushed nuts.
  • Pair with a warm brownie or slice of chocolate cake for an indulgent dessert.
  • Use as a filling in ice cream sandwiches with chocolate chip cookies.
  • Top with whipped cream and a dusting of cocoa powder for a café-style presentation.
  • Enjoy a scoop in your morning coffee for a decadent affogato.

Additional Tips

Here are five tips to ensure your mocha coffee ice cream turns out perfect every time:

  1. Use high-quality ingredients: The better your coffee and cocoa powder, the richer the flavor of your ice cream.
  2. Chill the mixture thoroughly: This is crucial for achieving the right texture when churning.
  3. Don’t skip the salt: Even a tiny pinch can significantly enhance the flavors.
  4. Experiment with add-ins: Consider adding a swirl of caramel or a handful of nuts for extra flair.
  5. Store properly: Keep your ice cream in an airtight container to prevent ice crystals from forming.

FAQ Section

Here are some common questions about making mocha coffee ice cream at home:

  1. Can I use decaf coffee?

    Yes, you can use decaf coffee if you prefer to avoid caffeine, and it won’t affect the flavor significantly.

  2. What can I use as a dairy-free option?

    For a dairy-free version, substitute the heavy cream and whole milk with coconut cream and almond milk.

  3. How long can I store the ice cream?

    Stored properly in an airtight container, the ice cream can last up to 2 weeks in the freezer.

  4. Can I make this without an ice cream maker?

    Yes, you can use a no-churn method by freezing the mixture and stirring it every 30 minutes until set.

  5. Is it possible to reduce the sugar content?

    You can reduce the sugar by 1/4 cup, but it might slightly alter the texture and sweetness of the ice cream.

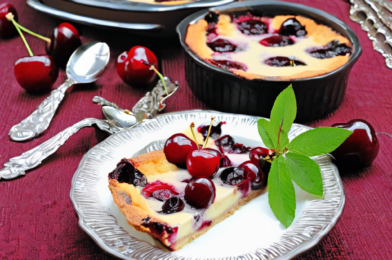
Cherry Clafoutis

Cherry Clafoutis is one of those delightful French desserts that captivates the senses with its elegant simplicity and rich flavor profile. It’s a dish that brings a sense of nostalgia, reminiscent of warm summer days spent in the company of loved ones. As a food enthusiast, I’ve had the pleasure of preparing this classic recipe for my family on numerous occasions, and it never fails to impress. The combination of sweet cherries enveloped in a creamy, custard-like batter is simply irresistible. My family particularly enjoys the subtle balance of flavors and the comforting texture, which makes it a coveted favorite at our dining table.

Ingredients

Creating the perfect Cherry Clafoutis begins with selecting the finest ingredients. Quality is key, as each component plays a crucial role in achieving the desired taste and texture. Here’s what you’ll need:

  • 1 cup of fresh cherries, pitted
  • 1 cup of whole milk
  • 1/2 cup of granulated sugar
  • 3 large eggs
  • 1 teaspoon of vanilla extract
  • 1/4 teaspoon of almond extract (optional for added flavor)
  • 1/2 cup of all-purpose flour
  • A pinch of salt
  • 1 tablespoon of unsalted butter, for greasing the baking dish
  • Powdered sugar for dusting (optional)

Instructions

Preparing Cherry Clafoutis is a straightforward process, yet it requires a touch of patience and attention to detail to achieve the perfect result. Follow these steps for a delectable dessert:

  1. Preheat your oven to 350°F (175°C). Grease a 9-inch round baking dish with the unsalted butter, ensuring the entire surface is covered to prevent sticking.
  2. In a medium-sized mixing bowl, whisk together the milk, granulated sugar, eggs, vanilla extract, and almond extract until well combined. The mixture should be smooth and slightly frothy.
  3. Gradually add the flour and salt to the wet ingredients, whisking continuously to avoid lumps. The batter should be silky and homogenous.
  4. Pour a thin layer of the batter into the prepared baking dish, just enough to cover the bottom. Place the dish in the preheated oven for about 5 minutes, or until the layer begins to set. This step helps create a stable base for the cherries.
  5. Remove the dish from the oven and evenly distribute the pitted cherries over the set layer. Carefully pour the remaining batter over the cherries, ensuring they are evenly covered.
  6. Return the dish to the oven and bake for 35-40 minutes, or until the Clafoutis is puffed and golden brown. A toothpick inserted into the center should come out clean.
  7. Allow the Clafoutis to cool slightly before dusting with powdered sugar, if desired. Serve warm for the best flavor and texture experience.

Nutrition Facts

This delightful dessert serves approximately 6 people, with each serving containing around 180 calories. While it is a sweet treat, the moderate calorie count makes it a guilt-free indulgence for those special occasions.

Preparation Time

The preparation time for Cherry Clafoutis is relatively short, taking about 15 minutes to gather and prepare the ingredients. Baking time adds another 40 minutes, making the total time just under an hour. It’s an ideal choice for those seeking a quick yet impressive dessert option.

How to Serve

Cherry Clafoutis is a versatile dessert that can be served in various ways to suit different occasions and preferences. Here are some serving suggestions:

  • Serve warm with a scoop of vanilla ice cream for a delightful contrast of temperatures.
  • Pair with a dollop of freshly whipped cream to enhance the creamy texture.
  • Serve with a side of fresh berries for an added burst of flavor and color.
  • Enjoy with a cup of coffee or tea for a relaxing afternoon treat.
  • Dust with a light sprinkling of powdered sugar for a simple yet elegant presentation.

Additional Tips

To ensure your Cherry Clafoutis turns out perfectly every time, consider these helpful tips:

  1. Choose ripe cherries: Opt for sweet, ripe cherries for the best flavor. If fresh cherries are unavailable, frozen cherries can be used, but be sure to thaw and drain them thoroughly.
  2. Room temperature ingredients: Allow the eggs and milk to reach room temperature before mixing. This helps the batter blend more smoothly and bake evenly.
  3. Don’t overbake: Keep an eye on the Clafoutis in the last few minutes of baking. Overbaking can result in a rubbery texture, so remove it from the oven as soon as it is set.
  4. Rest before serving: Let the Clafoutis cool for a few minutes after baking. This allows the flavors to meld and the texture to stabilize.
  5. Experiment with flavors: Feel free to add a dash of cinnamon or nutmeg to the batter for a warm spice note that complements the cherries beautifully.

FAQ Section

Here are some common questions about Cherry Clafoutis, answered for your convenience:

  1. Can I use other fruits instead of cherries? Yes, you can substitute cherries with other fruits such as plums, apricots, or berries. Each fruit will impart a unique flavor to the dish.
  2. Is Clafoutis served warm or cold? Clafoutis is traditionally served warm, but it can also be enjoyed cold. Its texture becomes denser when chilled, offering a different experience.
  3. Can I make Clafoutis in advance? Absolutely. You can prepare it a day ahead and store it covered in the refrigerator. Reheat gently before serving to bring back its fresh-baked warmth.
  4. Do I need to pit the cherries? Pitting the cherries is recommended for ease of eating and serving. However, traditional French recipes often leave the pits in, believing they add a hint of almond flavor during baking.
  5. What should I do if my Clafoutis is too runny? If your Clafoutis is runny, it may need additional baking time. Ensure your oven is at the correct temperature, and bake until it is set and slightly golden.

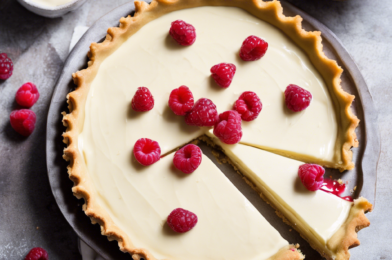
White Chocolate Raspberry Tart

The first time I made a White Chocolate Raspberry Tart, I was a bit apprehensive. Would the sweetness of the white chocolate overpower the tangy burst of raspberries? Would the crust hold up against the creamy filling? As a food enthusiast who loves to experiment in the kitchen, I was excited to try this recipe. The result was nothing short of spectacular. My family, who often serves as my taste testers, couldn’t get enough. The balance between the creamy white chocolate and the tart raspberries was divine. The buttery crust added a perfect crunch, rounding out the flavors and textures in each bite. This tart has now become a staple at our family gatherings, always leaving guests asking for the recipe.

Ingredients

Creating the perfect White Chocolate Raspberry Tart begins with assembling the right ingredients. You’ll need a few simple components to bring this dessert to life, each playing an essential role in the tart’s flavor profile and texture. Start with a pre-made tart shell or make your own using flour, sugar, butter, and a pinch of salt. For the filling, gather 8 ounces of high-quality white chocolate, 1 cup of heavy cream, and a teaspoon of vanilla extract. Fresh raspberries are key, so ensure you have about 2 cups of ripe, juicy berries. Optional ingredients include a tablespoon of raspberry liqueur for an extra punch of flavor and a dusting of powdered sugar for garnish.

Instructions

The process of creating this White Chocolate Raspberry Tart is straightforward, though it does require a bit of patience and attention to detail. Begin by preparing the tart shell if you’re making it from scratch, combining flour, sugar, butter, and salt in a food processor until the mixture resembles coarse crumbs. Press this mixture into a tart pan and bake until golden. While the crust cools, melt the white chocolate in a heatproof bowl set over simmering water. Stir in the heavy cream and vanilla extract until smooth. Pour this mixture into the cooled tart shell. Gently press the raspberries into the filling, arranging them in a pattern if desired. Refrigerate the tart for at least 4 hours or until set. Before serving, consider dusting with powdered sugar for a professional touch.

Nutrition Facts

This decadent dessert serves approximately 8 people, with each serving containing around 400 calories. The tart is a rich indulgence, with the white chocolate and cream contributing to a higher calorie count. However, the inclusion of fresh raspberries adds a touch of nutritional value, offering antioxidants and vitamin C. It’s a lovely treat to enjoy on special occasions or as a sweet ending to a meal.

Preparation Time

From start to finish, preparing this White Chocolate Raspberry Tart will take about 1 hour of active time, plus at least 4 hours for chilling. The preparation of the tart shell, filling, and assembly can be done in advance, making this dessert a convenient option for entertaining guests. The long chilling time allows the flavors to meld beautifully, ensuring a delicious and cohesive final product.

How to Serve

  • Serve chilled for a refreshing dessert experience.
  • Pair with a dollop of whipped cream or a scoop of vanilla ice cream for added decadence.
  • Garnish with fresh mint leaves for a pop of color and freshness.
  • Accompany with a glass of sparkling wine or champagne to complement the tart’s fruity notes.
  • Slice into thin wedges for a dainty presentation, perfect for afternoon tea or parties.

Additional Tips

Tip 1: Use high-quality white chocolate for the best flavor. The richness of the chocolate will shine through in the final product.

Tip 2: Ensure your raspberries are fresh and firm to prevent them from releasing too much juice into the tart.

Tip 3: If you prefer a less sweet dessert, reduce the amount of white chocolate slightly and increase the raspberry content.

Tip 4: For a glossy finish, brush the raspberries with a light layer of melted apricot jam.

Tip 5: Experiment with different tart shell recipes, such as almond or chocolate crusts, to add variety to your dessert repertoire.

FAQ Section

Q1: Can I use frozen raspberries instead of fresh ones?

A: While fresh raspberries are ideal for this recipe, you can use frozen raspberries if needed. Just be sure to thaw and drain them thoroughly to prevent excess moisture in the tart.

Q2: How long can I store the tart in the refrigerator?

A: The tart can be stored for up to 3 days in the refrigerator. Keep it covered or in an airtight container to maintain freshness.

Q3: Can I prepare the tart in advance?

A: Yes, this tart can be made a day ahead, allowing the flavors to meld beautifully and saving you time on the day of serving.

Q4: Is it possible to make this tart gluten-free?

A: Absolutely! Substitute the regular tart shell with a gluten-free version, using almond flour or a gluten-free flour blend for the crust.

Q5: What other fruits can I use in place of raspberries?

A: While raspberries are the classic choice, you can experiment with other berries such as strawberries, blueberries, or blackberries for a different flavor profile.

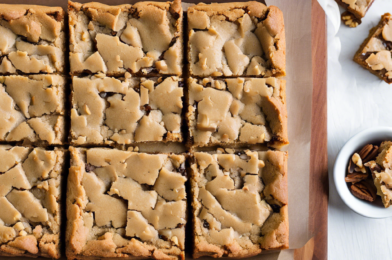
Maple Walnut Blondies

Maple Walnut Blondies are a delightful treat that seamlessly blend the rich, earthy flavors of maple syrup with the subtle crunch of walnuts. This dessert is not only a treat for the taste buds but also a comforting indulgence that brings warmth to any occasion. As a passionate food enthusiast, I must say that these blondies have become a favorite in my household. My family members eagerly anticipate the moment they can savor the chewy texture and nutty essence, often disappearing off the plate faster than I can make them. The combination of maple and walnuts creates a harmonious balance that is both satisfying and addictive, making it a must-try recipe for anyone looking to impress their loved ones with a homemade dessert that stands out.

Ingredients

Creating the perfect batch of Maple Walnut Blondies starts with gathering the finest ingredients, each contributing to the overall taste and texture of the final product. Here’s what you’ll need:

  • 1 cup (2 sticks) of unsalted butter, melted: Butter adds richness and moisture to the blondies, ensuring a soft, chewy texture.
  • 1 1/2 cups of packed brown sugar: This ingredient enhances the deep, caramel-like sweetness that complements the maple flavor.
  • 1/2 cup of pure maple syrup: Always opt for pure maple syrup rather than imitation varieties to achieve the most authentic flavor.
  • 2 large eggs: Eggs provide structure and stability to the blondies.
  • 1 teaspoon of vanilla extract: Vanilla adds a layer of aromatic complexity.
  • 2 cups of all-purpose flour: This forms the base of the blondie batter, giving it substance and body.
  • 1 teaspoon of baking powder: Baking powder helps the blondies rise, creating a light and airy crumb.
  • 1/2 teaspoon of salt: Salt enhances all the flavors, balancing the sweetness.
  • 1 cup of chopped walnuts: Walnuts add a delightful crunch and nutty flavor that pairs beautifully with the maple.

Instructions

Now that you have your ingredients ready, it’s time to dive into the process of making these delectable Maple Walnut Blondies. Follow these steps to ensure success:

  1. Preheat your oven: Start by preheating your oven to 350°F (175°C). Line a 9×13 inch baking pan with parchment paper, leaving some overhang on the sides for easy removal later.
  2. Mix wet ingredients: In a large mixing bowl, combine the melted butter, brown sugar, and maple syrup. Whisk these ingredients together until they are thoroughly combined.
  3. Add eggs and vanilla: Add the eggs one at a time, whisking well after each addition. Stir in the vanilla extract, ensuring the mixture is smooth and well-blended.
  4. Combine dry ingredients: In a separate bowl, whisk together the flour, baking powder, and salt. Gradually add the dry ingredients to the wet mixture, stirring gently until just combined.
  5. Incorporate walnuts: Fold in the chopped walnuts, ensuring they are evenly distributed throughout the batter.
  6. Bake: Pour the batter into the prepared baking pan, spreading it evenly. Bake in the preheated oven for 25-30 minutes, or until a toothpick inserted into the center comes out with a few moist crumbs.
  7. Cool and serve: Allow the blondies to cool in the pan for about 15 minutes before lifting them out using the parchment paper overhang. Once cool, cut into squares and serve.

Nutrition Facts

Understanding the nutritional content of your treats is important, especially if you’re mindful of your dietary intake. Here are the nutrition facts for these Maple Walnut Blondies:

  • Servings: This recipe yields approximately 24 blondies.
  • Calories per serving: Each blondie contains about 220 calories.

Preparation Time

One of the many reasons I adore this recipe is its simplicity and efficiency. With a preparation time that won’t keep you in the kitchen for hours, you can enjoy freshly baked blondies in no time. Here’s a breakdown of the time you’ll need:

  • Prep time: 15 minutes
  • Bake time: 25-30 minutes
  • Total time: Approximately 45 minutes

How to Serve

Maple Walnut Blondies are incredibly versatile and can be served in various ways to suit different occasions and preferences. Here are some serving suggestions to elevate your blondie experience:

  • As a standalone treat: Enjoy the blondies on their own, warm from the oven, for a simple and satisfying dessert.
  • With a scoop of ice cream: Serve with a scoop of vanilla ice cream for a classic combination that enhances the sweetness and provides a contrast in temperature and texture.
  • Paired with coffee or tea: Enjoy a blondie with your favorite hot beverage for a comforting afternoon snack.
  • Drizzled with extra maple syrup: For an extra burst of maple flavor, drizzle some pure maple syrup over the top before serving.
  • Decorated with whipped cream: Add a dollop of whipped cream on each blondie for an elegant touch at a dinner party.

Additional Tips

To ensure your Maple Walnut Blondies turn out perfectly every time, consider these additional tips and tricks:

  1. Use high-quality ingredients: The quality of your ingredients, especially the maple syrup and walnuts, will significantly impact the flavor of your blondies.
  2. Don’t overmix the batter: Overmixing can result in dense blondies. Stir just until the ingredients are combined for the best texture.
  3. Check for doneness: Blondies should have a slightly gooey center when done. Be careful not to overbake, as they will continue to firm up as they cool.
  4. Customize with add-ins: Feel free to experiment by adding chocolate chips, dried fruit, or even a sprinkle of sea salt on top.
  5. Store properly: Keep leftover blondies in an airtight container at room temperature for up to a week, or freeze them for longer storage.

FAQ Section

Here are some frequently asked questions about Maple Walnut Blondies to help you troubleshoot and perfect your baking experience:

  1. Can I use a different type of nut? Yes, you can substitute walnuts with pecans, almonds, or hazelnuts, depending on your preference.
  2. Is it possible to make these blondies gluten-free? Absolutely! Use a gluten-free all-purpose flour blend in place of regular flour for a gluten-free version.
  3. Can I make these blondies ahead of time? Yes, you can bake the blondies a day in advance. Store them in an airtight container to keep them fresh.
  4. What if I don’t have parchment paper? If you don’t have parchment paper, you can grease the baking pan with butter or cooking spray to prevent sticking.
  5. How can I tell when the blondies are done? The blondies are done when the edges are golden brown and a toothpick inserted into the center comes out with moist crumbs, not wet batter.

In conclusion, Maple Walnut Blondies are a delightful addition to any dessert repertoire. Their combination of flavors and textures make them a hit for family gatherings, parties, or simply as a treat for yourself. By following the recipe and tips provided, you’ll be able to create a batch of blondies that are sure to impress. Happy baking!

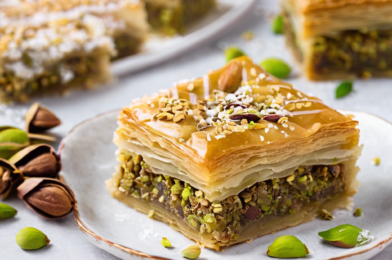
Pistachio Rose Baklava

When I first encountered the delightful dessert known as Pistachio Rose Baklava, I was immediately enchanted by its exquisite balance of flavors and textures. It was during a family gathering when I decided to try this recipe, and it quickly became a favorite among everyone present. The delicate aroma of roses combined with the rich, nutty pistachios and the crisp, flaky layers of phyllo pastry made it a standout dish. The baklava was not only a treat for the taste buds but also a feast for the eyes, with its beautifully golden layers and the vibrant green hue of the pistachios. It was a dessert that captivated not only in taste but also in presentation, leaving everyone at the table eager for a second serving.

Ingredients

The magic of Pistachio Rose Baklava begins with the careful selection of ingredients. The heart of the dish is the pistachios, which lend their rich, buttery flavor and vibrant color to the baklava. You will need about 2 cups of unsalted, shelled pistachios, chopped finely to ensure they distribute evenly throughout the layers. The phyllo dough, another crucial component, should be of high quality to achieve the perfect delicate and crispy texture. You will need approximately 1 pound of phyllo dough for this recipe.

In addition to the pistachios and phyllo dough, you will need unsalted butter, around 1 cup, melted and used to brush between the layers of dough, ensuring each layer is perfectly crisp and golden. For the rose syrup, which infuses the baklava with its unique floral note, you will require 1 cup of sugar, 1 cup of water, 1 tablespoon of rose water, and a tablespoon of lemon juice. This syrup is what brings the entire dessert together, adding sweetness and moisture.

The final touch to the ingredients list is a hint of ground cardamom, about 1 teaspoon, which complements the rose and pistachio flavors, adding depth and warmth to the dessert. With these ingredients ready, you are set to create a baklava that is both traditional and innovative in its flavor profile.

Instructions

Begin by preheating your oven to 350°F (175°C). While the oven heats up, prepare your workspace by gathering all your ingredients and tools. Start with the syrup: combine the sugar, water, and lemon juice in a saucepan over medium heat, stirring until the sugar dissolves. Allow the mixture to simmer for about 10 minutes until it thickens slightly, then remove from heat and stir in the rose water. Set this aside to cool.

Next, prepare the pistachio filling by mixing the finely chopped pistachios with the ground cardamom. Once ready, it’s time to assemble the baklava. Carefully lay a sheet of phyllo dough in a greased baking dish, brushing it with melted butter. Repeat this process for about 10 layers, ensuring each layer is brushed with butter. Spread a generous portion of the pistachio mixture evenly over the layered dough.

Continue layering the phyllo dough and pistachio filling until you have used all the ingredients, ending with a top layer of phyllo. Brush the top layer generously with butter. Using a sharp knife, cut the baklava into diamond or square shapes. Bake in the preheated oven for 45-50 minutes or until golden brown and crisp.

Once baked, remove the baklava from the oven and immediately pour the cooled rose syrup evenly over the top. Allow the baklava to soak up the syrup, resting for at least a few hours, preferably overnight, before serving. This ensures that every piece is infused with the delightful rose flavor.

Nutrition Facts

This recipe yields approximately 24 servings, making it perfect for gatherings and celebrations. Each serving contains about 200 calories, depending on the size of the pieces cut. The rich combination of nuts and syrup makes it a decadent treat, so it’s best enjoyed in moderation. Despite its indulgent nature, the baklava offers the nutritional benefits of pistachios, which are high in protein, fiber, and healthy fats.

Preparation Time

Preparing Pistachio Rose Baklava is a labor of love that requires patience and attention to detail. The entire process takes approximately 2 hours, including the time to prepare the ingredients, assemble the baklava, and bake it to perfection. The syrup can be made ahead of time, which helps streamline the preparation. Baking time is around 45-50 minutes, and it’s essential to allow the baklava to rest for several hours after baking to achieve the best flavor and texture.

How to Serve

  • Room Temperature: Pistachio Rose Baklava is best served at room temperature, allowing the flavors to be at their most vibrant.
  • Accompaniments: Pair it with a cup of aromatic tea or a strong espresso to complement the sweetness.
  • Plating: Arrange the baklava pieces on a decorative platter to enhance its visual appeal.
  • Garnish: Sprinkle additional chopped pistachios or a dusting of powdered sugar for an elegant finish.
  • Occasions: Perfect for festive occasions, holidays, or as a delightful end to a dinner party.

Additional Tips

Tip 1: Thaw the phyllo dough in the refrigerator overnight to prevent it from becoming too sticky or dry. This ensures easy handling during assembly.

Tip 2: Use a pastry brush to apply the melted butter evenly between phyllo layers, which is key to achieving the desired flaky texture.

Tip 3: Keep the phyllo dough covered with a damp cloth while working to prevent it from drying out and becoming brittle.

Tip 4: If you prefer a less sweet baklava, reduce the sugar in the syrup, but be sure to maintain the moisture balance.

Tip 5: For a more intense rose flavor, increase the amount of rose water slightly, but be cautious, as too much can overpower the other flavors.

FAQ Section

Q1: Can I use other nuts instead of pistachios?

A1: Yes, you can substitute pistachios with walnuts or almonds, but it will alter the flavor profile. Pistachios are preferred for their unique taste and color.

Q2: Can I make baklava ahead of time?

A2: Absolutely! Baklava can be made a day or two in advance. In fact, it often tastes better after resting as the flavors meld together.

Q3: How should I store leftover baklava?

A3: Store leftover baklava in an airtight container at room temperature for up to a week. Avoid refrigeration as it can make the pastry soggy.

Q4: Is it possible to make a vegan version of this baklava?

A4: Yes, you can use a vegan butter substitute for the phyllo layers and ensure the phyllo dough is vegan. The rest of the ingredients are naturally plant-based.

Q5: Can I freeze baklava?

A5: Yes, baklava can be frozen. Wrap each piece individually in plastic wrap and store in an airtight container. Thaw at room temperature before serving.

Salted Caramel Pudding

Salted caramel pudding is a dessert that has captured the hearts of sweet lovers all around the world. This delectable treat combines the rich, creamy texture of pudding with the irresistible flavor of salted caramel, creating a symphony of tastes that dance on your palate. The beauty of salted caramel pudding lies not only in its complex flavor profile but also in its ability to evoke nostalgia and comfort. It’s the kind of dessert that reminds us of cozy family gatherings and the warmth of home. Having made this dessert for my family, I can confidently say it was a resounding success. The bowls were licked clean, and requests for seconds were immediate. The balance of sweetness and saltiness was perfect, and the smooth, velvety texture was simply divine.

Ingredients

Creating the perfect salted caramel pudding begins with selecting the right ingredients. Each component plays a crucial role in achieving the desired taste and texture. Here’s what you’ll need:

  • 1 cup granulated sugar
  • 6 tablespoons unsalted butter, cut into pieces
  • 1 teaspoon sea salt
  • 2 cups whole milk
  • 1 cup heavy cream
  • 3 large egg yolks
  • 2 tablespoons cornstarch
  • 1 teaspoon vanilla extract

These ingredients come together to create a pudding that is both luxurious and comforting. The use of whole milk and heavy cream ensures a creamy consistency, while the sea salt enhances the flavor of the caramel. The vanilla extract adds a subtle depth, rounding out the flavor profile beautifully.

Instructions

Making salted caramel pudding is a rewarding process that requires patience and precision. Follow these steps for best results:

  1. In a medium saucepan, heat the granulated sugar over medium heat, stirring constantly with a spatula. Once the sugar melts and turns a deep amber color, carefully add the butter. Stir until fully incorporated.
  2. Slowly whisk in the cream and salt. Be cautious, as the mixture will bubble vigorously. Continue to stir until smooth. Remove from heat and set aside to cool slightly.
  3. In another bowl, whisk together the egg yolks and cornstarch until well combined. Gradually add the milk, whisking continuously to prevent lumps.
  4. Slowly pour the warm caramel mixture into the egg and milk mixture, whisking constantly to temper the eggs.
  5. Return the mixture to the saucepan and heat over medium heat, stirring constantly until the pudding thickens and begins to bubble.
  6. Remove from heat, stir in vanilla extract, and pour the pudding into individual serving dishes.
  7. Allow to cool to room temperature before covering with plastic wrap. Chill in the refrigerator for at least 2 hours before serving.

The key to this recipe is the careful attention to each step, ensuring the caramel doesn’t burn and the pudding thickens to the perfect consistency.

Nutrition Facts

Understanding the nutritional content of your dessert can help you enjoy it responsibly. Here’s a breakdown of the nutrition facts for salted caramel pudding:

  • Servings: 4
  • Calories per serving: 450

Each serving of salted caramel pudding is a delightful indulgence. While it is rich and slightly decadent, enjoying it in moderation allows you to savor its exquisite taste without guilt.

Preparation Time

Preparing salted caramel pudding is a labor of love that rewards patience. Here’s how the preparation time breaks down:

  • Active preparation time: 30 minutes
  • Chilling time: 2 hours

Though the active preparation time is fairly short, the chilling time is essential to allow the pudding to set properly. This dessert is perfect for making ahead of time, so you can focus on enjoying it with your guests.

How to Serve

Serving salted caramel pudding can be as simple or as elaborate as you wish. Here are some ideas to elevate your presentation:

  • Garnish with a dollop of whipped cream for added creaminess.
  • Sprinkle with extra sea salt or caramel shards for a touch of elegance.
  • Top with a dusting of cocoa powder or shaved chocolate for aesthetic appeal.
  • Pair with fresh berries to cut through the richness.
  • Serve in small jars or ramekins for a charming individual presentation.

These serving suggestions not only enhance the flavor but also make your dessert visually appealing.

Additional Tips

To ensure your salted caramel pudding turns out perfectly every time, consider these additional tips:

  • Use a heavy-bottomed saucepan: This helps distribute heat evenly, preventing the sugar from burning.
  • Monitor the caramel closely: Caramel can go from perfect to burnt in seconds, so keep a watchful eye.
  • Temper the eggs carefully: Pouring the hot caramel too quickly can scramble the eggs. Pour slowly and whisk continuously.
  • Chill for the full time: Allowing the pudding to chill completely ensures the best texture and flavor.
  • Experiment with flavors: Try adding a pinch of cinnamon or nutmeg for a warm, spiced version of this classic dessert.

These tips will help you master the art of making salted caramel pudding, making it a go-to dessert in your repertoire.

FAQ

Here are some common questions about making salted caramel pudding:

Q: Can I use salted butter instead of unsalted butter?

A: Yes, you can use salted butter, but you may want to reduce the added sea salt to avoid an overly salty pudding.

Q: What if my caramel hardens when I add the cream?

A: If the caramel hardens, return it to low heat and stir until it melts again. This is a common issue and can be easily remedied.

Q: Can I make this pudding ahead of time?

A: Absolutely! This pudding can be made a day in advance and stored in the refrigerator. Just give it a quick stir before serving.

Q: Can I use a sugar substitute in this recipe?

A: While sugar substitutes can be used, they may alter the texture and taste of the caramel. Experiment with small batches to find what works best for you.

Q: How do I store leftovers?

A: Store any leftover pudding in an airtight container in the refrigerator for up to 3 days. Enjoy it chilled or at room temperature.

Salted caramel pudding is a dessert that brings joy and satisfaction with every bite. Its rich, creamy texture and perfectly balanced flavors make it a favorite among dessert lovers. Whether you’re serving it at a dinner party or enjoying it as a treat for yourself, this recipe is sure to impress. By following the detailed instructions, paying attention to the tips, and experimenting with serving suggestions, you can create a dessert that is as beautiful as it is delicious. So, gather your ingredients, take your time, and indulge in the delightful experience of making and savoring salted caramel pudding.

Coconut Cream Pie

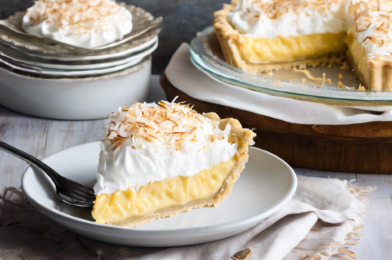
There’s something undeniably comforting about the creamy texture and delightful sweetness of a coconut cream pie. This classic dessert, with its flaky crust and luscious coconut filling, has become a favorite in many households, including mine. Recently, I decided to try out a new coconut cream pie recipe that I stumbled upon while browsing through an old family cookbook. The results were nothing short of spectacular. As the pie baked, the kitchen filled with the rich aroma of coconut, transporting me back to childhood days spent in my grandmother’s kitchen. When I finally served it to my family, the pie was met with enthusiastic approval. The smooth, silky filling combined with the toasted coconut topping provided a perfect balance of flavors and textures, making it a hit at our dinner table.

Ingredients

The success of any good coconut cream pie lies in the quality and selection of its ingredients. For this recipe, you’ll need:

  • For the crust: 1 1/2 cups of all-purpose flour, 1/2 teaspoon of salt, 1/2 cup of unsalted butter (cold and diced), and 1/4 cup of ice water.
  • For the filling: 1 cup of whole milk, 1 cup of coconut milk, 1/2 cup of granulated sugar, 1/4 cup of cornstarch, 1/4 teaspoon of salt, 4 large egg yolks, 1 teaspoon of vanilla extract, and 1 cup of sweetened shredded coconut.
  • For the topping: 1 1/2 cups of heavy cream, 2 tablespoons of powdered sugar, and 1/2 teaspoon of vanilla extract, along with 1/2 cup of toasted coconut for garnish.

Instructions

Creating the perfect coconut cream pie involves several steps, but each one is straightforward and ensures a delicious result:

  1. Prepare the crust: In a large bowl, combine the flour and salt. Add the diced butter and blend with a pastry cutter until the mixture resembles coarse crumbs. Gradually add the ice water, mixing until the dough comes together. Roll it into a ball, wrap in plastic, and refrigerate for at least 1 hour.
  2. Blind bake the crust: Preheat your oven to 375°F (190°C). Roll out the dough on a floured surface and fit it into a 9-inch pie pan. Line the crust with parchment paper, fill with pie weights, and bake for 15 minutes. Remove the weights and parchment, then bake for another 15 minutes until golden brown. Allow to cool completely.
  3. Make the filling: In a medium saucepan, combine the whole milk, coconut milk, sugar, cornstarch, and salt. Cook over medium heat, stirring constantly, until the mixture thickens and comes to a boil. In a separate bowl, whisk the egg yolks. Gradually add a small amount of the hot mixture to the yolks, then return everything to the saucepan. Cook for an additional 2 minutes, then remove from heat and stir in the vanilla and shredded coconut. Pour the filling into the cooled crust.
  4. Chill the pie: Cover the pie with plastic wrap, pressing it directly onto the surface of the filling to prevent a skin from forming. Refrigerate for at least 4 hours or until set.
  5. Prepare the topping: In a large bowl, whip the heavy cream, powdered sugar, and vanilla extract until soft peaks form. Spread or pipe the whipped cream over the chilled pie and sprinkle with toasted coconut. Serve and enjoy!

Nutrition Facts

Understanding the nutritional content of your dessert can help make informed choices. This coconut cream pie recipe serves 8, with each serving containing approximately 450 calories. While it’s a decadent treat, it’s perfect for those special occasions when indulgence is warranted.

Preparation Time

The preparation and cooking time for this coconut cream pie is relatively straightforward, making it an excellent choice for both novice and experienced bakers. Here’s a breakdown of the time required:

  • Preparation time: 30 minutes
  • Cooking time: 30 minutes
  • Chilling time: 4 hours
  • Total time: 5 hours

How to Serve

Coconut cream pie can be served in various delightful ways, making it a versatile dessert option for different occasions:

  • Serve chilled as a refreshing dessert on a warm day.
  • Add a scoop of vanilla ice cream on the side for an extra indulgent treat.
  • Pair with fresh tropical fruits like mango or pineapple for a vibrant flavor combination.
  • Dust with a light sprinkle of cocoa powder or grated chocolate for a touch of elegance.
  • Enjoy with a cup of freshly brewed coffee or a fragrant herbal tea.

Additional Tips

To ensure your coconut cream pie turns out perfectly every time, consider these additional tips:

  • Tip 1: For an even flakier crust, ensure that your butter is very cold before incorporating it into the flour.
  • Tip 2: If you’re short on time, consider using a pre-made pie crust to speed up the preparation process.
  • Tip 3: Toasting the shredded coconut before adding it to the filling enhances its flavor and adds a pleasant crunch.
  • Tip 4: To prevent the filling from becoming lumpy, make sure to stir constantly while cooking and gradually temper the egg yolks.
  • Tip 5: For a more pronounced coconut flavor, consider adding a few drops of coconut extract to the whipped cream topping.

FAQ Section

Here are some frequently asked questions about making coconut cream pie:

Q1: Can I use coconut cream instead of coconut milk?
A: While coconut cream can be used, it will result in a richer and thicker filling. Adjust the quantity to maintain the desired consistency.

Q2: How do I store leftover coconut cream pie?
A: Store any leftover pie in the refrigerator, covered with plastic wrap, for up to 3 days. For best results, avoid freezing as it may affect the texture.

Q3: Can I make this pie dairy-free?
A: Yes, substitute the whole milk and heavy cream with your favorite non-dairy alternatives, such as almond milk and coconut cream.

Q4: What can I do if my filling doesn’t set?
A: If your filling remains runny, it may need more time to cook and thicken. Reheat it gently on the stove, stirring constantly until it achieves the desired consistency.

Q5: Is it possible to make coconut cream pie in advance?
A: Absolutely! You can prepare the crust and filling a day in advance. Assemble the pie and add the whipped cream topping shortly before serving for best results.

Red Velvet Cupcakes

Red velvet cupcakes have long held a special place in the hearts of dessert lovers around the world. Their vibrant color and subtle cocoa flavor, combined with a creamy frosting, make them an irresistible treat for any occasion. I recently decided to revisit this classic recipe to see if it would win the approval of my family, who are known for their discerning palates. The result? A resounding success! The cupcakes disappeared almost as quickly as they were made, with my family praising their moist texture and perfect balance of flavors. It’s safe to say that this recipe has now become a staple in our household, and I’m thrilled to share it with you.

Ingredients

Creating the perfect red velvet cupcake requires a careful selection of ingredients that come together to create its distinct flavor and texture. Here is what you’ll need:

  • 1 and 1/4 cups all-purpose flour
  • 1 tablespoon unsweetened cocoa powder
  • 1/2 teaspoon baking soda
  • 1/4 teaspoon salt
  • 1/2 cup unsalted butter, softened
  • 3/4 cup granulated sugar
  • 1 large egg
  • 1 teaspoon vanilla extract
  • 1 teaspoon white vinegar
  • 1/2 cup buttermilk
  • 1 tablespoon red food coloring
  • 1/2 cup cream cheese, softened
  • 1/4 cup unsalted butter, softened (for frosting)
  • 2 cups powdered sugar
  • 1 teaspoon vanilla extract (for frosting)

Instructions

Creating these delicious cupcakes is a rewarding process. Follow these steps to ensure your cupcakes turn out perfect every time:

Step 1: Preheat your oven to 350°F (175°C) and line a 12-cup muffin tin with cupcake liners.

Step 2: In a medium bowl, whisk together the flour, cocoa powder, baking soda, and salt. Set aside.

Step 3: In a large bowl, beat the butter and granulated sugar together until light and creamy. Add the egg and vanilla extract, mixing until well combined.

Step 4: Mix in the vinegar and buttermilk. Gradually add the dry ingredients, mixing until just combined. Stir in the red food coloring until the batter is evenly colored.

Step 5: Divide the batter evenly among the prepared cupcake liners, filling each about two-thirds full.

Step 6: Bake for 18-20 minutes, or until a toothpick inserted into the center of a cupcake comes out clean. Allow the cupcakes to cool in the pan for 5 minutes before transferring to a wire rack to cool completely.

Step 7: To make the frosting, beat the cream cheese and butter together until smooth and creamy. Gradually add the powdered sugar and vanilla extract, mixing until the frosting is light and fluffy.

Step 8: Once the cupcakes have cooled, generously frost each one with the cream cheese frosting. Enjoy!

Nutrition Facts

The following nutrition facts are based on a serving size of one cupcake:

Servings: 12 cupcakes

Calories per serving: Approximately 300 calories

Preparation Time

Preparing these delightful red velvet cupcakes is a straightforward process that doesn’t take much time:

  • Prep time: 20 minutes
  • Cook time: 20 minutes
  • Total time: 40 minutes

How to Serve

Red velvet cupcakes are versatile and can be enjoyed in various ways. Here are a few serving suggestions:

  • Serve as a delightful dessert at parties and gatherings.
  • Pair with a scoop of vanilla ice cream for an indulgent treat.
  • Enjoy with a cup of coffee or tea for a sweet afternoon break.
  • Decorate with fresh berries or a sprinkle of chocolate shavings for added flair.
  • Gift them to friends and loved ones as a homemade treat.

Additional Tips

To ensure your red velvet cupcakes are a success, keep these tips in mind:

  • Tip 1: Use gel food coloring for a more vibrant red hue without altering the batter’s consistency.
  • Tip 2: Ensure all your ingredients are at room temperature before starting, as this helps them combine more smoothly.
  • Tip 3: Do not overmix the batter to maintain a light and fluffy texture.
  • Tip 4: Allow the cupcakes to cool completely before frosting to prevent the frosting from melting.
  • Tip 5: Store cupcakes in an airtight container in the refrigerator for up to five days to keep them fresh.

FAQ

Here are some frequently asked questions about red velvet cupcakes:

Q: Can I substitute the buttermilk?

A: Yes, you can make a buttermilk substitute by adding 1 tablespoon of lemon juice or vinegar to a cup of milk. Let it sit for 5 minutes before using.

Q: Why is vinegar used in this recipe?

A: Vinegar reacts with the baking soda to help the cupcakes rise and achieve a fluffy texture. It also enhances the red color.

Q: Can I use a different frosting?

A: Absolutely! While cream cheese frosting is traditional, you can use buttercream or any frosting of your choice.

Q: How do I achieve a deeper red color?

A: Using gel food coloring instead of liquid will give you a more intense color without affecting the batter’s consistency.

Q: Can these cupcakes be made ahead of time?

A: Yes, you can bake the cupcakes a day in advance and frost them the next day. Just be sure to store them in an airtight container.

Apple Crumble Crisp

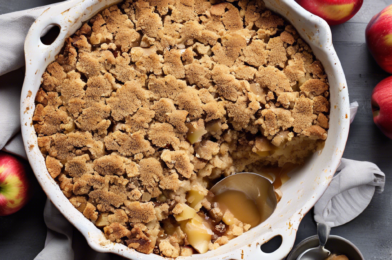
There’s something incredibly comforting about the aroma of a freshly baked apple crumble crisp wafting through the house. This classic dessert combines the best of both worlds: the sweet, tender apples and the buttery, crunchy topping. It’s a dessert that has stood the test of time, beloved by many for its simplicity and the homey warmth it brings. As the weather turns chilly, there are few things more satisfying than sitting down with a warm serving of apple crumble crisp, perhaps topped with a scoop of creamy vanilla ice cream. My family couldn’t get enough of it; the kids were particularly delighted, scraping their plates clean and asking for seconds. It’s these little moments, sitting around the table and sharing something so universally adored, that truly highlight the joy of home baking.

Ingredients

The magic of the apple crumble crisp lies in its straightforward ingredients, which you likely already have in your pantry. You will need:

  • 6 to 8 medium-sized apples, peeled, cored, and sliced
  • 1 cup granulated sugar
  • 1 tablespoon all-purpose flour
  • 1 teaspoon ground cinnamon
  • 1/4 cup water
  • 1 cup quick-cooking oats
  • 1 cup all-purpose flour
  • 1 cup packed brown sugar
  • 1/4 teaspoon baking powder
  • 1/4 teaspoon baking soda
  • 1/2 cup butter, melted

Instructions

Creating an apple crumble crisp is a rewarding and straightforward culinary endeavor. Begin by preheating your oven to 350°F (175°C). In a large bowl, toss the apples with granulated sugar, a tablespoon of flour, and cinnamon. Spread the apple mixture evenly in a 9×13-inch baking dish and pour the water over the apples. In another bowl, combine oats, flour, brown sugar, baking powder, and baking soda. Stir in the melted butter until the mixture is crumbly. Sprinkle the oat mixture evenly over the apples. Bake in the preheated oven for 45 minutes until the topping is golden brown and the apples are tender. Allow it to cool slightly before serving, letting the flavors meld together. The warm, spiced scent filling your kitchen is a prelude to the delightful experience of tasting this classic dessert.

Nutrition Facts

For those mindful of their dietary intake, it’s useful to know the nutritional breakdown of this dessert. This recipe serves approximately 8, with each serving containing roughly 320 calories. Of course, these values can vary slightly based on the specific brands and quantities of ingredients used. Enjoying a serving of apple crumble crisp as part of a balanced diet can provide a wonderful sweet treat without overindulgence.

Preparation Time

From start to finish, preparing your apple crumble crisp will take about an hour. The preparation, including peeling and slicing the apples and mixing the ingredients, takes about 15 minutes. The baking time is approximately 45 minutes, during which you can enjoy the anticipation built by the tempting aroma that fills your kitchen. This makes the apple crumble crisp a perfect option for those who want a quick yet fulfilling homemade dessert.

How to Serve

Serving apple crumble crisp can be as simple or as elaborate as you wish:

  • Classic Style: Serve warm, straight from the oven, to capture the delightful contrast between the tender apples and the crunchy topping.
  • With Ice Cream: Add a scoop of vanilla ice cream on top for a creamy, cool contrast.
  • Caramel Drizzle: Drizzle with a bit of caramel sauce for extra sweetness.
  • Whipped Cream: Top with a dollop of freshly whipped cream for a light, airy addition.
  • Nuts and Seeds: Sprinkle some toasted nuts or seeds for added texture and flavor.

Additional Tips

To further enhance your apple crumble crisp experience, consider the following tips:

  1. Apple Variety: Use a mix of apple types for a balance of sweet and tart flavors. Granny Smith and Honeycrisp are excellent choices.
  2. Spice It Up: Experiment with additional spices like nutmeg or cloves for a unique twist.
  3. Make Ahead: Prepare the crumble topping in advance and store it in the fridge for a quick assembly when needed.
  4. Gluten-Free Option: Substitute the all-purpose flour with almond flour or a gluten-free baking mix for a gluten-free version.
  5. Storage: Store leftovers in an airtight container in the refrigerator and reheat in the oven for best results.

FAQ Section

Q: Can I use other fruits besides apples?

A: Absolutely! Pears, peaches, and berries are excellent alternatives or additions.

Q: How can I prevent the topping from becoming soggy?

A: Ensure the topping is well-mixed and evenly distributed. Baking it until golden brown will also help maintain its crispiness.

Q: Can I make this dessert vegan?

A: Yes, replace the butter with a vegan alternative and ensure all other ingredients are plant-based.

Q: What’s the best way to reheat leftovers?

A: Reheat in the oven at 350°F (175°C) for about 10-15 minutes to regain the original texture.

Q: Can I freeze apple crumble crisp?

A: Yes, you can freeze it before or after baking. If freezing after baking, allow it to cool completely and wrap it tightly before storing it in the freezer.