Tahini Chocolate Fudge

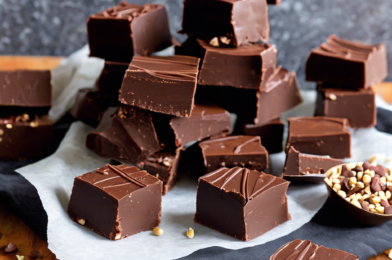
There’s something truly magical about the combination of tahini and chocolate, a union that transforms simple ingredients into a luxurious treat. As a self-proclaimed dessert enthusiast, I recently embarked on a culinary journey to create Tahini Chocolate Fudge. The results were extraordinary, leaving my family begging for more. The rich, nutty flavor of tahini paired beautifully with the deep, indulgent notes of chocolate, creating a fudge that was not only delicious but also unique. This fusion of flavors brought a new dimension to our dessert table, making every bite a memorable experience. The fudge was both a hit at home and a delightful surprise for guests who were intrigued by its unique flavor profile.

Ingredients

The beauty of Tahini Chocolate Fudge lies in its simplicity. Here’s what you’ll need to create this delectable treat:

  • 1 cup of tahini – Ensure you use a smooth and creamy variety for the best texture.
  • 1 cup of dark chocolate chips – High-quality chocolate makes all the difference.
  • 1/2 cup of honey – You can substitute maple syrup for a vegan option.
  • 1 teaspoon of vanilla extract – Adds depth and enhances the chocolate flavor.
  • A pinch of sea salt – Balances the sweetness and elevates the overall flavor.

Instructions

Creating Tahini Chocolate Fudge is an art that requires patience and precision. Follow these steps to achieve perfect results:

  1. Melt the chocolate: In a heatproof bowl, melt the dark chocolate chips using a double boiler or microwave. Stir until completely smooth.
  2. Combine ingredients: In a separate bowl, mix the tahini, honey, vanilla extract, and sea salt until well combined. Gradually add the melted chocolate, stirring continuously until the mixture is smooth and uniform.
  3. Prepare the mold: Line a square baking dish with parchment paper, ensuring the paper hangs over the sides for easy removal later.
  4. Pour and set: Pour the fudge mixture into the prepared dish, spreading it evenly with a spatula. Place the dish in the refrigerator for at least 2 hours, or until the fudge is firm.
  5. Slice and serve: Once set, lift the fudge out of the dish using the parchment paper. Cut into squares and serve chilled.

Nutrition Facts

This recipe yields approximately 16 servings, with each piece containing about 120 calories. It’s a rich, indulgent treat that’s perfect for satisfying your sweet tooth without overwhelming your daily calorie intake.

Preparation Time

The total preparation time for Tahini Chocolate Fudge is approximately 2 hours and 15 minutes. This includes about 15 minutes of active preparation and 2 hours for the fudge to set in the refrigerator.

How to Serve

There are many delightful ways to enjoy your Tahini Chocolate Fudge:

  • Serve as a chilled dessert after dinner to impress your guests with its unique flavor.
  • Pair with a scoop of vanilla ice cream for a decadent treat.
  • Enjoy with a cup of hot coffee or tea for a cozy afternoon snack.
  • Wrap individually and give as homemade gifts during the holiday season.
  • Add to a dessert platter alongside fresh fruits and nuts for a balanced offering.

Additional Tips

  1. Use quality ingredients: The flavor of your fudge will rely heavily on the quality of the tahini and chocolate you use. Invest in good brands for the best results.
  2. Experiment with flavors: Try adding a teaspoon of cinnamon or a dash of chili powder for a spicy twist.
  3. Storage: Store the fudge in an airtight container in the refrigerator for up to 1 week, or freeze for up to 3 months.
  4. Texture variation: If you prefer a crunchy texture, consider adding chopped nuts or seeds to the mixture before setting.
  5. Adjust sweetness: Feel free to adjust the honey or maple syrup to suit your personal taste preference.

FAQ Section

  1. Can I use milk chocolate instead of dark chocolate? Yes, you can substitute milk chocolate, but it will result in a sweeter fudge. Adjust the honey or maple syrup accordingly if you prefer a less sweet dessert.
  2. What can I use instead of tahini? If you don’t have tahini, you can use almond butter or peanut butter, although it will alter the final flavor.
  3. Is there a way to make this fudge vegan? Absolutely! Use maple syrup instead of honey and ensure your chocolate chips are dairy-free.
  4. Can I add other flavors to the fudge? Yes, feel free to add extracts like almond or peppermint for a different flavor profile. Just be mindful of the quantity so as not to overpower the tahini and chocolate.
  5. How do I know when the fudge is ready to cut? The fudge is ready to be sliced when it feels firm to the touch. If it’s still too soft, give it more time in the refrigerator.
Coconut Milk Mashed Potatoes

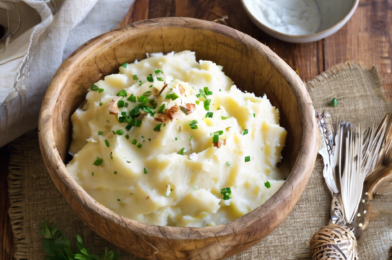
Coconut Milk Mashed Potatoes are a delightful twist on the classic comfort food that many of us grew up loving. I recently tried this recipe for a family gathering, and it was nothing short of a hit. The subtle sweetness of the coconut milk combined with the creamy texture of the potatoes was a revelation. My family, who are usually purists when it comes to traditional dishes, were pleasantly surprised by how the coconut milk added a new dimension of flavor without overpowering the original taste. It was a dish that not only satisfied our taste buds but also sparked conversations around the dinner table about the possibilities of reinventing traditional recipes.

Ingredients

To make Coconut Milk Mashed Potatoes, you’ll need the following ingredients:

  • 2 pounds of Yukon Gold potatoes, peeled and cut into chunks
  • 1 cup of full-fat coconut milk
  • 2 tablespoons of coconut oil
  • Salt and pepper to taste
  • Optional: chopped fresh chives or parsley for garnish

Instructions

Start by placing the peeled and chopped potatoes into a large pot. Fill the pot with enough cold water to cover the potatoes by about an inch. Add a generous pinch of salt to the water, which will help flavor the potatoes as they cook. Bring the water to a boil over medium-high heat, then reduce the heat to a simmer. Cook the potatoes until they are fork-tender, about 15-20 minutes.

Once the potatoes are cooked, drain them thoroughly and return them to the pot. Allow the potatoes to sit in the pot for a few minutes to let any excess moisture evaporate. This step is crucial for achieving a creamy consistency in your mashed potatoes.

In a small saucepan, gently heat the coconut milk and coconut oil over low heat until the oil has melted and the mixture is warm. Be careful not to bring it to a boil, as this could alter the flavor of the coconut milk.

Using a potato masher or a fork, mash the potatoes until they reach your desired level of smoothness. Gradually add the warm coconut milk mixture to the potatoes, stirring continuously. Season with salt and pepper to taste, and continue to mash and mix until everything is well incorporated. If you prefer a creamier texture, you can use an electric mixer to beat the potatoes.

Transfer the mashed potatoes to a serving bowl and garnish with chopped fresh chives or parsley if desired. Serve immediately, and enjoy!

Nutrition Facts

This recipe serves approximately four people. Each serving contains about 250 calories. The calorie content is relatively low for such a satisfying dish, making it a great choice for those who are mindful of their calorie intake but still want to enjoy a hearty side dish.

Preparation Time

The total preparation time for Coconut Milk Mashed Potatoes is about 35 minutes. This includes roughly 15 minutes of preparation for peeling and chopping the potatoes, and around 20 minutes of cooking time. It’s a quick and easy recipe that can be whipped up on a weeknight or as part of a larger holiday meal.

How to Serve

  • Pair your Coconut Milk Mashed Potatoes with a roast chicken or turkey for a classic meal with a modern twist.
  • Serve alongside grilled vegetables for a vibrant and healthy dinner option.
  • Add a scoop to a bowl of soup for an extra creamy texture.
  • Top with sautéed mushrooms for an earthy, flavorful combination.
  • Use as a filling for vegetable shepherd’s pie.

Additional Tips

  1. Choose Yukon Gold potatoes for this recipe, as they have a naturally buttery flavor and creamy texture that works well with coconut milk.
  2. If you prefer a slightly tangy taste, consider adding a splash of lime juice to the coconut milk mixture before heating.
  3. For added richness, you can substitute half of the coconut oil with butter if desired.
  4. Make sure to taste and adjust the seasoning at each step to ensure the perfect balance of flavors.
  5. Leftovers can be stored in an airtight container in the refrigerator for up to three days. Reheat gently on the stovetop or in the microwave, adding a splash of coconut milk to restore creaminess.

FAQ Section

Q: Can I use a different type of potato?

A: Yes, while Yukon Gold potatoes are recommended for their texture and flavor, you can use russet or red potatoes if preferred. Keep in mind that the texture may vary slightly.

Q: Is there a substitute for coconut milk?

A: If you are not a fan of coconut milk, you can use almond milk or cashew milk as an alternative, though the flavor profile will change.

Q: Can I make this recipe vegan?

A: This recipe is already vegan if you stick to using coconut oil. Ensure that all ingredients used are vegan-friendly.

Q: How can I make the mashed potatoes extra creamy?

A: For an extra creamy texture, consider using a hand mixer or stand mixer to whip the potatoes after adding the coconut milk mixture.

Q: Can I freeze the mashed potatoes?

A: Yes, you can freeze the mashed potatoes in an airtight container for up to one month. Thaw overnight in the refrigerator and reheat gently before serving.

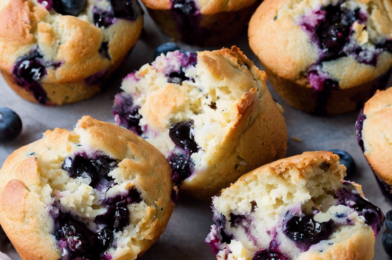
Dairy-Free Blueberry Muffins

Blueberry muffins have long held a cherished place in the hearts of breakfast enthusiasts and snack lovers alike. Traditionally made with rich butter and milk, these delightful treats have often been off-limits for those adhering to a dairy-free diet. However, innovation in the culinary world has led to the creation of dairy-free versions that do not compromise on taste or texture. In fact, the dairy-free blueberry muffin has emerged as a favorite among both those with dietary restrictions and those without. The magic lies in the perfect balance of moist, fluffy cake and the burst of fresh blueberries, all achieved without the use of traditional dairy products. With a few clever substitutions, the classic blueberry muffin becomes accessible to a wider audience, ensuring that everyone can enjoy this timeless treat.

Creating a dairy-free blueberry muffin involves some strategic ingredient swaps that maintain the integrity of the muffin’s flavor and texture. Plant-based milks, such as almond, oat, or soy, replace cow’s milk, providing moisture and a subtle nutty undertone that complements the sweetness of the blueberries. Instead of butter, coconut oil or a vegan margarine can be used, contributing to a light, airy crumb without overpowering the other flavors. Eggs, often a staple in traditional muffin recipes, can be substituted with applesauce or flaxseed meal mixed with water, both of which act as effective binding agents while adding a hint of additional flavor. The result is a muffin that is just as satisfying as its dairy-laden counterpart, with the added benefit of being suitable for a dairy-free lifestyle.

The popularity of dairy-free blueberry muffins is not solely due to dietary restrictions. Many people choose dairy-free options for the perceived health benefits and environmental considerations. By eliminating dairy, these muffins are often lower in cholesterol and saturated fat, appealing to health-conscious consumers. Moreover, the use of plant-based ingredients aligns with the growing demand for sustainable and eco-friendly food choices. As awareness of the environmental impact of dairy farming increases, more individuals are opting for plant-based alternatives that are kinder to the planet. The dairy-free blueberry muffin thus represents not only a delicious option for those with allergies or intolerances but also a conscientious choice for those looking to reduce their carbon footprint.

Beyond health and environmental factors, the versatility of dairy-free blueberry muffins adds to their appeal. They can be enjoyed as a quick breakfast on the go, a mid-afternoon pick-me-up, or even a dessert with a scoop of dairy-free ice cream. Their adaptability extends to the recipe itself; bakers can experiment with different types of flours, such as whole wheat or gluten-free alternatives, to cater to various dietary needs. Additionally, add-ins like nuts or seeds can enhance the nutritional profile and provide a satisfying crunch. This adaptability makes dairy-free blueberry muffins a versatile staple in modern kitchens, capable of meeting diverse dietary requirements without sacrificing taste or enjoyment.

In conclusion, dairy-free blueberry muffins exemplify the evolution of traditional recipes to meet contemporary dietary and environmental needs. They offer a delicious solution for those with dairy allergies, lactose intolerance, or those choosing to follow a plant-based diet. With simple ingredient swaps, these muffins maintain their beloved flavor and texture while providing a healthier, more sustainable option. As the demand for dairy-free foods continues to rise, these muffins stand out as a testament to the creativity and adaptability of modern baking. Whether enjoyed at breakfast, as a snack, or as a dessert, dairy-free blueberry muffins are a testament to the idea that dietary restrictions need not limit culinary enjoyment. They invite everyone to savor the simple pleasure of a freshly baked muffin, bursting with the natural sweetness of blueberries, no matter their dietary preferences.

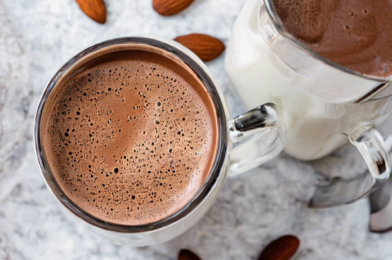
Homemade Almond Milk Hot Chocolate

As the chilly winds of the winter season begin to sweep across our lives, the yearning for a comforting cup of hot chocolate becomes almost inevitable. When my family and I first tried this homemade almond milk hot chocolate, it was like discovering a new tradition. Unlike the typical store-bought mixes, this recipe offered a creamy, nutty richness that was both satisfying and heartwarming. My kids, who can often be fussy with new flavors, were delighted by the subtle sweetness and the smooth texture. It’s a delightful twist on a classic, and the best part? Everyone can enjoy it, including those who are lactose intolerant or prefer a plant-based diet. This recipe has quickly become a family favorite, and I’m excited to share it with you.

Ingredients

The beauty of this homemade almond milk hot chocolate lies in its simplicity and accessibility. With just a few pantry staples, you can create a beverage that feels both luxurious and comforting. Here’s what you’ll need:

  • 2 cups of almond milk (unsweetened for a more controlled sweetness level)
  • 2 tablespoons of unsweetened cocoa powder
  • 2 tablespoons of sugar or preferred sweetener
  • 1/4 teaspoon of vanilla extract
  • A pinch of salt
  • Optional toppings: whipped cream, marshmallows, or a sprinkle of cinnamon

Instructions

Creating this delicious hot chocolate is a straightforward process, perfect for a cozy evening at home or a festive gathering with friends. Follow these steps to indulge in a comforting cup:

  1. In a medium saucepan, combine the almond milk, cocoa powder, sugar, and salt. Whisk together until the cocoa powder is completely dissolved and the mixture is smooth.
  2. Place the saucepan over medium heat, stirring occasionally, until the mixture is hot but not boiling. This should take about 5 minutes.
  3. Remove the saucepan from the heat and stir in the vanilla extract.
  4. Pour the hot chocolate into mugs and top with your choice of optional toppings like whipped cream or marshmallows.
  5. Serve immediately and enjoy the warmth and richness of this delightful drink.

Nutrition Facts

This recipe makes approximately 2 servings, perfect for sharing or enjoying a generous cup all to yourself. Each serving contains about 130 calories, making it a guilt-free indulgence that fits into most dietary plans.

Preparation Time

One of the greatest advantages of this recipe is its efficiency. From start to finish, the preparation time is approximately 10 minutes, allowing you to quickly satisfy your craving for a cozy treat.

How to Serve

  • Classic Style: Serve with a dollop of whipped cream and a sprinkle of cocoa powder for a traditional touch.
  • Festive Flair: Add a handful of mini marshmallows and a pinch of cinnamon for a holiday-themed treat.
  • Gourmet Touch: Grate a bit of dark chocolate over the top for an extra layer of indulgence.
  • Nutty Twist: Sprinkle some toasted almond slivers to enhance the nutty flavor profile.
  • Spicy Kick: Add a pinch of cayenne pepper for a surprising spicy twist that warms you from the inside out.

Additional Tips

  1. Choose Your Almond Milk: For a creamier texture, opt for a higher-fat almond milk. If you prefer a lighter beverage, stick with the unsweetened version.
  2. Sweetness Level: Adjust the sugar to your liking. If you prefer a more natural sweetness, try using honey or maple syrup as alternatives.
  3. Cocoa Quality: Use high-quality cocoa powder to ensure a rich and deep chocolate flavor.
  4. Vanilla Extract: A good quality vanilla extract can make a significant difference in enhancing the flavor profile of your hot chocolate.
  5. Storage: If you have leftovers, store the hot chocolate in a sealed container in the fridge for up to 3 days. Reheat gently on the stove, adding a splash of almond milk if needed to restore its original consistency.

FAQ Section

  1. Can I use other plant-based milks?

    Absolutely! This recipe is versatile and can be adapted to include other plant-based milks like soy, oat, or coconut milk. Each will impart its unique flavor, so feel free to experiment and find your favorite.

  2. How can I make this hot chocolate thicker?

    For a thicker consistency, try adding a tablespoon of cornstarch or a small amount of chocolate chips as you heat the mixture. Whisk thoroughly to combine and achieve a luscious texture.

  3. Is it possible to make this sugar-free?

    Yes, you can substitute the sugar with a sugar-free sweetener of your choice, such as stevia or erythritol, to make this a sugar-free treat.

  4. Can this recipe be doubled?

    Definitely! Simply double the ingredients to make more servings. It’s an excellent option for larger gatherings or when you want to prepare in advance and store for later.

  5. What if I don’t have vanilla extract?

    If you don’t have vanilla extract, you can omit it or replace it with another extract like almond or peppermint for a different flavor twist.

Spaghetti Squash Stir-Fry

There’s something magical about transforming an unassuming vegetable like spaghetti squash into a culinary masterpiece. As a food enthusiast and a person who loves experimenting with flavors, I find that spaghetti squash stir-fry offers a delightful combination of health and taste. When I first served this dish to my family, their enthusiastic response was all the validation I needed. The subtle crunch and rich flavors of the stir-fry make it a favorite in our household. It’s a dish that not only satisfies our taste buds but also nourishes us, making it an ideal meal for any occasion.

Ingredients

The beauty of spaghetti squash stir-fry lies in its simplicity. Here is what you need to create this delicious dish:

  • 1 medium spaghetti squash
  • 2 tablespoons olive oil
  • 1 onion, thinly sliced
  • 2 cloves garlic, minced
  • 1 red bell pepper, sliced
  • 1 cup broccoli florets
  • 1 carrot, julienned
  • 2 tablespoons soy sauce
  • 1 tablespoon sesame oil
  • Salt and pepper, to taste
  • 2 green onions, chopped
  • 1 tablespoon sesame seeds (optional)

Instructions

Creating spaghetti squash stir-fry is as easy as it is rewarding. Follow these steps to bring this dish to life:

  1. Preheat your oven to 400°F (200°C). Cut the spaghetti squash in half lengthwise and remove the seeds. Drizzle the cut sides with olive oil and place the halves cut-side down on a baking sheet. Roast for about 30-40 minutes or until tender.
  2. While the squash is roasting, heat olive oil in a large skillet over medium heat. Add the sliced onion and minced garlic, sautéing until fragrant and translucent.
  3. Add the red bell pepper, broccoli florets, and julienned carrot to the skillet. Stir-fry for about 5-7 minutes until the vegetables are tender-crisp.
  4. Once the spaghetti squash is cooked, use a fork to scrape out the strands into a bowl. Add the squash strands to the skillet with the vegetables.
  5. Stir in the soy sauce and sesame oil, mixing well to combine all the flavors. Season with salt and pepper to taste.
  6. Garnish with chopped green onions and sesame seeds before serving.

Nutrition Facts

This recipe serves approximately 4 people. Each serving contains about 210 calories, making it a light yet filling meal option for those mindful of their caloric intake.

Preparation Time

The preparation time for this dish is relatively quick and straightforward. Expect to spend about 15 minutes preparing the ingredients and approximately 40 minutes cooking, which includes roasting the spaghetti squash.

How to Serve

Spaghetti squash stir-fry is a versatile dish that pairs well with various accompaniments. Here are some serving suggestions:

  • As a main course: Enjoy it on its own for a light and nutritious meal.
  • With rice: Serve it over a bed of steamed jasmine or brown rice for added sustenance.
  • Protein boost: Top with grilled chicken, shrimp, or tofu for extra protein.
  • Side dish: Pair it with your favorite Asian-inspired entrée for a complete meal.
  • Garnish: Add a sprinkle of crushed peanuts or cashews for an extra crunch.

Additional Tips

  1. Choose a ripe squash: Look for a spaghetti squash with a firm and unblemished skin. It should feel heavy for its size.
  2. Season generously: Don’t be afraid to adjust the seasoning to your taste. A dash of red pepper flakes can add a nice kick.
  3. Experiment with veggies: Feel free to add or substitute other vegetables such as snap peas, mushrooms, or baby corn for variety.
  4. Prep in advance: Roast the spaghetti squash ahead of time and store it in the fridge to save time on busy weeknights.
  5. Customize the sauce: Try adding a tablespoon of hoisin or oyster sauce for a sweeter or more savory profile.

FAQ Section

Q: Can I use frozen vegetables?

A: Yes, frozen vegetables can be used in this recipe. Just make sure to thaw and drain them before adding to the skillet to avoid excess moisture.

Q: Is there an alternative to soy sauce for those with soy allergies?

A: Absolutely! Tamari or coconut aminos are excellent substitutes that are soy-free and gluten-free.

Q: How do I store leftovers?

A: Store leftovers in an airtight container in the refrigerator for up to 3 days. Reheat gently on the stove or in the microwave before serving.

Q: Can I make this dish vegan?

A: This dish is naturally vegan, but if you add protein like chicken or shrimp, ensure to replace them with tofu or tempeh for a vegan option.

Q: What can I do if my spaghetti squash is too watery?

A: If you find your spaghetti squash to be watery, let it rest on paper towels for a few minutes to absorb some of the excess moisture before adding to the stir-fry.

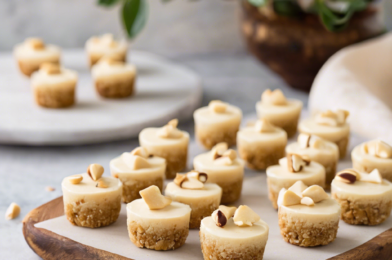
Cashew Cheesecake Bites

Cashew Cheesecake Bites have become a delightful mainstay in my family’s dessert repertoire. Their creamy texture and nutty flavor are simply irresistible, and they have won over even the most skeptical of cheesecake traditionalists in our circle. The first time I introduced these bites at a family gathering, they were met with curious glances but quickly disappeared once people took their first bite. The ease of preparation combined with their rich, decadent taste makes them a favorite for both casual get-togethers and more formal occasions. Not only are these bites a hit with adults, but kids also seem to adore them, often coming back for seconds and thirds. It’s safe to say that these little treats have become a beloved addition to our family celebrations.

Ingredients

The beauty of Cashew Cheesecake Bites lies in their simplicity and the quality of the ingredients used. Here’s what you’ll need to get started:

  • 2 cups of raw cashews, soaked overnight
  • 1/2 cup of coconut oil, melted
  • 1/2 cup of maple syrup
  • 1/4 cup of lemon juice
  • 1 teaspoon of vanilla extract
  • 1/4 teaspoon of sea salt
  • 1 cup of graham cracker crumbs
  • 2 tablespoons of sugar
  • 1/4 cup of melted butter

Instructions

Creating these delectable Cashew Cheesecake Bites is a straightforward process that even a novice chef can tackle with confidence. Follow these steps for a perfect result:

  1. Prepare the crust: In a medium bowl, combine the graham cracker crumbs, sugar, and melted butter. Mix until the mixture resembles wet sand. Press the mixture firmly into the bottom of a lined muffin tin to form the base of the cheesecake bites.
  2. Blend the filling: Drain the soaked cashews and place them in a high-speed blender. Add the melted coconut oil, maple syrup, lemon juice, vanilla extract, and sea salt. Blend until completely smooth and creamy, scraping down the sides as needed.
  3. Assemble: Spoon the cashew filling over the prepared crusts in the muffin tin, smoothing the tops with a spatula.
  4. Chill: Place the muffin tin in the freezer for at least 2 hours, or until the cheesecake bites are firm to the touch.
  5. Serve: Once set, remove the cheesecake bites from the muffin tin and let them thaw for a few minutes before serving.

Nutrition Facts

These Cashew Cheesecake Bites are not only delicious but also come with a reasonable nutritional profile. Each serving provides a balance of healthy fats and natural sugars.

  • Servings: 12 bites
  • Calories per serving: Approximately 220 calories

Preparation Time

One of the great things about this recipe is how quickly it comes together, allowing you to whip up a batch with minimal fuss:

  • Preparation time: 20 minutes
  • Chilling time: 2 hours
  • Total time: 2 hours and 20 minutes

How to Serve

Cashew Cheesecake Bites are versatile and can be served in various ways to suit the occasion:

  • Top with fresh berries or a berry compote for a fruity twist.
  • Drizzle with melted dark chocolate for an indulgent touch.
  • Garnish with a sprinkle of crushed nuts for added texture.
  • Serve alongside a scoop of your favorite ice cream for a decadent dessert plate.
  • Add a dollop of whipped cream for an extra creamy experience.

Additional Tips

To ensure your Cashew Cheesecake Bites turn out perfectly every time, consider these helpful tips:

  1. Use fresh ingredients: Fresh cashews and high-quality maple syrup make a noticeable difference in flavor.
  2. Soak cashews thoroughly: Soaking overnight ensures they blend into a smooth, creamy filling.
  3. Adjust sweetness: Taste the filling before assembling, and adjust the sweetness to your preference by adding more maple syrup if needed.
  4. Experiment with flavors: Try adding a touch of cinnamon or nutmeg to the filling for a warm, spicy note.
  5. Storage: Store in an airtight container in the freezer to maintain their texture and freshness.

FAQ

Here are some frequently asked questions about Cashew Cheesecake Bites:

  1. Can I use roasted cashews instead of raw? Raw cashews are recommended for their neutral flavor, but lightly roasted cashews can be used if raw are unavailable.
  2. Is there a substitute for coconut oil? Yes, you can use another neutral oil like avocado oil, but it may slightly alter the flavor.
  3. Can I make this recipe vegan? This recipe is already vegan, as it uses plant-based ingredients and omits dairy and eggs.
  4. How long do these bites last in the freezer? When stored properly, they can last up to two months in the freezer.
  5. Can I make a larger batch? Absolutely! Simply double or triple the ingredients to make a larger batch for gatherings or events.

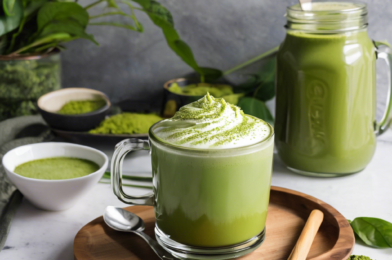
Dairy-Free Matcha Latte

As someone who enjoys exploring different beverage trends, the dairy-free matcha latte has been a delightful discovery. This vibrant green drink, rooted in centuries-old Japanese tradition, has recently surged in popularity for its health benefits and rich, earthy flavor. It’s not just about the aesthetic pleasure of its lush hue; the matcha latte offers a unique combination of taste and wellness, making it a favorite among many, including myself. My family, who are avid coffee enthusiasts, were initially skeptical about replacing their morning brew with something so different. However, after a few sips, they found themselves appreciating the nuanced flavors and the gentle energy boost that matcha provides. The combination of creamy plant-based milk and finely ground matcha powder results in a beverage that is not only satisfying but also nourishing, making it a staple in our morning routine.

Ingredients

The beauty of a dairy-free matcha latte lies in its simplicity and the quality of its ingredients. Here’s what you’ll need to make a perfect cup:

  • 1 teaspoon of matcha powder: Opt for high-quality, ceremonial-grade matcha for the best flavor and health benefits.
  • 1 cup of plant-based milk: Almond, oat, or coconut milk work particularly well, each adding a unique flavor profile.
  • 1 tablespoon of hot water: This helps to dissolve the matcha powder properly.
  • Sweetener (optional): You can use honey, maple syrup, or agave nectar to taste.
  • A pinch of vanilla extract (optional): For an added depth of flavor.

Instructions

Creating a dairy-free matcha latte at home is a simple yet rewarding process. Follow these steps to enjoy a delicious cup:

  1. Step 1: Start by sifting the matcha powder into a bowl or a cup to ensure there are no lumps.
  2. Step 2: Add the hot water to the matcha powder. Whisk using a bamboo whisk or a milk frother until the mixture is smooth and frothy.
  3. Step 3: Heat the plant-based milk in a saucepan over medium heat. Alternatively, you can microwave it for about a minute until hot.
  4. Step 4: Pour the hot milk into the matcha mixture, stirring gently to combine. Add sweetener and vanilla extract at this stage, if desired.
  5. Step 5: Pour the latte into a cup and enjoy it warm, or let it cool and serve it over ice for a refreshing cold drink.

Nutrition Facts

This dairy-free matcha latte recipe makes one serving, with approximately 150 calories per serving, depending on the type and amount of sweetener used.

Preparation Time

Preparing this delightful drink takes about 5 minutes, making it a quick and easy addition to your morning or afternoon routine.

How to Serve

There are several ways you can enjoy your dairy-free matcha latte:

  • Serve it warm with a sprinkle of matcha powder on top for an extra touch of elegance.
  • For a chilled version, pour the prepared latte over ice cubes and enjoy it as a refreshing iced beverage.
  • Add a dollop of coconut whipped cream for a decadent treat.
  • Garnish with a sprinkle of cinnamon or nutmeg to enhance the flavor profile.
  • Pair it with a light snack like a slice of banana bread or a handful of nuts for a complete and satisfying experience.

Additional Tips

To make the most out of your dairy-free matcha latte experience, consider these tips:

  1. Tip 1: Invest in a good quality matcha powder. The taste and nutritional benefits are significantly better with higher-grade matcha.
  2. Tip 2: Use a bamboo whisk, known as a chasen, to mix the matcha. It helps in achieving a frothy texture, which is key to a good latte.
  3. Tip 3: Experiment with different plant-based milks to find the one that best suits your taste preferences.
  4. Tip 4: If you find the matcha flavor too strong, start with a smaller amount and gradually increase as you get accustomed to the taste.
  5. Tip 5: Store your matcha powder in an airtight container in a cool, dark place to maintain its freshness and prevent it from becoming bitter.

FAQ Section

Q1: What is matcha, and how is it different from green tea?

Matcha is a type of green tea made from young tea leaves ground into a fine powder. Unlike traditional green tea, where leaves are steeped in water, matcha involves consuming the whole leaf, providing more antioxidants and nutrients.

Q2: Can I use regular milk instead of plant-based milk in this recipe?

Yes, you can use regular milk if you are not avoiding dairy. However, using plant-based milk makes the drink suitable for those who are lactose intolerant or prefer a vegan diet.

Q3: Is matcha latte caffeinated?

Yes, matcha contains caffeine, but it typically provides a more sustained energy boost compared to coffee, thanks to the presence of L-theanine, an amino acid that promotes relaxation without drowsiness.

Q4: How can I make my matcha latte frothy without a bamboo whisk?

If you don’t have a bamboo whisk, a milk frother or a small electric whisk can work as alternatives to achieve a frothy latte.

Q5: Are there any health benefits to drinking matcha lattes?

Yes, matcha is rich in antioxidants, particularly catechins, which are known to boost metabolism, enhance mood, and even support heart health. It’s a great way to enjoy a healthy and delicious drink.

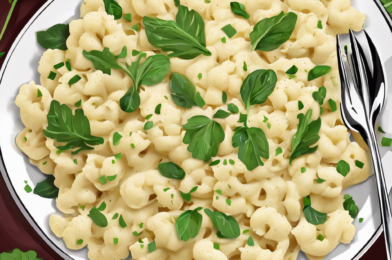
Vegan Cauliflower Alfredo

When the aroma of a comforting pasta dish wafts through my home, it often signals a gathering of family and friends, eager to dive into a meal that’s both delicious and soul-satisfying. Recently, I introduced my family to the delightful surprise of Vegan Cauliflower Alfredo. This recipe, while entirely plant-based, had everyone at the table reaching for seconds. The creamy texture, combined with the subtle nuttiness from the cauliflower, created a sauce so rich and flavorful that it was hard to believe there wasn’t a speck of dairy in sight. Even the skeptics in the family, who usually shy away from anything labeled “vegan,” couldn’t help but express their delight. The dish was met with unanimous approval, and it has since become a staple in our household, providing a healthier alternative to the traditional Alfredo sauce without compromising on taste.

Ingredients

The magic of this Vegan Cauliflower Alfredo lies in its simple yet wholesome ingredients that come together to create a dish that’s both nourishing and indulgent. Here’s what you’ll need:

  • 1 medium head of cauliflower, chopped
  • 2 tablespoons olive oil
  • 4 cloves garlic, minced
  • 1 cup unsweetened almond milk (or any plant-based milk of choice)
  • 3 tablespoons nutritional yeast
  • 1 tablespoon lemon juice
  • Salt and pepper to taste
  • Fresh parsley, chopped (for garnish)
  • Your choice of pasta (spaghetti, fettuccine, or penne work well)

Instructions

Creating this creamy Alfredo sauce is a straightforward process that even novice cooks will find manageable. Follow these simple steps:

  1. Begin by bringing a large pot of salted water to a boil. Add the cauliflower florets and cook until tender, about 8-10 minutes. Drain and set aside.
  2. In a pan over medium heat, add the olive oil. Sauté the minced garlic until fragrant, being careful not to brown it.
  3. In a blender, combine the cooked cauliflower, sautéed garlic, almond milk, nutritional yeast, lemon juice, salt, and pepper. Blend until smooth and creamy.
  4. Return the sauce to the pan and heat gently, adjusting the seasoning as needed.
  5. Cook your choice of pasta according to package instructions, then drain.
  6. Toss the pasta with the creamy cauliflower Alfredo sauce and serve hot, garnished with fresh parsley.

Nutrition Facts

This recipe generously serves 4, with each serving providing approximately 250 calories. The calories are kept low by the substitution of cauliflower for traditional heavy cream, making it a healthier option for those watching their intake without sacrificing the creamy texture we all love in an Alfredo sauce.

Preparation Time

The total preparation and cooking time for this Vegan Cauliflower Alfredo is about 30 minutes. This makes it an ideal choice for a quick weeknight dinner or a last-minute entertaining option that doesn’t compromise on flavor or presentation.

How to Serve

While this dish is a delight on its own, here are some serving suggestions to elevate your dining experience:

  • As a Main Course: Serve with a side of garlic bread for a complete meal.
  • With Vegetables: Toss in some steamed broccoli or peas for added nutrition and color.
  • As a Side Dish: Pair with grilled tofu or a hearty plant-based protein.
  • Garnish: Add a sprinkle of vegan Parmesan or nutritional yeast for an extra umami kick.
  • For a Crowd: Double the recipe and serve it as part of a buffet with a selection of toppings like roasted red peppers or sun-dried tomatoes.

Additional Tips

To ensure your Vegan Cauliflower Alfredo is a success every time, consider these handy tips:

  1. Blending Tips: For the smoothest sauce, use a high-speed blender, and be sure to blend until all the cauliflower is completely pureed.
  2. Variations: Experiment with different herbs such as basil or oregano to tailor the sauce to your taste.
  3. Storage: Leftover sauce can be stored in an airtight container in the refrigerator for up to 3 days. Reheat gently on the stove before serving.
  4. Thickening: If the sauce is too thin, let it simmer on low heat until it reaches the desired consistency.
  5. Flavor Enhancements: Add a pinch of nutmeg or smoked paprika for a unique twist.

FAQ Section

Here are some frequently asked questions about Vegan Cauliflower Alfredo:

  1. Can I freeze the sauce? Yes, the sauce can be frozen for up to a month. Thaw it in the refrigerator overnight before reheating.
  2. What can I substitute for nutritional yeast? Nutritional yeast provides a cheesy flavor, but you can substitute it with a vegan cheese of your choice or omit it entirely if desired.
  3. Can I use a different type of plant milk? Absolutely! Coconut milk will add a richer texture, while soy milk can be used for a more neutral taste.
  4. Is this recipe gluten-free? The sauce itself is gluten-free, but ensure to use gluten-free pasta if required.
  5. How do I prevent the sauce from becoming grainy? Ensure the cauliflower is thoroughly cooked and blended until smooth to avoid any graininess in the sauce.

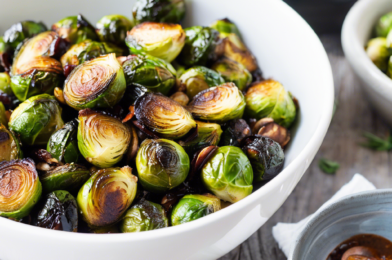
Balsamic Roasted Brussels Sprouts

Balsamic roasted Brussels sprouts have become a beloved dish in my household, and for good reason. These tender yet crispy vegetables, caramelized to perfection, offer a delightful balance of sweet and tangy flavors that even the pickiest eaters in my family can’t resist. As someone who has cooked these multiple times, I’ve witnessed the magic they bring to the dinner table, turning a once-dreaded vegetable into a star attraction. Whether served as a side to a hearty roast or enjoyed as a main dish in a vegetarian meal, these Brussels sprouts have earned their place as a staple in our weekly menu.

Ingredients

The ingredients list for balsamic roasted Brussels sprouts is refreshingly simple, allowing the natural flavors of the vegetables to shine. You’ll need:

  • 1 1/2 pounds of fresh Brussels sprouts, trimmed and halved
  • 3 tablespoons of olive oil
  • 1/4 cup of balsamic vinegar
  • 2 tablespoons of honey or maple syrup
  • Salt and pepper to taste
  • Optional: 1/4 cup of grated Parmesan cheese or toasted nuts for garnish

These straightforward ingredients not only make this dish easy to prepare but also ensure that the Brussels sprouts remain the focal point of the meal.

Instructions

Creating the perfect balsamic roasted Brussels sprouts is a simple process that can be completed in just a few steps:

  1. Preheat your oven to 400°F (200°C) and line a baking sheet with parchment paper or aluminum foil for easy cleanup.
  2. In a large bowl, toss the halved Brussels sprouts with olive oil, ensuring that each piece is well-coated. This step is crucial for achieving that desired crispy texture.
  3. Spread the Brussels sprouts in a single layer on the prepared baking sheet, cut side down. This allows for even roasting and caramelization.
  4. Roast in the preheated oven for 20-25 minutes, or until the sprouts are tender and golden brown on the edges.
  5. While the sprouts are roasting, whisk together the balsamic vinegar and honey or maple syrup in a small bowl.
  6. Remove the Brussels sprouts from the oven and drizzle them with the balsamic mixture. Toss to coat evenly.
  7. Return the sprouts to the oven for an additional 5 minutes, allowing the glaze to thicken and adhere to the vegetables.
  8. Season with salt and pepper to taste, and if desired, garnish with Parmesan cheese or toasted nuts before serving.

Nutrition Facts

This recipe serves approximately four people, with each serving containing about 150 calories. These figures can vary slightly depending on the specific ingredients used, but the overall nutritional profile makes this dish a healthy addition to any meal plan.

Preparation Time

One of the many advantages of this recipe is its efficiency. From start to finish, balsamic roasted Brussels sprouts can be prepared in just 35-40 minutes, making them a perfect option for busy weeknights or when you need to whip up a quick side dish for a dinner party.

How to Serve

These versatile Brussels sprouts can be served in a variety of ways, enhancing numerous dishes:

  • As a side dish: Pair them with grilled chicken, steak, or fish for a balanced and nutritious meal.
  • In a salad: Toss them into a fresh green salad with feta cheese, cranberries, and walnuts for added texture and flavor.
  • On a grain bowl: Add them to a bowl of quinoa or brown rice, along with roasted sweet potatoes and avocado, for a satisfying vegetarian meal.
  • As a pizza topping: Spread them over a white pizza with goat cheese and caramelized onions for a unique twist.
  • In a sandwich: Layer them in a sandwich with turkey and cranberry sauce for a delicious post-Thanksgiving treat.

Additional Tips

  1. Don’t overcrowd the pan: Ensure that the Brussels sprouts are spread out in a single layer to allow for even roasting.
  2. Use fresh Brussels sprouts: Fresh, firm sprouts will roast more evenly and have a better taste than older, softer ones.
  3. Adjust sweetness: If you prefer a less sweet glaze, reduce the amount of honey or maple syrup according to your taste.
  4. Experiment with flavors: Add a sprinkle of red pepper flakes for a hint of heat, or a dash of lemon juice for brightness.
  5. Try different garnishes: Experiment with various toppings like crumbled blue cheese, toasted almonds, or crispy bacon for added flavor and texture.

FAQ Section

Q: Can I make this recipe ahead of time?

A: Yes, you can roast the Brussels sprouts a day in advance. Store them in an airtight container in the refrigerator, and reheat them in the oven before serving to ensure they remain crispy.

Q: Can I use frozen Brussels sprouts for this recipe?

A: While fresh Brussels sprouts are ideal for roasting, you can use frozen ones in a pinch. Just be sure to thaw and pat them dry before roasting to avoid excess moisture.

Q: What can I use as a substitute for balsamic vinegar?

A: If you’re out of balsamic vinegar, you can substitute it with red wine vinegar mixed with a little sugar or honey to mimic the sweetness of balsamic.

Q: How do I store leftovers?

A: Store any leftovers in an airtight container in the refrigerator for up to three days. Reheat them in the oven or on the stovetop to regain their crispy texture.

Q: Can I double this recipe?

A: Absolutely! Simply double the ingredients and use two baking sheets to ensure the Brussels sprouts have enough space to roast evenly.

Coconut Curry Chickpeas

Coconut Curry Chickpeas have become a beloved staple in my household, transforming regular weeknight dinners into something extraordinary. The warm, spicy aroma that fills the kitchen as the dish simmers is nothing short of inviting. My family eagerly gathers around the table, bowls in hand, ready to indulge in the comforting flavors of coconut milk, aromatic spices, and tender chickpeas. The first time I prepared this dish, I was uncertain how it would be received by everyone, especially the kids, who have their peculiar preferences. Much to my surprise and delight, it was an instant hit. The subtle sweetness of the coconut milk perfectly balanced the spices, making it palatable even for the youngest members of the family. This recipe has since become a regular in our meal rotation, loved for both its simplicity and rich, complex flavors.

Ingredients

The beauty of Coconut Curry Chickpeas lies in its simplicity and the ease of sourcing ingredients. Most of the components are pantry staples, making this dish accessible and convenient for any home cook. Here’s what you’ll need:

  • 2 tablespoons of olive oil
  • 1 large onion, finely chopped
  • 3 cloves of garlic, minced
  • 1 tablespoon of grated fresh ginger
  • 1 teaspoon of ground cumin
  • 1 teaspoon of ground coriander
  • 1 teaspoon of turmeric
  • 1 teaspoon of garam masala
  • 1/2 teaspoon of chili powder (adjust to taste)
  • 2 cans (15 ounces each) of chickpeas, drained and rinsed
  • 1 can (13.5 ounces) of coconut milk
  • 1 cup of vegetable broth
  • 1 tablespoon of tomato paste
  • Salt and pepper to taste
  • Fresh cilantro, chopped, for garnish
  • Cooked rice or naan, for serving

Instructions

Creating Coconut Curry Chickpeas is a straightforward process that even novice cooks can master. Follow these steps to bring this delightful dish to your table:

  1. In a large skillet or saucepan, heat the olive oil over medium heat. Add the chopped onion and sauté until translucent, about 5 minutes.
  2. Add the minced garlic and grated ginger, cooking for another 2 minutes until fragrant.
  3. Stir in the spices: cumin, coriander, turmeric, garam masala, and chili powder. Cook for 1-2 minutes, allowing the spices to release their oils and become aromatic.
  4. Add the drained chickpeas, coconut milk, vegetable broth, and tomato paste. Stir well to combine.
  5. Bring the mixture to a simmer, then reduce the heat to low. Let it simmer gently for 20-25 minutes, stirring occasionally, until the sauce has thickened and the flavors have melded together.
  6. Season with salt and pepper to taste.
  7. Garnish with fresh cilantro before serving.
  8. Serve hot over cooked rice or with warm naan.

Nutrition Facts

This recipe serves approximately four people, making it an ideal meal for a family dinner or meal preps for the week. Each serving contains approximately 350 calories, making it a nutritious choice that doesn’t compromise on flavor.

Preparation Time

One of the many advantages of this Coconut Curry Chickpeas recipe is its relatively quick preparation time. From start to finish, you can have this delicious dish ready in about 40 minutes. This includes the time spent gathering ingredients, prepping your vegetables, and allowing the curry to simmer to perfection. It’s a perfect option for those busy weeknights when you want something wholesome and satisfying without spending hours in the kitchen.

How to Serve

There are several ways to serve Coconut Curry Chickpeas that can enhance your dining experience:

  • Serve over a bed of fluffy basmati or jasmine rice for a complete meal.
  • Accompany with warm naan or roti to soak up the creamy curry sauce.
  • Offer a side of steamed vegetables such as broccoli or green beans for added nutrition.
  • Top with a dollop of plain yogurt or a squeeze of lime for a refreshing contrast.
  • Pair with a crisp salad of cucumbers, tomatoes, and red onion, dressed with lemon and olive oil.

Additional Tips

To make the most out of your Coconut Curry Chickpeas, consider these helpful tips:

  • Adjust spice levels: If you prefer a milder curry, reduce the chili powder or omit it altogether. Conversely, increase it if you like more heat.
  • Use fresh ingredients: Fresh ginger and garlic provide a more vibrant flavor compared to powdered alternatives.
  • Experiment with vegetables: Consider adding spinach, bell peppers, or sweet potatoes for a different twist and extra nutrients.
  • Make it ahead: This curry tastes even better the next day as the flavors continue to develop, making it perfect for meal prep.
  • Freeze leftovers: Coconut Curry Chickpeas freeze well for up to three months. Portion into containers for easy future meals.

FAQ

Here are some frequently asked questions about Coconut Curry Chickpeas:

  1. Can I use dried chickpeas instead of canned?
    Yes, but you’ll need to soak and cook them beforehand. Start with about 1.5 cups of dried chickpeas to yield the equivalent of two cans.
  2. Is there a substitute for coconut milk?
    You can use almond milk or cashew cream as a non-dairy alternative, though it may alter the flavor slightly.
  3. Can I make this dish in a slow cooker?
    Absolutely! Combine all ingredients in a slow cooker and cook on low for 6-8 hours or on high for 3-4 hours.
  4. How can I thicken the curry?
    If you prefer a thicker curry, reduce the amount of vegetable broth or simmer the curry uncovered until it reaches your desired consistency.
  5. Is this recipe vegan-friendly?
    Yes, this Coconut Curry Chickpeas recipe is entirely plant-based, making it suitable for vegans and vegetarians.

In conclusion, Coconut Curry Chickpeas is a versatile and flavorful dish that suits a variety of dietary preferences while offering a comforting meal option. Whether you’re feeding a family or meal prepping for the week, this recipe is sure to become a favorite in your culinary repertoire.