Dairy-Free Chocolate Chip Cookies

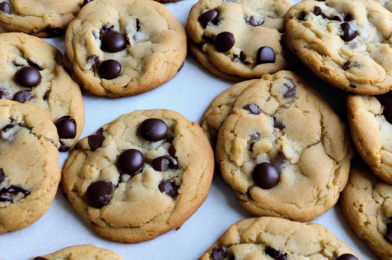
When it comes to baking, few treats are as universally cherished as the classic chocolate chip cookie. However, for those who are lactose intolerant or choose to avoid dairy for other reasons, finding a satisfying alternative can be a challenge. Enter the dairy-free chocolate chip cookie, a delicious twist on the beloved classic that doesn’t compromise on taste or texture. For anyone who’s ever had to forgo these sweet delights due to dietary restrictions, this recipe is a game-changer. When I first baked a batch of these cookies for my family, I was met with rave reviews. The cookies were devoured in minutes, and even the staunchest dairy lovers in the house couldn’t tell the difference. The rich flavor and soft, chewy texture won everyone over, proving that going dairy-free doesn’t mean sacrificing indulgence.

Ingredients

Creating the perfect dairy-free chocolate chip cookie begins with selecting the right ingredients. These cookies rely on a blend of traditional elements and innovative substitutes to achieve their classic taste and texture. Here’s what you’ll need:

  • 1 cup coconut oil: This serves as a rich and flavorful substitute for butter, lending the cookies a subtle tropical taste that complements the chocolate perfectly.
  • 1 cup packed brown sugar: The molasses in brown sugar adds moisture and a deeper flavor profile.
  • 1/2 cup granulated sugar: This helps balance the sweetness and provides a slight crispness to the edges of the cookies.
  • 2 teaspoons vanilla extract: Essential for enhancing the overall flavor.
  • 2 large eggs: The binding agent that holds everything together.
  • 2 1/4 cups all-purpose flour: The foundation of any good cookie.
  • 1 teaspoon baking soda: Helps the cookies rise just the right amount.
  • 1/2 teaspoon salt: Balances the sweetness and enhances the chocolate flavor.
  • 2 cups dairy-free chocolate chips: The star of the show, ensuring each bite is filled with chocolatey goodness.

Instructions

Transforming these ingredients into mouthwatering cookies is straightforward and rewarding. Follow these steps to ensure perfect results:

  1. Preheat your oven to 350°F (175°C) and line two baking sheets with parchment paper.

  2. In a large mixing bowl, combine the coconut oil, brown sugar, and granulated sugar. Beat together until the mixture is smooth and creamy.

  3. Add the vanilla extract and eggs to the mixture, beating well after each addition until the ingredients are fully incorporated.

  4. In a separate bowl, whisk together the flour, baking soda, and salt. Gradually add the dry ingredients to the wet mixture, stirring until just combined.

  5. Fold in the dairy-free chocolate chips, ensuring they are evenly distributed throughout the dough.

  6. Drop spoonfuls of dough onto the prepared baking sheets, spacing them about 2 inches apart to allow for spreading.

  7. Bake for 10-12 minutes, or until the edges are golden brown and the centers are set. Allow the cookies to cool on the baking sheets for a few minutes before transferring them to a wire rack to cool completely.

Nutrition Facts

This recipe yields approximately 24 cookies, each serving packed with flavor and satisfaction. For those mindful of their caloric intake, each cookie contains around 150 calories. While these cookies are a treat, they don’t skimp on the delightful experience we all seek in a sweet indulgence.

Preparation Time

Baking these cookies is a relatively quick process, perfect for those who crave instant gratification. The total time from start to finish is about 30 minutes, with 10-12 minutes for baking and the remaining time dedicated to preparation. This makes them an ideal choice for last-minute gatherings or when a sudden craving strikes.

How to Serve

Serving these dairy-free chocolate chip cookies can be as creative or as straightforward as you desire. Here are a few suggestions to enhance your cookie experience:

  • Classic with a Twist: Enjoy warm cookies fresh from the oven with a cold glass of almond or oat milk.
  • Ice Cream Sandwiches: Pair these cookies with your favorite dairy-free ice cream for a delightful dessert.
  • Cookie Crumble: Crumble the cookies over a bowl of dairy-free yogurt or smoothie bowl for added texture and flavor.
  • Cookie Stack: Stack them up with layers of dairy-free whipped cream for an impressive treat at parties.
  • Gift Box: Package them in a decorative box to share as a thoughtful homemade gift.

Additional Tips

To ensure your dairy-free chocolate chip cookies are nothing short of perfection, consider these additional tips:

  1. Room Temperature Ingredients: Ensure the coconut oil and eggs are at room temperature for easier mixing and better consistency.
  2. Chill the Dough: Refrigerate the cookie dough for at least 30 minutes if you prefer thicker cookies that don’t spread as much.
  3. Experiment with Mix-Ins: Customize your cookies by adding nuts, dried fruits, or even a dash of cinnamon for a unique twist.
  4. Store Properly: Keep the cookies in an airtight container at room temperature to maintain their freshness for up to a week.
  5. Freezing for Later: To enjoy fresh cookies anytime, freeze the cookie dough balls on a baking sheet, then transfer them to a freezer bag. Bake from frozen, adding a couple of extra minutes to the baking time.

FAQ Section

Here are some frequently asked questions about dairy-free chocolate chip cookies:

  1. Can I substitute another oil for coconut oil?

    Yes, you can use other vegetable oils like canola or avocado oil, though the flavor and texture might vary slightly. Coconut oil is recommended for its flavor and consistency.

  2. What can I use instead of eggs?

    If you are also avoiding eggs, you can use flaxseed meal as an egg replacement. Mix one tablespoon of flaxseed meal with three tablespoons of water for each egg and let it sit for a few minutes to thicken.

  3. Are these cookies vegan?

    Yes, as long as you use a vegan egg substitute, these cookies can be considered vegan.

  4. Can I make these cookies gluten-free?

    You can try using a gluten-free flour blend in place of all-purpose flour. Make sure to select a blend that is suitable for baking to ensure the best texture.

  5. How do I prevent the cookies from spreading too much?

    Chilling the dough before baking and ensuring your baking sheets are cool can help prevent the cookies from spreading too much in the oven.

Quinoa & Roasted Veggie Bowl

The allure of a well-crafted Quinoa & Roasted Veggie Bowl isn’t merely in its vibrant colors or enticing aroma but lies deeply rooted in its nutritional value and the symphony of flavors it offers. As a journalist with an appreciation for culinary delights, I had the pleasure of indulging in this particular dish with my family, and it did not disappoint. The blend of fluffy quinoa with roasted vegetables not only satiated our hunger but also left us feeling revitalized and content. Each bite delivered a delightful crunch from the veggies, perfectly complemented by the soft, nutty texture of quinoa. My children, often finicky with their vegetable intake, found themselves reaching for seconds, a testament to the dish’s universal appeal.

Ingredients

To recreate this delightful Quinoa & Roasted Veggie Bowl, gather the following ingredients to ensure a harmonious blend of flavors and nutrition:

  • 1 cup quinoa – Rinsed and drained.
  • 2 cups water or vegetable broth – For a richer flavor.
  • 1 large red bell pepper – Chopped into bite-sized pieces.
  • 1 zucchini – Sliced into half-moons.
  • 1 cup cherry tomatoes – Halved.
  • 1 red onion – Sliced thinly.
  • 2 tablespoons olive oil – For roasting.
  • Salt and pepper – To taste.
  • 1 teaspoon garlic powder – Adds depth of flavor.
  • 1 teaspoon dried thyme – For a hint of earthiness.
  • 1/2 lemon – Juiced, for a fresh zing.
  • Fresh parsley – Chopped, for garnish.

Instructions

Crafting the perfect Quinoa & Roasted Veggie Bowl is a straightforward process that brings out the best of each ingredient. Follow these steps for a successful culinary experience:

  1. Cook the Quinoa: In a medium saucepan, combine the rinsed quinoa with water or vegetable broth. Bring it to a boil over medium-high heat, then reduce the heat to low, cover, and let it simmer for about 15 minutes, or until the quinoa is tender and the liquid is absorbed. Fluff with a fork and set aside.
  2. Prepare the Veggies: Preheat your oven to 400°F (200°C). In a large bowl, toss the chopped red bell pepper, zucchini, cherry tomatoes, and sliced red onion with olive oil, salt, pepper, garlic powder, and dried thyme. Spread the veggies evenly on a baking sheet.
  3. Roast the Veggies: Roast in the preheated oven for about 20-25 minutes, or until the vegetables are tender and slightly caramelized at the edges, stirring halfway through for even cooking.
  4. Assemble the Bowl: In a large serving bowl, combine the cooked quinoa with the roasted vegetables. Drizzle with lemon juice and toss to combine. Taste and adjust seasonings if necessary.
  5. Garnish and Serve: Top with freshly chopped parsley before serving to add a burst of color and freshness. Serve warm or at room temperature for a delightful meal.

Nutrition Facts

This Quinoa & Roasted Veggie Bowl serves 4 people, with each serving containing approximately 350 calories. The nutritional profile is balanced, making it an excellent choice for those seeking a wholesome and satisfying meal.

Preparation Time

The preparation and cooking time for this delightful dish is approximately 40-50 minutes. This includes both the time needed to prepare the ingredients and the cooking time to deliver a meal that is both quick and satisfying.

How to Serve

Present the Quinoa & Roasted Veggie Bowl in a way that highlights its vibrant colors and textures. Here are some serving suggestions:

  • Serve as a main course for a light lunch or dinner.
  • Pair with a side of crusty bread for a more substantial meal.
  • Top with a dollop of hummus or a sprinkle of feta cheese for added flavor.
  • Include a fresh, green salad on the side to complement the bowl.
  • For a protein boost, add grilled chicken or chickpeas to the dish.

Additional Tips

To enhance your cooking experience and the flavors of this dish, consider these additional tips:

  1. Rinse the Quinoa Thoroughly: Rinsing removes quinoa’s natural coating, saponin, which can make it taste bitter or soapy.
  2. Customize the Veggies: Feel free to swap or add vegetables such as sweet potatoes, carrots, or broccoli, depending on what’s in season.
  3. Spice it Up: Add a pinch of chili flakes or a dash of hot sauce for a spicy kick.
  4. Store Properly: Leftovers can be stored in an airtight container in the refrigerator for up to 3 days.
  5. Reheat Gently: When reheating, do so on a low heat to maintain the texture and flavor of the quinoa and veggies.

FAQ Section

Here are some common questions and answers about the Quinoa & Roasted Veggie Bowl:

  1. Can I make this recipe ahead of time?
    Yes, you can prepare the quinoa and roast the vegetables in advance. Store them separately in the refrigerator and combine them just before serving.
  2. What can I use instead of quinoa?
    You can replace quinoa with couscous, bulgur, or brown rice for a different taste and texture.
  3. Is this dish vegan?
    Yes, the Quinoa & Roasted Veggie Bowl as described is vegan. Ensure any additional toppings, like cheese, are vegan if maintaining the dish’s vegan status.
  4. How can I add more protein to this dish?
    Consider adding grilled chicken, tofu, or chickpeas to increase the protein content of the meal.
  5. Can I freeze the leftovers?
    While the dish is best enjoyed fresh, you can freeze the leftovers. Be sure to thaw completely and reheat thoroughly before enjoying.

This Quinoa & Roasted Veggie Bowl is more than just a meal; it’s an experience that brings together flavor, nutrition, and satisfaction. Whether you’re cooking for family, friends, or yourself, this recipe is sure to become a staple in your culinary repertoire.

Lemon Garlic Grilled Chicken

Every so often, a recipe comes along that redefines simplicity and flavor in home cooking, and the Lemon Garlic Grilled Chicken is precisely that kind of dish. This recipe has become a staple in my home, a favorite that never fails to impress both family and guests alike. The first time I prepared it, the aroma of garlic and lemon wafted through the house, drawing everyone into the kitchen. The succulent chicken, infused with zesty lemon and aromatic garlic, was met with rave reviews. Even the pickiest eaters in my family couldn’t resist the juicy, flavorful bite of this perfectly grilled chicken. It’s become a go-to dish for dinner parties and casual family meals alike, always leaving plates empty and hearts full.

Ingredients

The magic of this Lemon Garlic Grilled Chicken lies in its simplicity, allowing the fresh ingredients to shine. Here’s what you’ll need:

  • 4 boneless, skinless chicken breasts
  • 2 tablespoons olive oil
  • 1 large lemon, juiced and zested
  • 3 cloves garlic, minced
  • 1 teaspoon salt
  • 1/2 teaspoon black pepper
  • 1 teaspoon dried oregano
  • 1/2 teaspoon paprika
  • Fresh parsley for garnish (optional)

Instructions

Creating this dish is as easy as it is delicious. Follow these steps to achieve grilling perfection:

  1. Prepare the marinade: In a large bowl, combine the olive oil, lemon juice, lemon zest, minced garlic, salt, pepper, oregano, and paprika. Mix well to ensure the flavors are evenly distributed.
  2. Marinate the chicken: Add the chicken breasts to the bowl, ensuring each piece is thoroughly coated with the marinade. Cover the bowl with plastic wrap and refrigerate for at least 30 minutes, allowing the flavors to penetrate the meat.
  3. Preheat the grill: While the chicken is marinating, preheat your grill to medium-high heat. This will ensure the chicken cooks evenly and develops a beautiful char.
  4. Grill the chicken: Remove the chicken from the marinade and place it on the preheated grill. Cook each side for about 6-8 minutes, or until the internal temperature reaches 165°F (74°C). Be sure not to overcook, as this can result in dry chicken.
  5. Rest and serve: Once cooked, remove the chicken from the grill and let it rest for a few minutes. This allows the juices to redistribute, ensuring each bite is moist and flavorful. Garnish with fresh parsley before serving.

Nutrition Facts

The Lemon Garlic Grilled Chicken is not only tasty but also a healthy meal choice. Here are the nutrition facts:

  • Servings: 4
  • Calories per serving: Approximately 250

Preparation Time

The beauty of this recipe lies in its efficiency. From start to finish, you can have a delicious meal ready in under an hour.

  • Preparation time: 10 minutes
  • Marinating time: 30 minutes
  • Cooking time: 15 minutes

How to Serve

The versatility of Lemon Garlic Grilled Chicken makes it an excellent choice for various meal settings. Here are some serving suggestions:

  • Serve with a side of steamed vegetables for a healthy, balanced meal.
  • Pair with a fresh garden salad and a light vinaigrette for a refreshing summer dinner.
  • Chop the chicken and add it to a wrap or sandwich for a quick and satisfying lunch.
  • Serve alongside a creamy pasta dish for a comforting, indulgent meal.
  • Use leftovers to top a homemade pizza for a unique twist on a classic favorite.

Additional Tips

Here are some tips to help you make the most of your Lemon Garlic Grilled Chicken experience:

  1. Use fresh ingredients: Fresh lemon and garlic make a significant difference in flavor. Avoid pre-packaged lemon juice and garlic powder for the best results.
  2. Don’t skip the marinating: Allowing the chicken to marinate is crucial for infusing it with flavor. If time permits, marinate for up to 4 hours for even more depth.
  3. Monitor grill temperature: Maintaining a consistent grill temperature ensures even cooking and prevents the chicken from drying out.
  4. Rest the chicken: Letting the chicken rest after grilling is essential for keeping it juicy and tender.
  5. Experiment with herbs: Feel free to experiment by adding other herbs like thyme or rosemary for a different flavor profile.

FAQ Section

Here are some frequently asked questions about Lemon Garlic Grilled Chicken:

  1. Can I use chicken thighs instead of breasts?

    Absolutely! Chicken thighs are a great alternative and offer a richer flavor. Adjust the cooking time as they may take slightly longer to cook through.

  2. Is it possible to bake instead of grill?

    Yes, you can bake the chicken in a preheated oven at 400°F (200°C) for about 20-25 minutes, or until the internal temperature reaches 165°F (74°C).

  3. Can I prepare the marinade in advance?

    Definitely! The marinade can be prepared and stored in the refrigerator for up to 3 days. Just give it a good stir before adding the chicken.

  4. What if I don’t have a grill?

    No worries! You can use a grill pan or a regular skillet on your stovetop for similar results.

  5. How do I know when the chicken is done?

    Using a meat thermometer is the best way to ensure your chicken is cooked through. It should read 165°F (74°C) when inserted into the thickest part of the chicken.

Dairy-Free Pesto Zoodles

The culinary world has a way of reinventing itself, bringing fresh twists to classic dishes, and one such delightful innovation is the ‘Dairy-Free Pesto Zoodles.’ This dish strikes a harmonious balance between health and taste, offering an alternative for those who love pesto but need to avoid dairy. Zoodles, or zucchini noodles, serve as the perfect base, capturing the essence of pasta without the carbs. The pesto, traditionally rich in Parmesan, undergoes a transformation here, relying on nutritional yeast to provide that signature cheesy flavor without dairy. This not only makes the dish vegan-friendly but also a lighter, more digestible option for many. The vibrant green of the zucchini and basil, combined with the aromatic allure of garlic and nuts, create a sensory delight that is both visually appealing and tantalizing to the taste buds. It’s a recipe that has garnered appreciation across diverse palates, from the health-conscious to the flavor aficionados.

The ingredients for Dairy-Free Pesto Zoodles are straightforward yet packed with flavor. You’ll need fresh zucchini, preferably organic, to spiralize into noodles. For the pesto, gather fresh basil leaves, garlic cloves, pine nuts or walnuts, nutritional yeast, lemon juice, and extra-virgin olive oil. A pinch of salt and pepper enhances the taste, while a dash of red pepper flakes can add a hint of heat for those who enjoy a bit of spice. The simplicity of these ingredients is deceptive, as they come together to create a dish that feels gourmet yet is incredibly easy to prepare. The emphasis on fresh produce not only ensures a burst of flavor but also aligns with the growing trend towards plant-based eating. This dish proves that you don’t need dairy to enjoy a creamy, rich pesto that can elevate any meal.

Preparing Dairy-Free Pesto Zoodles is as rewarding as it is straightforward. Begin by spiralizing the zucchini into noodles and set them aside. For the pesto, blend the basil, garlic, nuts, nutritional yeast, lemon juice, and olive oil until smooth, adjusting the consistency with water as needed. Season to taste with salt, pepper, and red pepper flakes. Gently toss the zoodles with the pesto until well coated. This dish can be enjoyed as a refreshing cold salad or lightly sautéed for a warm meal. It’s versatile enough to serve as a stand-alone dish or a side. The beauty of this recipe is its adaptability—feel free to experiment with different nuts or add vegetables like cherry tomatoes or spinach for an extra nutrient boost. Dairy-Free Pesto Zoodles is more than just a meal; it’s a testament to how creativity in the kitchen can lead to healthier, tastier options that satisfy both the palate and the body.

Dairy-Free Pumpkin Soup

As the crisp autumn air begins to weave its way through our days, the comforting embrace of a warm bowl of soup becomes a staple in many households. Among the plethora of seasonal delights, dairy-free pumpkin soup stands out, not just for its vibrant hue reminiscent of falling leaves, but for its rich, savory flavor that embodies the essence of fall. Recently, I had the opportunity to whip up a batch of this delightful soup for a family gathering, and it was met with enthusiastic reviews. The velvety texture and the subtle interplay of spices made it a standout dish, even among our traditional family favorites. My family, particularly the kids, who are usually skeptical of new recipes, found themselves reaching for seconds, their bowls emptied and their hearts warmed. This recipe has since become a family favorite, a testament to its universal appeal and heartening essence.

Ingredients

Creating a truly spectacular dairy-free pumpkin soup requires a careful selection of ingredients that not only enhance the soup’s natural flavors but also contribute to its creamy consistency without the use of dairy. Here’s what you’ll need:

  • 2 tablespoons olive oil
  • 1 large onion, chopped
  • 2 cloves garlic, minced
  • 1 teaspoon ground ginger
  • 1 teaspoon ground cinnamon
  • 1/2 teaspoon ground nutmeg
  • 1/4 teaspoon ground cloves
  • 1 can (15 ounces) pumpkin puree
  • 4 cups vegetable broth
  • 1 can (14 ounces) coconut milk
  • Salt and pepper to taste
  • Fresh parsley, chopped (for garnish)

Instructions

The process of making dairy-free pumpkin soup is as straightforward as it is rewarding. Follow these steps for a soup that’s sure to impress:

  1. Heat the olive oil in a large pot over medium heat. Add the chopped onion and garlic, sautéing them until the onion becomes translucent and the garlic is fragrant, about 5 minutes.
  2. Add the spices – ginger, cinnamon, nutmeg, and cloves – and stir for another minute, allowing the aromas to release and fill your kitchen with the scent of fall.
  3. Stir in the pumpkin puree, mixing well with the onions and spices. Gradually pour in the vegetable broth, stirring to combine all ingredients thoroughly.
  4. Bring the mixture to a boil, then reduce the heat and let it simmer for about 15 minutes, allowing the flavors to meld together.
  5. Remove the pot from heat and use an immersion blender to puree the soup until smooth. If you don’t have an immersion blender, carefully transfer the soup to a blender, working in batches if necessary.
  6. Return the soup to the pot and stir in the coconut milk. Heat gently until the soup is warmed through. Taste and season with salt and pepper as needed.
  7. Serve hot, garnished with fresh parsley for a touch of color and freshness.

Nutrition Facts

This recipe makes approximately 6 servings, with each serving containing around 180 calories. The use of coconut milk not only provides a dairy-free alternative but also contributes healthy fats, making this soup a nourishing option for those watching their dietary intake.

Preparation Time

One of the many advantages of this dairy-free pumpkin soup is its quick preparation time. The entire process, from chopping the onions to garnishing the final dish, takes about 30 minutes. This makes it an ideal choice for a quick weeknight dinner or a last-minute gathering where time is of the essence.

How to Serve

To truly elevate the experience of enjoying this soup, consider the following serving suggestions:

  • Crusty Bread: Pair the soup with a slice of crusty sourdough or a warm baguette to complement its creamy texture.
  • Salad: A light, crisp green salad with a simple vinaigrette can provide a refreshing contrast to the rich soup.
  • Toasted Seeds: Sprinkle toasted pumpkin or sunflower seeds on top for an added crunch and nutty flavor.
  • Herb Infusion: A drizzle of herb-infused olive oil can add an extra layer of flavor.
  • Spice it Up: For those who prefer a bit of heat, a pinch of cayenne pepper or a dash of hot sauce can be added to individual bowls.

Additional Tips

To ensure your soup turns out perfectly every time, consider the following tips:

  1. Quality Ingredients: Use high-quality pumpkin puree for the best flavor. If possible, opt for organic or homemade puree.
  2. Consistency Control: Adjust the consistency of the soup by adding more or less vegetable broth, depending on your preference for thickness.
  3. Flavor Boost: A splash of apple cider vinegar or lemon juice can enhance the soup’s flavor and add brightness.
  4. Storage: This soup can be stored in an airtight container in the refrigerator for up to 3 days. Reheat gently on the stove or in the microwave.
  5. Freezing: For longer storage, freeze the soup in individual portions. Thaw and reheat as needed for a quick, comforting meal.

FAQ Section

Here are some frequently asked questions about dairy-free pumpkin soup:

Q: Can I use fresh pumpkin instead of canned puree?
A: Yes, you can use fresh pumpkin. Simply peel, cube, and roast the pumpkin until tender before blending it into a smooth puree.

Q: Is there a substitute for coconut milk?
A: If you prefer not to use coconut milk, almond milk or cashew cream are excellent alternatives that will maintain the soup’s creamy texture.

Q: Can I make this soup in advance?
A: Absolutely! This soup tastes even better the next day as the flavors continue to develop. Prepare it a day ahead and store it in the refrigerator until ready to serve.

Q: How can I make this soup spicier?
A: To add some heat, incorporate a diced jalapeño or a pinch of crushed red pepper flakes during the cooking process.

Q: Is this recipe suitable for vegans?
A: Yes, this dairy-free pumpkin soup is entirely vegan, as it contains no animal products.

In conclusion, dairy-free pumpkin soup is a versatile, delicious, and nourishing dish that captures the spirit of fall. Its simplicity, combined with the depth of flavor and ease of preparation, makes it a go-to recipe for anyone looking to savor the season’s bounty. Whether you’re serving it as a starter or the main event, this soup is sure to warm both the body and the soul.

Mango Coconut Ice Cream

Mango Coconut Ice Cream is a tropical delight that has captured the hearts and taste buds of dessert enthusiasts worldwide. This delectable treat combines the rich, creamy texture of coconut milk with the vibrant, sweet flavor of ripe mangoes, creating a refreshing dessert that’s perfect for warm weather. As you take a scoop, the silky smoothness of the ice cream melts in your mouth, releasing a burst of tropical flavors that transport you to a sun-kissed beach. This culinary creation is not only a feast for the taste buds but also a visual delight, with its sunny yellow hue and inviting aroma. Whether enjoyed in a bowl, a cone, or as part of a more elaborate dessert, Mango Coconut Ice Cream offers a soothing escape from the ordinary.

What sets Mango Coconut Ice Cream apart is its simplicity and natural ingredients. The recipe often features just a handful of components: fresh mangoes, creamy coconut milk, a touch of sugar, and perhaps a hint of lime juice to elevate the flavors. The process is straightforward, making it an ideal project for both novice and experienced home cooks. The absence of artificial additives and preservatives means you can indulge in this treat without guilt. Additionally, because it’s dairy-free, it caters to a wide range of dietary preferences, including those who are lactose intolerant or following a vegan lifestyle. This versatility has helped Mango Coconut Ice Cream gain popularity, as it offers a healthier alternative to traditional ice cream without sacrificing taste or texture.

As the demand for unique and exotic flavors continues to rise, Mango Coconut Ice Cream stands out as a must-try delicacy. Many artisanal ice cream shops and restaurants have embraced this flavor, adding their own creative twists, such as incorporating chunks of fresh mango or a sprinkle of toasted coconut flakes for added texture. It’s also a favorite among those who enjoy experimenting in the kitchen, as it allows for endless customization. For a gourmet touch, some enthusiasts add a dash of cardamom or a swirl of passion fruit puree. Others enjoy pairing it with tropical fruits like pineapple or serving it alongside a warm dessert to create a delightful contrast. Whether you’re a seasoned ice cream aficionado or simply someone seeking a new dessert experience, Mango Coconut Ice Cream is sure to satisfy and inspire with its exotic allure and irresistible taste.

Coconut Yogurt Parfait

The Coconut Yogurt Parfait has become a beloved staple in my household, and for good reason. The first time I whipped up this delightful treat, it was an instant hit with my family. The creamy texture of the coconut yogurt combined with the vibrant taste of fresh fruits and the satisfying crunch of granola created a perfect harmony of flavors and textures. It’s a versatile dish that pleases everyone, regardless of age or dietary preference. Whether enjoyed for breakfast, as a snack, or a light dessert, this parfait has become a go-to recipe that never fails to impress. The ease of preparation and the ability to customize with various toppings make it a winner, time and time again.

Ingredients

The magic of the Coconut Yogurt Parfait lies in its simplicity and the freshness of its ingredients. For a basic version, you will need the following:

  • 2 cups of coconut yogurt
  • 1 cup of granola
  • 1 cup of mixed berries (such as strawberries, blueberries, and raspberries)
  • 1 tablespoon of honey or maple syrup (optional)
  • 1 teaspoon of chia seeds (optional)
  • A handful of nuts or seeds (e.g., almonds, walnuts, or sunflower seeds)

These ingredients can be easily found at any grocery store, and you can always substitute with your preferred fruits or toppings based on availability and personal taste. The recipe is highly adaptable, allowing for endless variations that cater to different dietary needs and flavor profiles.

Instructions

Creating a Coconut Yogurt Parfait is as simple as layering your favorite ingredients. Here’s a step-by-step guide to assembling this delightful treat:

  1. Prepare your ingredients: Wash and dry the berries, and if necessary, chop them into bite-sized pieces. Gather all your toppings and have them ready for layering.
  2. Start layering: In a glass or bowl, add a layer of coconut yogurt as the base. The thickness of this layer can be adjusted based on personal preference.
  3. Add granola: Sprinkle a generous layer of granola over the yogurt. This will add a delightful crunch to the parfait.
  4. Layer the berries: Add a layer of mixed berries on top of the granola. Feel free to get creative with the pattern or mix them up evenly.
  5. Repeat: Continue layering yogurt, granola, and berries until you reach the top of your glass or bowl. Aim for at least two layers of each for a well-balanced parfait.
  6. Finish with toppings: Drizzle honey or maple syrup over the top if desired, and sprinkle with chia seeds and nuts or seeds for added texture and flavor.
  7. Chill and serve: For the best experience, chill the parfait in the refrigerator for about 15 minutes before serving. This allows the flavors to meld together beautifully.

Nutrition Facts

The Coconut Yogurt Parfait is not only delicious but also nutritious. Here’s a quick look at the nutritional breakdown:

  • Servings: 4
  • Calories per serving: Approximately 250 calories

Each serving is packed with vitamins, minerals, and healthy fats, making it a wholesome choice for any time of the day.

Preparation Time

One of the most appealing aspects of the Coconut Yogurt Parfait is its quick preparation time. From start to finish, you can have this delightful dish ready in just 10 minutes. It’s perfect for those hectic mornings when you need something nutritious and satisfying but don’t have much time to spare. The simple process of layering makes it a fun and easy activity that even kids can participate in, turning breakfast preparation into a family bonding moment.

How to Serve

Serving a Coconut Yogurt Parfait is an opportunity to showcase your creativity. Here are some ideas to make your parfait presentation stand out:

  • In a glass jar: Serve in a mason jar for a rustic and portable option, perfect for on-the-go breakfasts.
  • In a dessert glass: Use a clear dessert glass to highlight the beautiful layers and colors of the parfait.
  • In a bowl: For a more casual presentation, serve in a bowl and mix everything together for a delicious medley of flavors.
  • With a garnish: Add a sprig of fresh mint or a slice of citrus on top for a pop of color and a hint of freshness.
  • Custom toppings: Customize each serving with different toppings to cater to individual preferences, such as adding a dollop of nut butter or a sprinkle of coconut flakes.

Additional Tips

To make your Coconut Yogurt Parfait experience even better, consider these helpful tips:

  1. Choose quality ingredients: Opt for organic coconut yogurt and fresh, seasonal fruits for the best flavor and nutritional benefits.
  2. Customize the sweetness: Adjust the amount of honey or maple syrup based on your taste preferences or dietary needs.
  3. Experiment with flavors: Try adding spices like cinnamon or nutmeg to the yogurt for an extra layer of warmth and complexity.
  4. Make it ahead: Prepare the parfait the night before and store it in the refrigerator for a grab-and-go breakfast option.
  5. Consider dietary restrictions: Use gluten-free granola or nut-free toppings if serving guests with specific allergies or dietary preferences.

FAQ Section

Here are some frequently asked questions about the Coconut Yogurt Parfait:

Q1: Can I use regular yogurt instead of coconut yogurt?

A1: Absolutely! You can substitute coconut yogurt with any yogurt of your choice, such as Greek yogurt or almond milk yogurt, based on your dietary needs and taste preferences.

Q2: How long can I store the parfait in the refrigerator?

A2: The parfait can be stored in the refrigerator for up to 2 days. However, for the best texture and flavor, it’s recommended to consume it within 24 hours.

Q3: What can I use instead of granola?

A3: If you’re looking for a granola substitute, try using crushed nuts, seeds, or even cereal for a similar crunchy texture.

Q4: Can I make this parfait vegan?

A4: Yes, you can make it vegan by using plant-based yogurt, ensuring the granola is vegan-friendly, and substituting honey with maple syrup or agave nectar.

Q5: Is it possible to make this parfait nut-free?

A5: Certainly! Simply omit the nuts and use seeds like pumpkin or sunflower seeds to maintain a crunchy texture without the nuts.

The Coconut Yogurt Parfait is a delightful and nutritious option for any meal or snack. Its simplicity, adaptability, and deliciousness make it a favorite in many households, including mine. Enjoy experimenting with different variations and flavors to find the perfect combination that suits your palate!

Coconut Yogurt Parfait

The moment you dip your spoon into a coconut yogurt parfait, you’re embarking on a tropical journey that tantalizes the taste buds and nourishes the soul. The creamy texture of the coconut yogurt, blended with the natural sweetness of fresh fruits, and topped with crunchy granola, creates an irresistible symphony of flavors and textures. In my household, this parfait has become a breakfast staple, much adored by everyone from the youngest to the oldest. Its vibrant presentation makes it a feast for the eyes as much as it is for the palate, and the ease of preparation ensures that it can be whipped up effortlessly on busy mornings or as a delightful snack anytime.

Ingredients

To create this delectable coconut yogurt parfait, you’ll need the following ingredients:

  • 2 cups of coconut yogurt
  • 1 cup of granola (choose your favorite variety)
  • 1 cup of fresh berries (strawberries, blueberries, raspberries, or a mix)
  • 1/2 cup of sliced almonds or your preferred nuts
  • 2 tablespoons of honey or maple syrup (optional, for additional sweetness)
  • 1 teaspoon of vanilla extract (optional, for enhanced flavor)
  • Mint leaves for garnish (optional)

Instructions

Crafting a coconut yogurt parfait is a simple yet rewarding process. Here’s how to do it:

  1. Start by preparing your ingredients. Wash the berries thoroughly and set them aside to drain.
  2. In a small bowl, mix the coconut yogurt with the vanilla extract and honey or maple syrup, if using, to infuse extra flavor.
  3. In a glass or bowl, begin layering the parfait by adding a generous spoonful of the coconut yogurt as the base layer.
  4. Add a layer of granola over the yogurt, followed by a handful of fresh berries.
  5. Repeat the layering process until all ingredients are used, ending with a layer of berries on top.
  6. Sprinkle sliced almonds or nuts over the berries for a crunchy element.
  7. Garnish with a sprig of mint for a refreshing finish.
  8. Serve immediately and enjoy the burst of flavors!

Nutrition Facts

This recipe serves 4 people, with each serving providing approximately 300 calories. The nutritional content may vary based on the specific brands and varieties of ingredients used.

Preparation Time

One of the greatest advantages of this coconut yogurt parfait is its quick preparation time. You can have it ready in just 10 minutes, making it a perfect option for those rushed mornings or when you need a quick, healthy snack.

How to Serve

Serving your coconut yogurt parfait can be as creative as you want it to be. Here are some ideas:

  • In a tall glass to showcase the beautiful layers.
  • In a small bowl for a more casual presentation.
  • In mason jars for a portable breakfast or snack option.
  • As part of a brunch buffet, allowing guests to customize their parfaits.
  • With a side of additional toppings such as chia seeds, shredded coconut, or dried fruit.

Additional Tips

  1. Customize the Sweetness: Adjust the sweetness to your preference by varying the amount of honey or maple syrup.
  2. Experiment with Flavors: Try different types of yogurt, such as almond or soy, for a unique twist.
  3. Add a Tropical Touch: Incorporate tropical fruits like mango or pineapple for an exotic flavor profile.
  4. Make it Dairy-Free: Ensure all ingredients, including granola, are dairy-free for those with lactose intolerance.
  5. Prepare in Advance: Assemble the parfaits the night before and refrigerate for a ready-to-go breakfast.

FAQ Section

Q1: Can I use regular yogurt instead of coconut yogurt?

A: Absolutely! Regular yogurt can be used as a substitute if you prefer, but the coconut yogurt offers a distinct flavor that enhances the tropical feel of the parfait.

Q2: How long can I store the parfait?

A: It’s best to consume the parfait immediately after preparation to enjoy the crunchy texture of the granola. However, you can store it in the refrigerator for up to 24 hours, but note that the granola may become soggy.

Q3: Can I add protein powder to this parfait?

A: Yes, you can mix a scoop of protein powder into the yogurt to increase the protein content, making it an even more filling option.

Q4: What other toppings can I use?

A: Feel free to get creative with your toppings. Some popular choices include chia seeds, flaxseeds, coconut flakes, and dried fruits like cranberries or raisins.

Q5: Is this parfait suitable for vegans?

A: Yes, the parfait can be made vegan by ensuring all ingredients, including the granola, are vegan-friendly and by using maple syrup instead of honey.

Cashew Cream Pasta

There’s something inherently comforting about a warm bowl of pasta, and when it comes to Cashew Cream Pasta, the experience is elevated to an entirely new level. Having tried this dish with my family, I can vouch for its creamy texture and the delightful nutty flavor that had everyone at the table asking for seconds. The sauce, made from cashews, is a wonderful alternative for those who are lactose intolerant or simply looking to add a twist to the traditional cream-based pasta. It’s a dish that doesn’t just please the palate but also brings a sense of warmth and togetherness, which is what family meals are all about.

Ingredients

Creating the perfect Cashew Cream Pasta begins with gathering high-quality ingredients. Here’s what you’ll need:

  • 1 cup raw cashews, soaked in water for at least 2 hours
  • 3 cloves garlic, minced
  • 2 tablespoons olive oil
  • 1 cup vegetable broth
  • 2 tablespoons nutritional yeast
  • 1 tablespoon lemon juice
  • Salt and pepper to taste
  • 12 ounces of your favorite pasta
  • Fresh basil leaves for garnish
  • Cherry tomatoes, halved (optional)

Instructions

Start by preparing the cashews. Drain and rinse the soaked cashews and add them to a blender with the vegetable broth, nutritional yeast, lemon juice, salt, and pepper. Blend until the mixture is smooth and creamy, scraping down the sides as needed. This will form the base of your sauce.

Next, cook the pasta according to the package instructions until al dente. While the pasta is cooking, heat olive oil in a large skillet over medium heat. Add the minced garlic and sauté until fragrant, being careful not to burn it. Reduce the heat to low and add the cashew cream to the skillet, stirring well to combine with the garlic.

Once the pasta is cooked, reserve about a cup of pasta water and then drain the rest. Add the cooked pasta to the skillet with the cashew cream sauce. Toss everything together, adding reserved pasta water a little at a time until you reach your desired sauce consistency.

Finish by adding a handful of fresh basil leaves and cherry tomatoes, if using. Serve immediately, garnishing with additional basil and a sprinkle of nutritional yeast if desired.

Nutrition Facts

This Cashew Cream Pasta recipe serves four people. Each serving contains approximately 450 calories, making it a hearty meal that doesn’t skimp on flavor. The nutritional yeast provides a good source of B vitamins, while the cashews offer healthy fats and protein, making this dish both satisfying and nutritious.

Preparation Time

From start to finish, this Cashew Cream Pasta can be on your table in about 30 minutes. The longest part of the preparation is soaking the cashews, which can be done ahead of time, making this an ideal choice for a quick weeknight dinner.

How to Serve

  • As a Main Dish: Serve the pasta as is, with a side of crusty bread for a complete meal.
  • With a Salad: Pair with a fresh green salad drizzled with balsamic vinaigrette for added freshness.
  • As a Side Dish: Complement a grilled protein such as chicken or tofu with this creamy pasta.
  • For a Crowd: Double the recipe and serve it family-style for a larger gathering.
  • For Lunch: Pack leftovers in an airtight container for a satisfying lunch the next day.

Additional Tips

Here are some tips to ensure your Cashew Cream Pasta is a success:

  1. Soak Cashews Properly: For a silky-smooth sauce, ensure the cashews are soaked long enough and blended thoroughly.
  2. Adjust Consistency: If the sauce is too thick, add more pasta water; if too thin, let it simmer longer to thicken.
  3. Spice It Up: Add a pinch of red pepper flakes for a bit of heat.
  4. Use Fresh Ingredients: Fresh basil and garlic greatly enhance the flavor profile of the dish.
  5. Experiment with Add-ins: Try adding sautéed mushrooms, spinach, or peas for extra texture and nutrients.

FAQ

Q: Can I use roasted cashews instead of raw?

A: It’s best to use raw cashews as they blend into a creamier sauce. Roasted cashews will alter the flavor and may not blend as smoothly.

Q: How long can I store leftovers?

A: Store leftovers in an airtight container in the refrigerator for up to three days. Reheat gently on the stove, adding a splash of water if needed.

Q: Can I make this dish gluten-free?

A: Absolutely! Simply substitute the pasta with your favorite gluten-free variety for a delicious gluten-free meal.

Q: What can I use instead of nutritional yeast?

A: Nutritional yeast adds a cheesy flavor, but you can omit it or substitute with grated vegan parmesan if preferred.

Q: Can I freeze the cashew cream sauce?

A: Yes, the cashew cream sauce can be frozen for up to three months. Thaw in the refrigerator overnight and reheat gently before use.

Vegan Cheese Sauce

There’s something incredibly comforting about a silky, smooth cheese sauce draped over your favorite dish. But for those who have embraced the vegan lifestyle, finding a plant-based alternative that matches the rich, creamy texture and savory flavor of traditional cheese sauce can be challenging. Fortunately, the culinary world has seen a surge in innovative recipes, one of which is the delightful vegan cheese sauce. My family and I recently tried this recipe, and it’s safe to say it was a hit! Even the most skeptical cheese lovers in the house couldn’t resist its charm. With its nutty undertones and a hint of tang, this sauce is a must-try for anyone looking to explore vegan cooking.

Ingredients

Creating this vegan cheese sauce is a breeze, and it requires just a handful of wholesome ingredients that you likely already have in your pantry. Here’s what you’ll need:

  • 1 cup of raw cashews
  • 1/2 cup of nutritional yeast
  • 1 tablespoon of lemon juice
  • 1 teaspoon of garlic powder
  • 1 teaspoon of onion powder
  • 1 teaspoon of salt
  • 1/2 teaspoon of turmeric (for color)
  • 1 1/2 cups of water
  • Optional: a pinch of cayenne pepper for a spicy kick

Instructions

To make this luscious vegan cheese sauce, follow these simple steps:

  1. Soak the Cashews: Begin by soaking the raw cashews in hot water for at least 30 minutes. This helps to soften them, ensuring a smooth and creamy texture when blended.
  2. Blend the Ingredients: Drain the soaked cashews and add them to a blender along with nutritional yeast, lemon juice, garlic powder, onion powder, salt, turmeric, and water. Blend until the mixture is completely smooth and creamy. This may take a couple of minutes depending on the power of your blender.
  3. Adjust the Seasoning: Taste the sauce and adjust the seasoning to your liking. If you prefer a tangier sauce, add a bit more lemon juice. For extra spice, include a pinch of cayenne pepper.
  4. Heat the Sauce: Transfer the blended mixture to a saucepan and heat over medium heat. Stir continuously until the sauce thickens and becomes gooey, which should take about 3 to 5 minutes.
  5. Serve and Enjoy: Once thickened, remove the sauce from the heat and serve immediately over pasta, vegetables, or as a dip.

Nutrition Facts

This recipe yields approximately 4 servings. Each serving contains around 150 calories, making it a light yet satisfying addition to any meal.

Preparation Time

From start to finish, this vegan cheese sauce takes about 45 minutes to prepare, including soaking time. The active cooking time is around 10 minutes, so it’s perfect for a quick weeknight meal.

How to Serve

Vegan cheese sauce is incredibly versatile and can be served in many ways:

  • Drizzle over steamed vegetables for a nutritious side dish.
  • Use as a creamy sauce for your favorite pasta dish.
  • Serve as a dip with tortilla chips or vegetable sticks.
  • Layer over nachos for a vegan-friendly snack.
  • Spread over baked potatoes for a comforting meal.

Additional Tips

To elevate your vegan cheese sauce experience, consider these additional tips:

  1. Experiment with Spices: Try adding different spices like smoked paprika or cumin to give your sauce a unique flavor profile.
  2. Use a High-Powered Blender: A high-powered blender ensures a smoother texture, which is key for this sauce.
  3. Store Properly: Store any leftover sauce in an airtight container in the refrigerator for up to 5 days. Reheat gently on the stove.
  4. Try Different Nuts: If cashews are not available, almonds or macadamia nuts can be used as an alternative.
  5. Add Vegetables: For added nutrients, consider blending in cooked carrots or roasted red peppers.

FAQ Section

Here are some frequently asked questions about this vegan cheese sauce recipe:

  1. Can I make this sauce ahead of time? Yes, you can make this sauce ahead of time and store it in the refrigerator for up to 5 days. Reheat it gently on the stove before serving.
  2. Is there a nut-free version? Absolutely! You can use sunflower seeds instead of cashews for a nut-free version.
  3. Can I freeze the sauce? While it’s best enjoyed fresh, you can freeze the sauce in a freezer-safe container for up to 2 months. Thaw it in the refrigerator and reheat gently.
  4. What can I use instead of nutritional yeast? Nutritional yeast provides a cheesy flavor, but if unavailable, you can try using chickpea miso for a savory note.
  5. How can I make the sauce thicker? If you prefer a thicker sauce, reduce the amount of water in the recipe or add a tablespoon of cornstarch while heating.

In conclusion, this vegan cheese sauce is not only a healthier alternative to traditional cheese sauce but also a deliciously versatile addition to your culinary repertoire. Whether you’re a seasoned vegan or simply looking to incorporate more plant-based meals into your diet, this recipe is sure to please. Enjoy experimenting with flavors and serving it in various ways to suit your taste and dietary preferences.